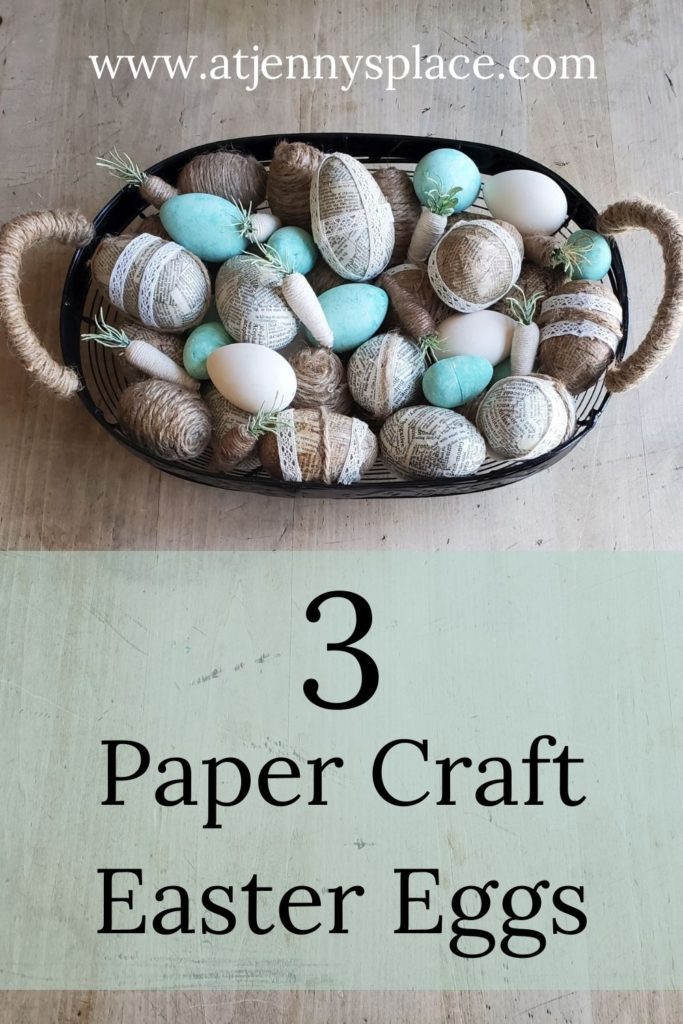
Decoupage Easter Eggs Made Easy
Today let’s create decoupage Easter eggs with craft paper and dollar store supplies. These adorable Easter eggs are impossible to mess up.
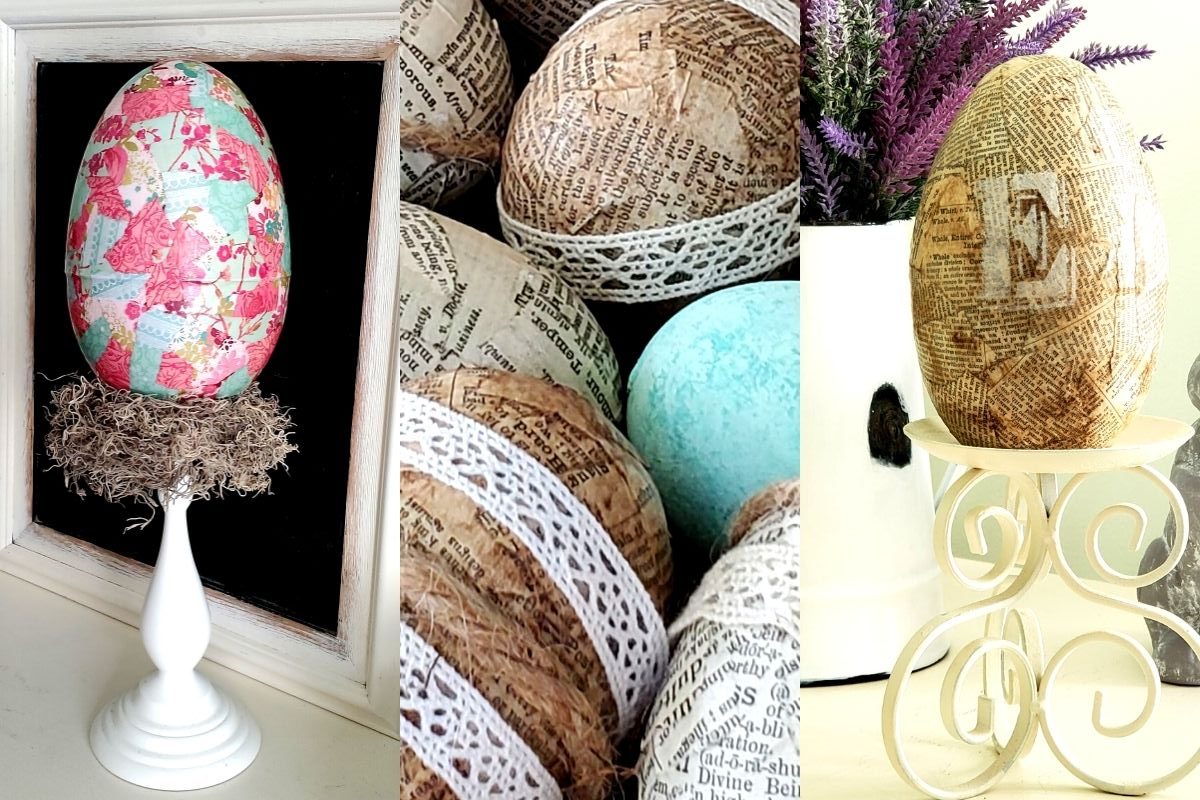
Decoupage Easter Eggs #1: Oversized Abstract Faberge Easter Egg
I saw these oversized, plastic Easter eggs at Dollarama (Canadian Dollar Store) and just knew instantly what I wanted to do with it. This massive Easter egg was filled with smaller plastic eggs and the $4 price tag made this a deal too good to pass up. So into the cart it went.
During this same shop I came across a stack of gorgeous craft paper booklets. Into the cart they went. Along with a few basic DIY products I already had at home these humble plastic eggs were turned into whimsical, shabby chic Easter decor.
Supplies You Will Need to Make Faberge Easter Egg
- Large Plastic Easter Egg
- Craft Paper
- Mod Podge
- Foam Brush
- Damp rag
How To Make Faberge Easter Egg
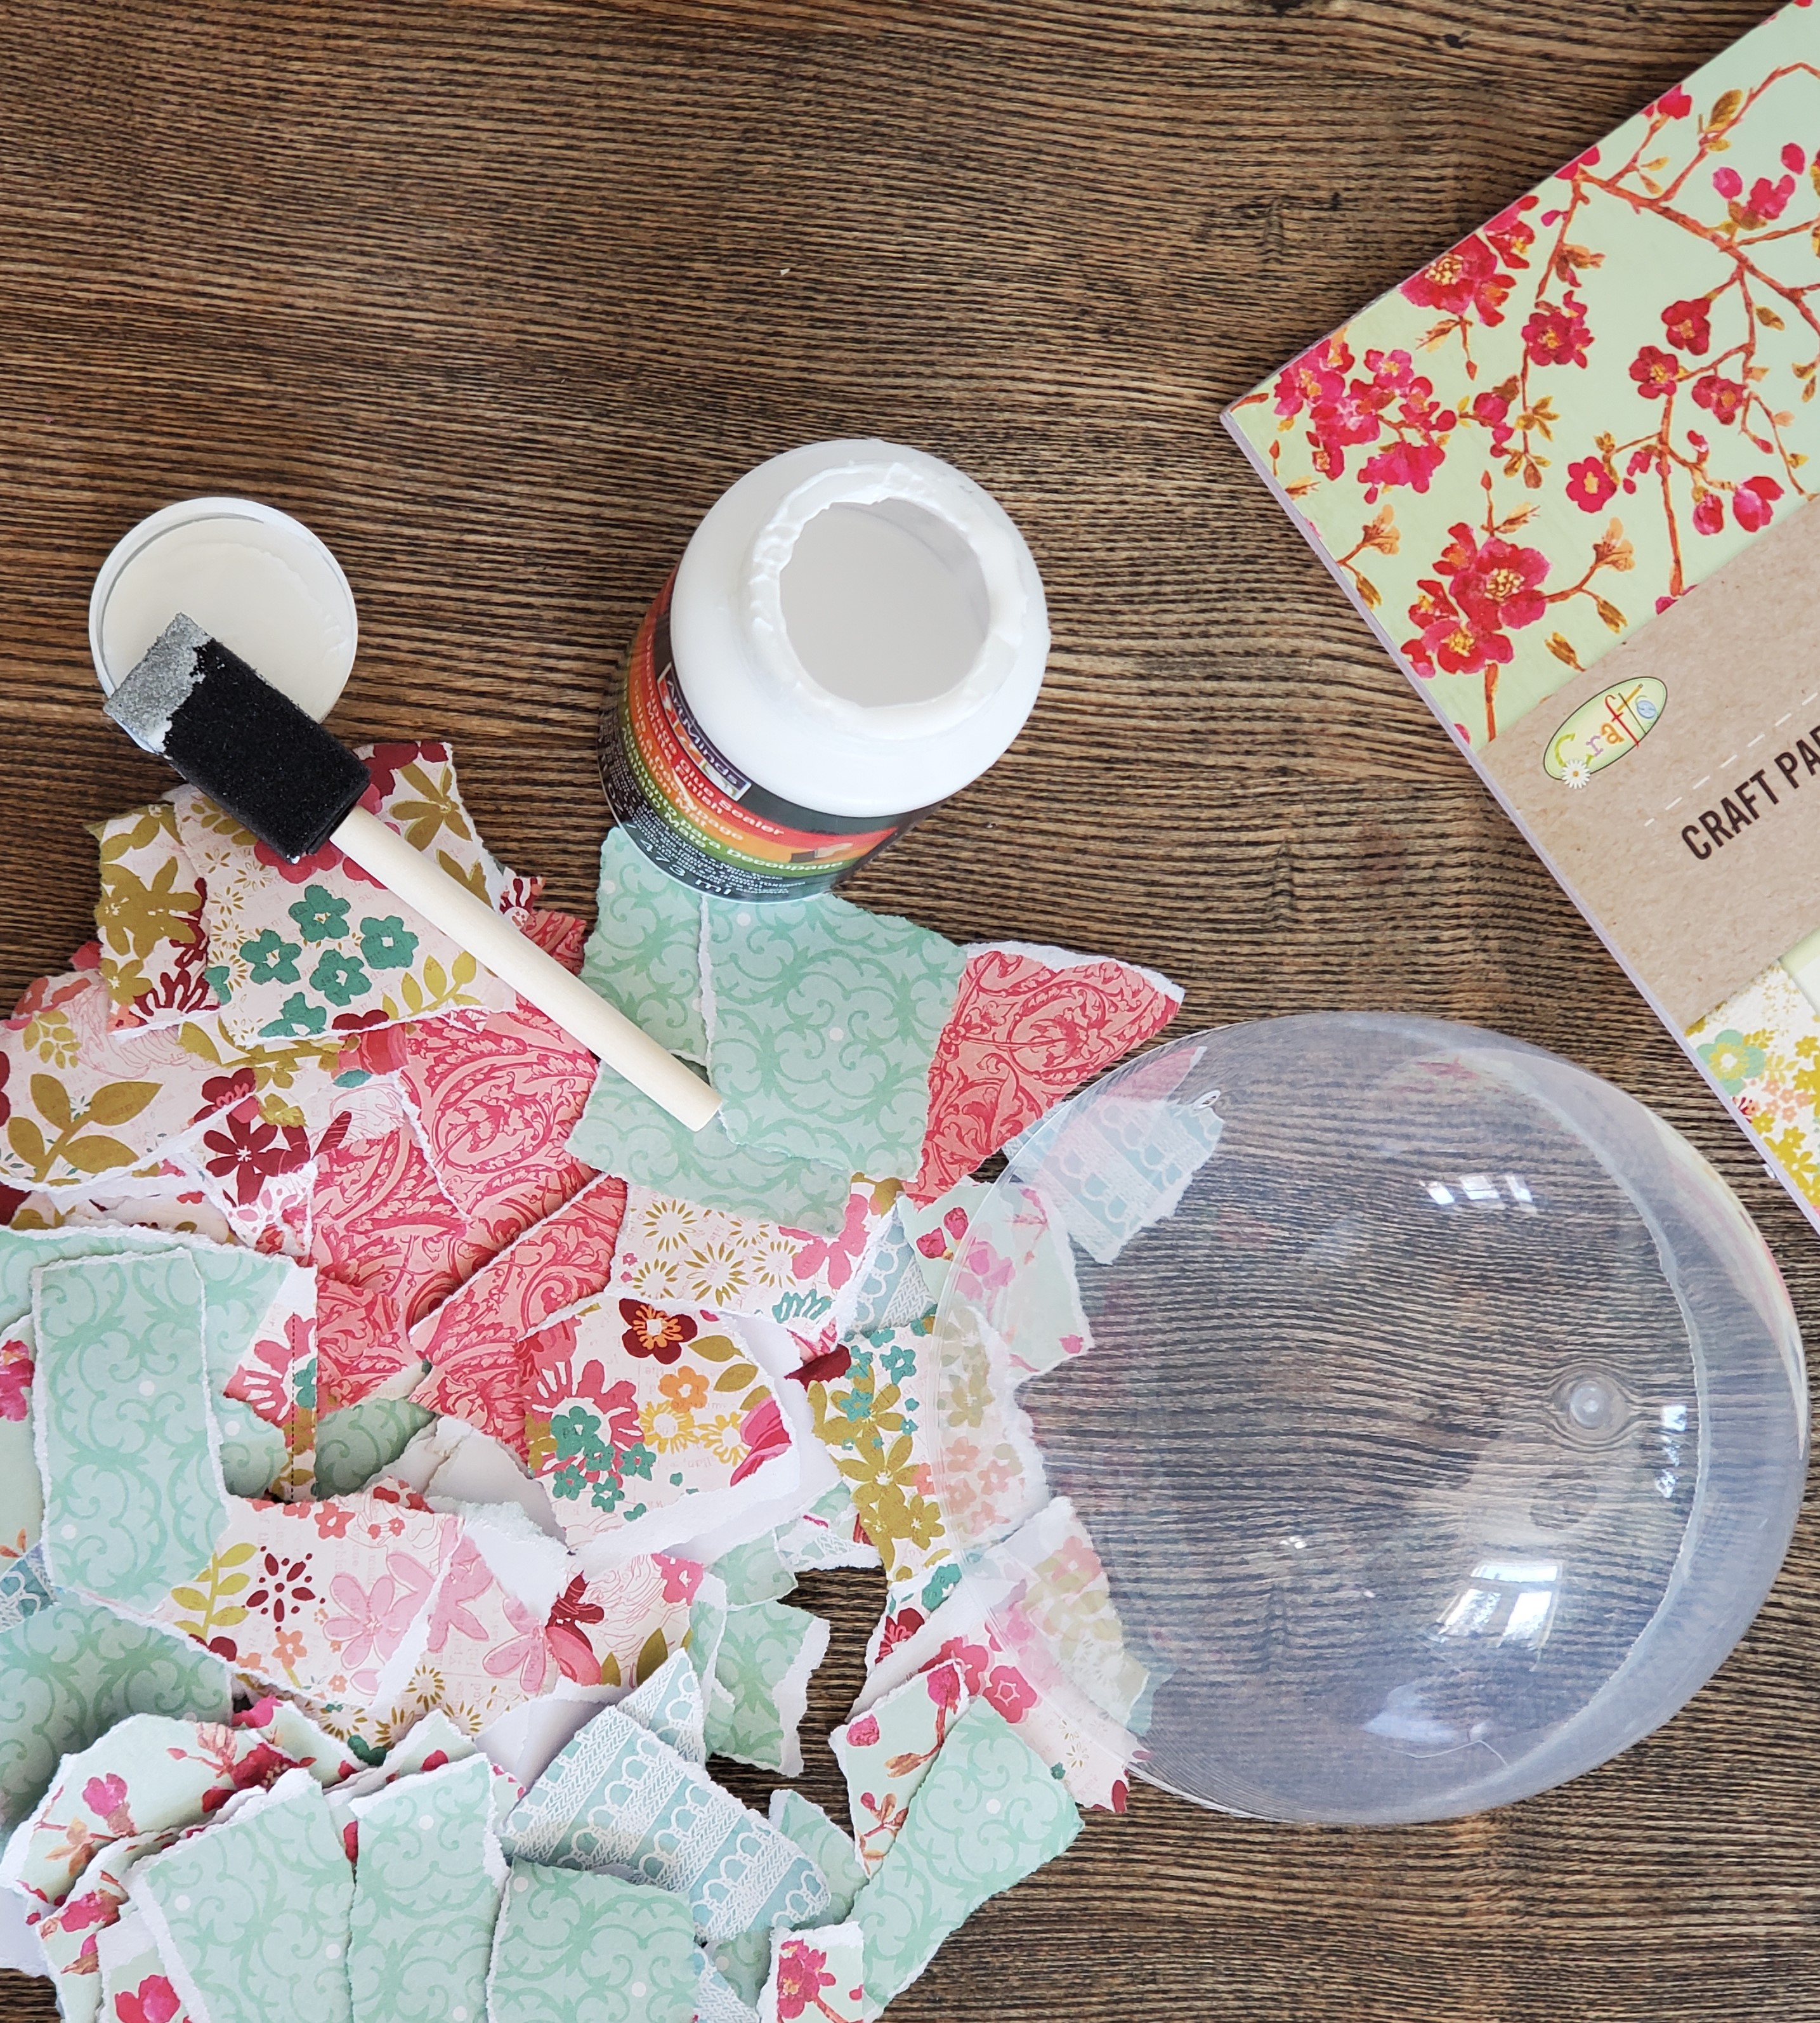
Start by removing the plastic handle on the egg. Make sure the the 2 sides of the egg are firmly attached. Select several different sheets of craft paper and rip them into 1″ – 2″ pieces. I choose 5 different paper designs.
This is where you get decide what look you are going for. Have fun and really personalize the look so that it matches your decor. You could add embellishments, ribbons, and charms. Choose papers that will match your decor and will reflect your personal style.
I decided to go with more of a shabby chic look. I chose papers that were similar in style and were all in the same colour tone. This way I figured this way the end result would be abstract but not visually jarring.
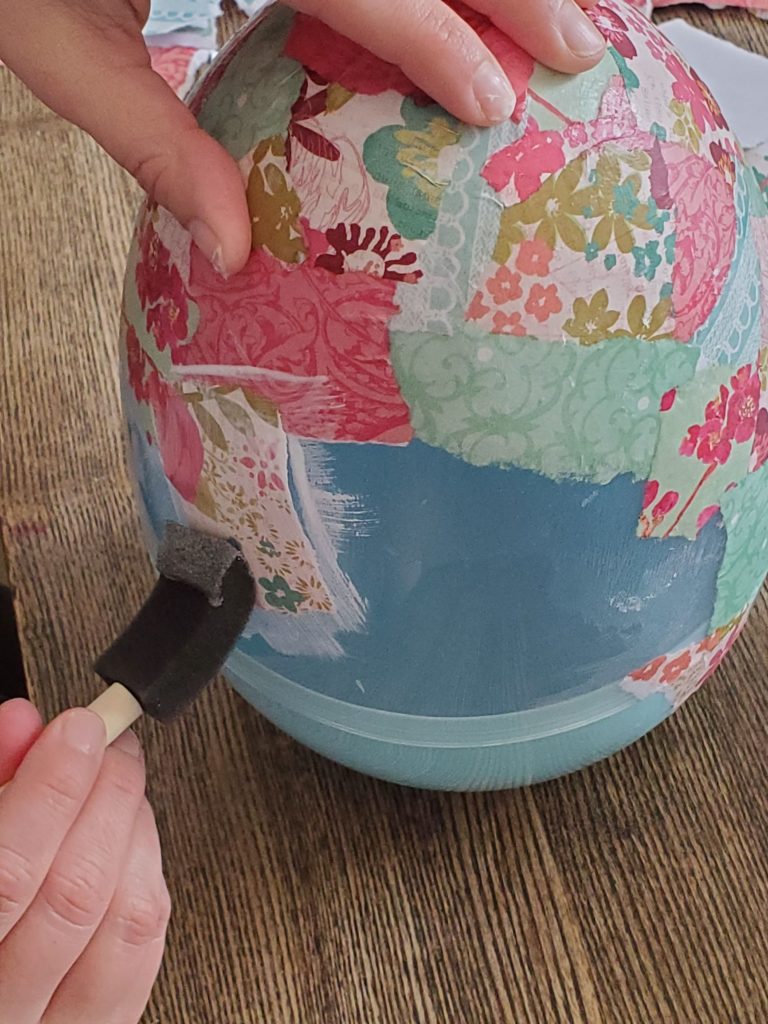
Using the foam brush, brush on a thin layer of Mod Podge to the plastic Easter egg.
TIP: I would normally tell you to apply the Mod Podge to the back of the paper and then apply it to the preferred surface but through a bit of trial and error I personally found that applying the glue to the actual egg first and then pressing on the paper just worked best for me. That is why I am suggesting it but you do what works best for you.
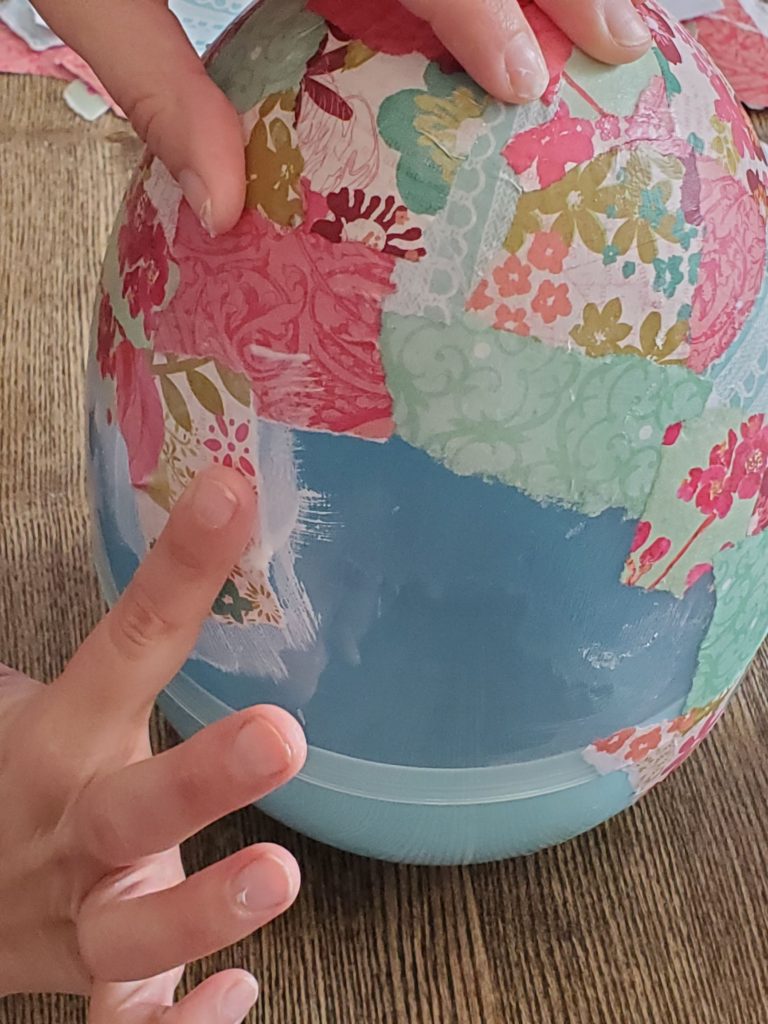
Press the ripped piece of paper onto the plastic Easter egg.Again, using your foam brush paint a thin layer of Mod Podge on top of the piece of paper.
Use your finger tips to smooth out the paper and press out any air bubbles and creases.
Use the damp rag to keep your finger tips slightly moist and this will help with smoothing the paper out and prevent tearing. Cover the entire egg and let dry.
CONFESSION: I still ended up with some creases. I was OK with that though because I liked that the texture along with the style of paper made the whole thing look even more shabby and therefor… chic. Right?
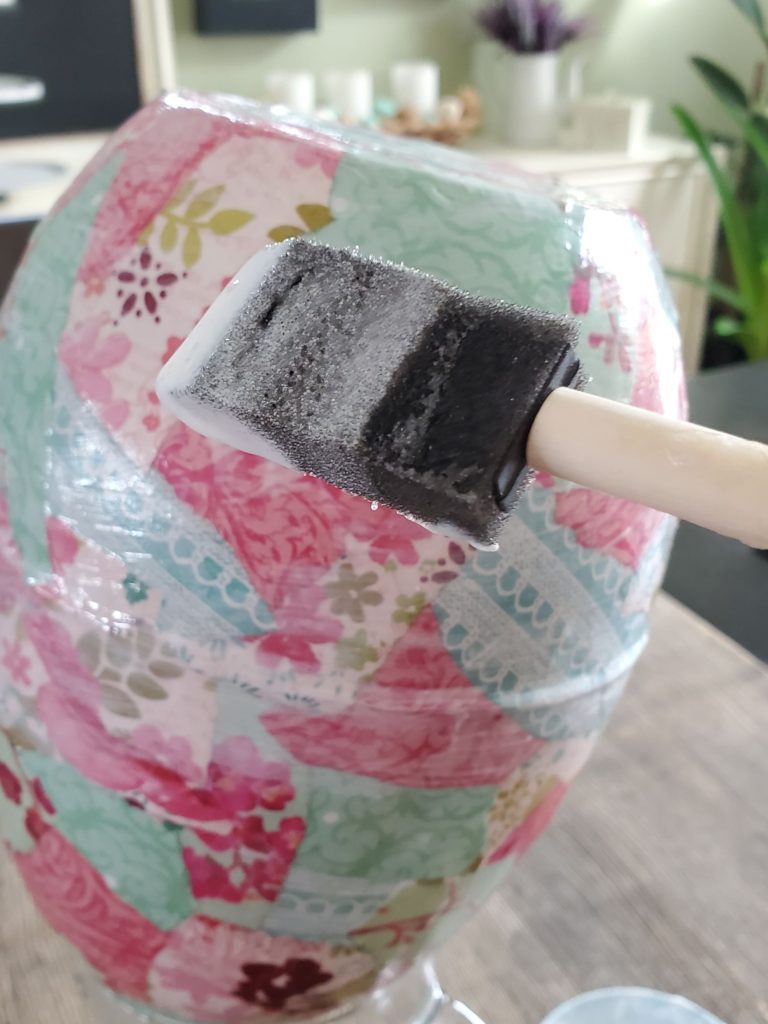
Once you have covered the entire egg with the ripped craft papers and it has dried overnight, apply another thin layer of Mod Podge to the whole thing. This just helps to ensure the whole Easter egg is covered and that any loose edges are laid flat.
TIP: I found it helpful to prop the whole gluey egg on to something (I used a glass jug) so that it can completely dry.
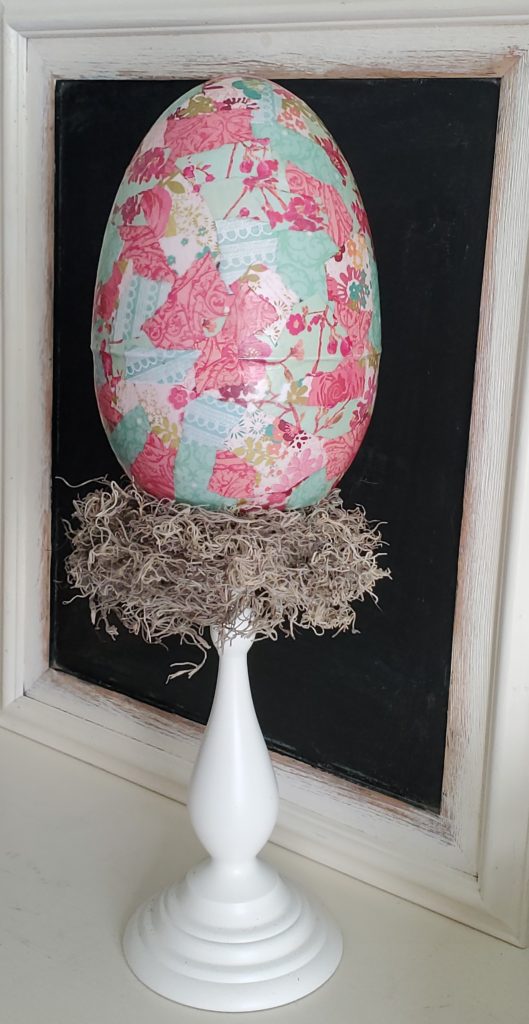
I decided to display my awesome and huge Easter egg on a tall white stand made out of a candle holder that I found during a thrift store haul. I covered the top of the stand with French Moss I purchased from Dollarama and then placed the egg on top.
Voila! Fabulous shabby chic Easter egg decor at it’s finest.
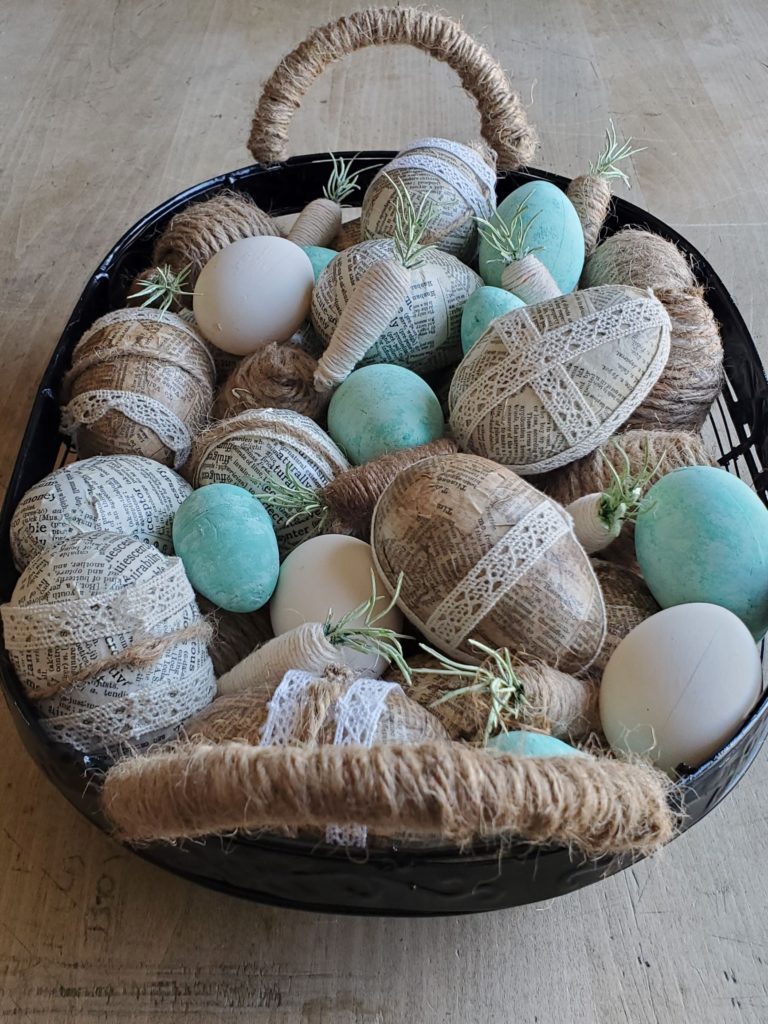
Decoupage Easter Eggs #2: Decorated Book Page Easter Eggs
OMG! I love these book page Easter eggs. They are the perfect combination of whimsy and rustic. They are so easy to personalize. You can make them as simple as you like or you can adorn them to your heart’s content. I found numerous ways and places to decorate with these.
Supplies You Will Need to Make Book Page Easter Eggs
- Hinged plastic Easter eggs (In regular or larger size)
- Book pages
- Mod Podge
- Foam brush
- ArtMinds Antique Wax
- ArtMinds Chalk Paint in Onyx
- Twine
- Yarn
- Lace
- Ribbon
- Stencils
- Stencil brush
TIP: Try using book pages that come in varying shades of white. Yellowing pages look great next to white pages.
How to Make Book Page Easter Eggs
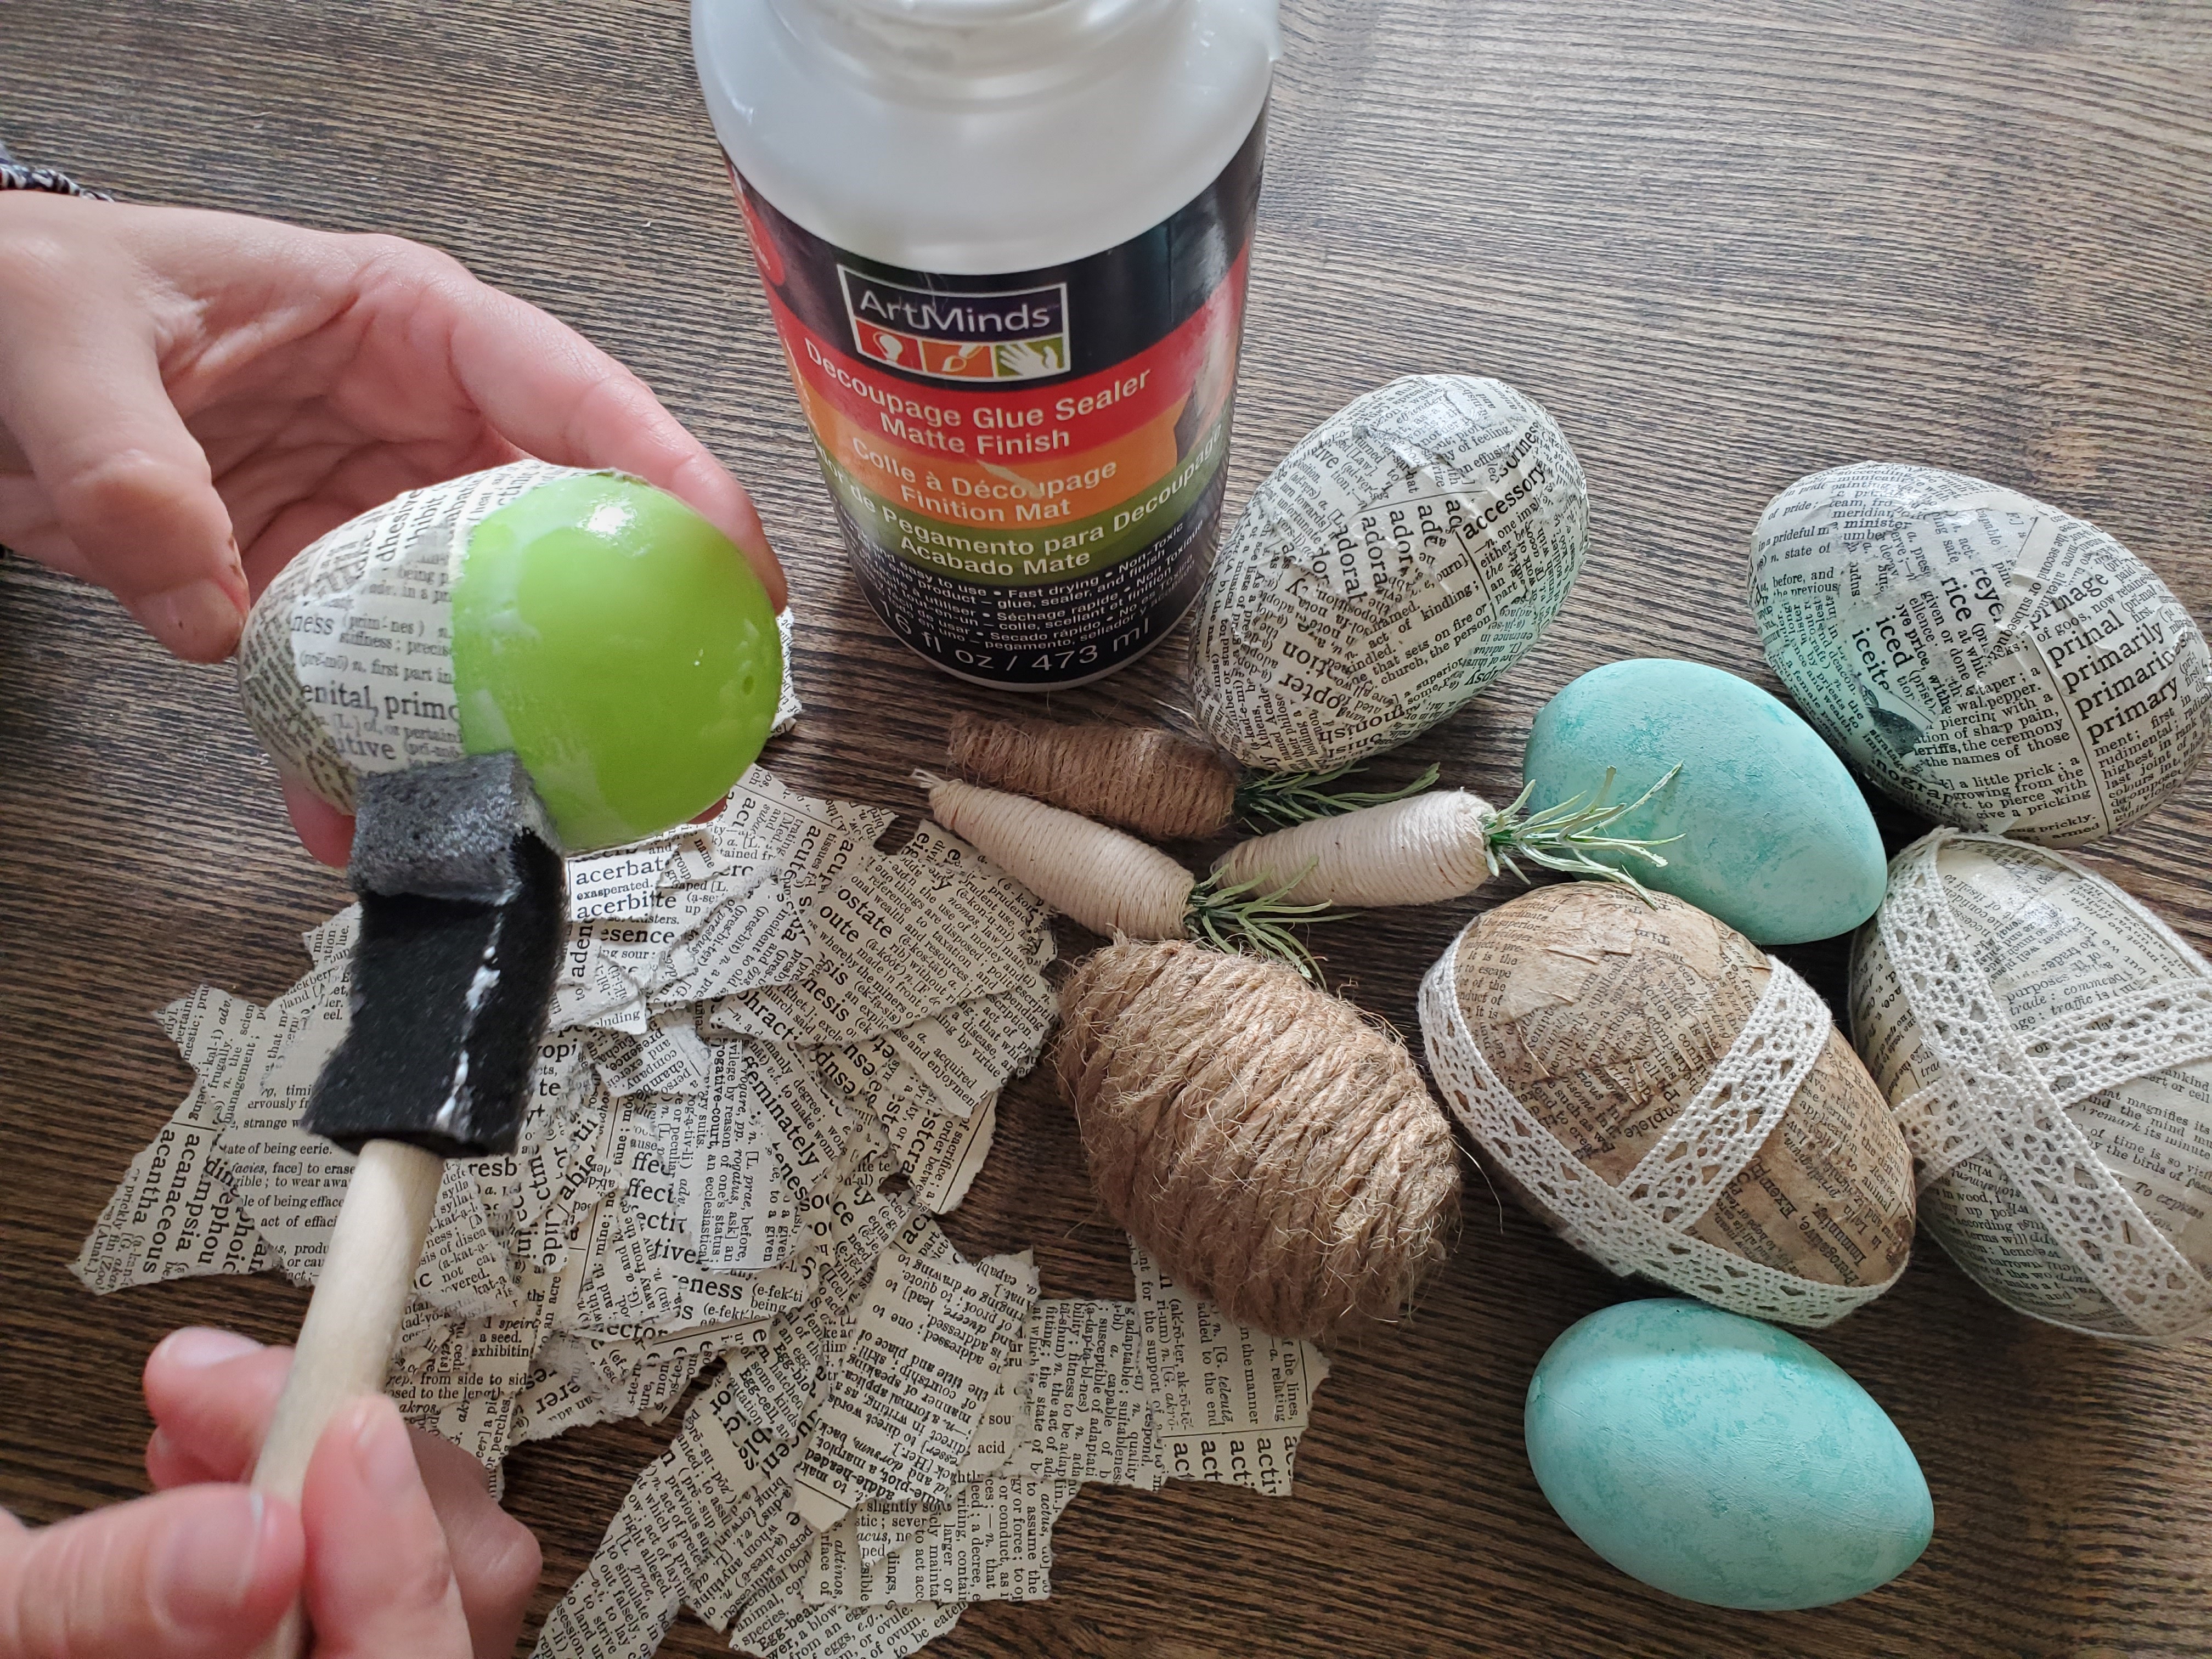
Rip the book pages into .5″ – 1″ pieces. Make sure that all the eggs are tightly closed.
Using Mod Podge and the foam brush apply the book pages to the Easter egg and then press the torn page onto the plastic egg.
Next, apply a thin layer of Mod Podge over the newly glued on piece of paper. Use a damp cloth to keep your fingers moistened so that you can smooth out any pesky air bubbles or creases. Continue this until the entire egg is covered. Do this to all of the eggs. Let dry completely. I left them overnight.
I decide to leave some of my Easter eggs plain, some were aged with a bit of antiquing wax, and some were decorated with embellishments.
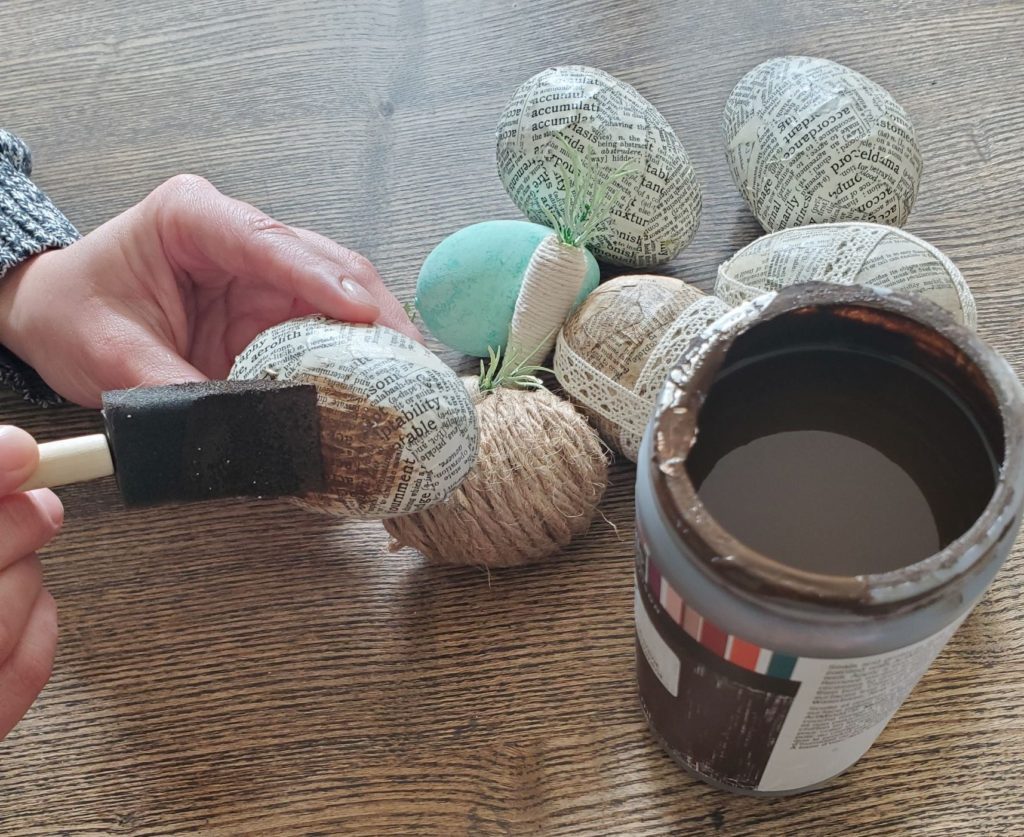
To make the aged Easter eggs
Using ArtMinds Antique Wax and a sponge to dab the antiquing wax onto the papered egg. With a dry cloth wipe away any access and spread out the wax. Keep playing with this until you are happy with the look and the Easter eggs look antiqued.
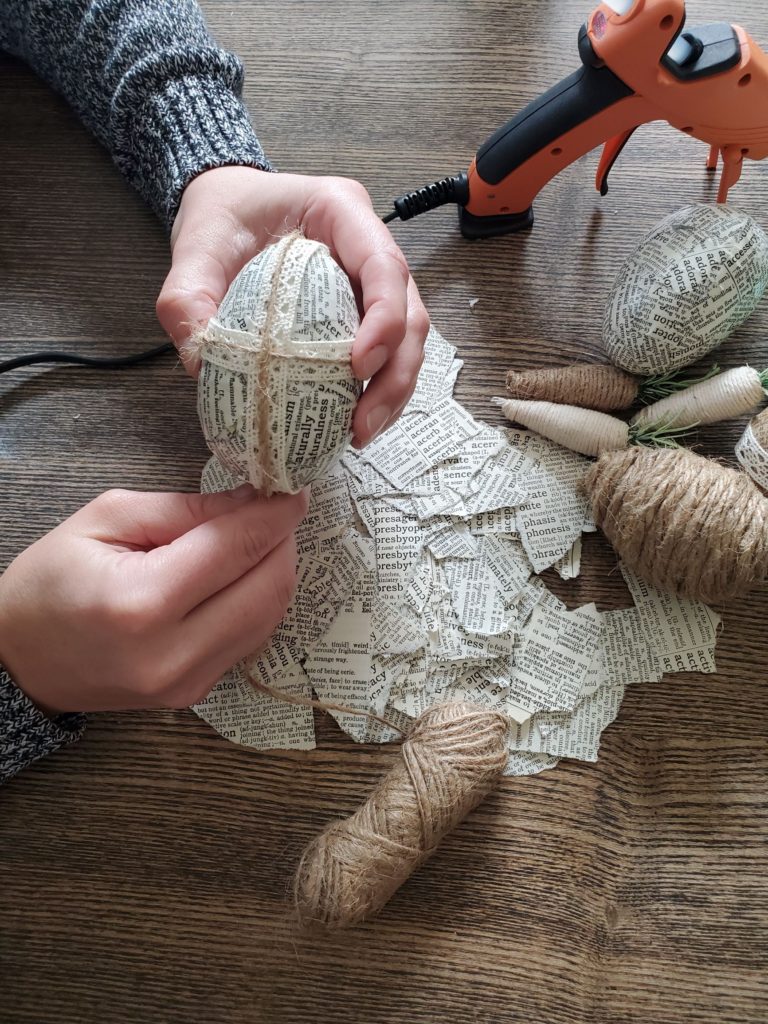
To decorate the eggs
Now things get fun! Using the ribbon, lace, and twine go to town decorating the page covered Easter eggs. Attach the embellishments with hot glue.
TIP: Personally I think that these eggs look best in neutral colours. I suggest going with fabric ribbons, twine, lace, and yarn in neutral colours like white, cream, beige, or brown.

Decoupage Easter Eggs #3: Monogrammed Large Book Page Easter Egg
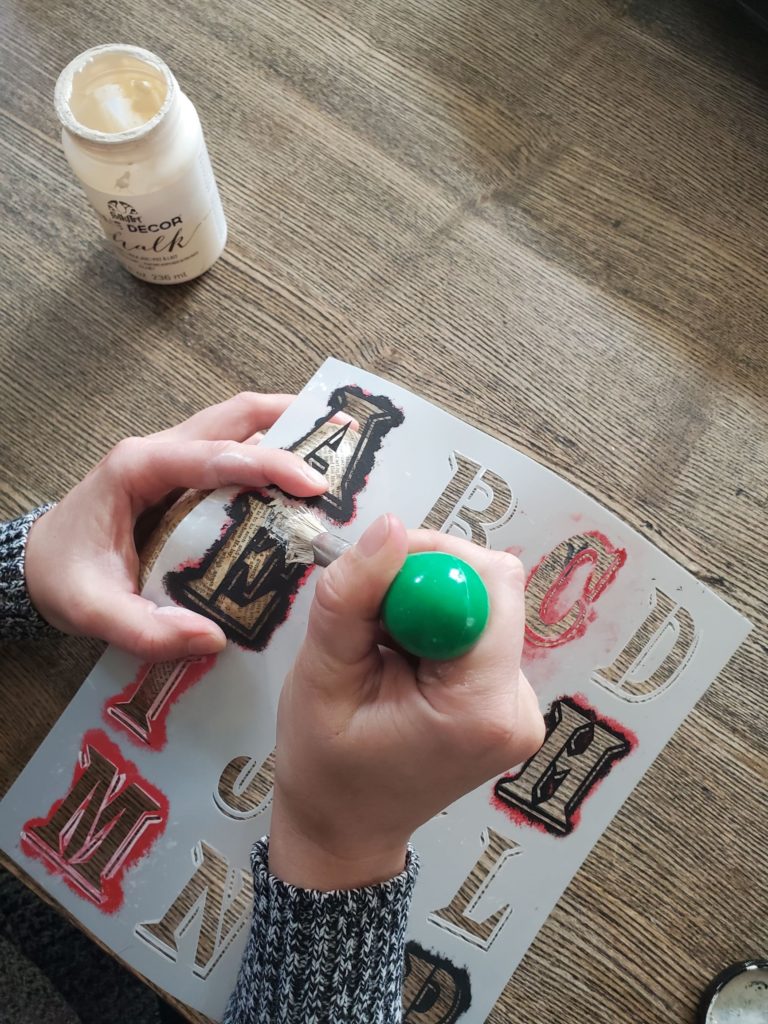
For the larger book page Easter egg: I decided to stencil it. Using an off white chalk paint, FolkArt in Milk Jug,a stencil of your choice. I used FolkArt Painting Stencil, Peddler Alphabet.
Press the stencil letter you want to apply down as best as you can. It’s a little challenging with the curved shape but with a little care it can be done. With a stenciling brush dab on the paint and then let dry.

NOTE: Stenciling on the smaller book page eggs was next to impossible and I was feeling less than ambitious. You can certainly give it a try but I found it quite challenging and it turned out a bit messier than I like. So for me – no go.
Jenny’s Finishing Thoughts on Decoupage Easter Eggs
These paper decoupaged Easter eggs were so much fun to make. They made a bit of a mess but they were almost impossible to mess up and they all looked fabulous when finished. I couldn’t be more pleased with them. I hope you enjoying making and decorating your own decoupaged Easter eggs as well.
Leave a comment and let me know if you prefer rustic, shabby chic, glam, or modern Easter decor. I would love to find out your preference. Cheers!
Did you find this post helpful or inspirational? Save This Pin to your Easter Decor board on Pinterest