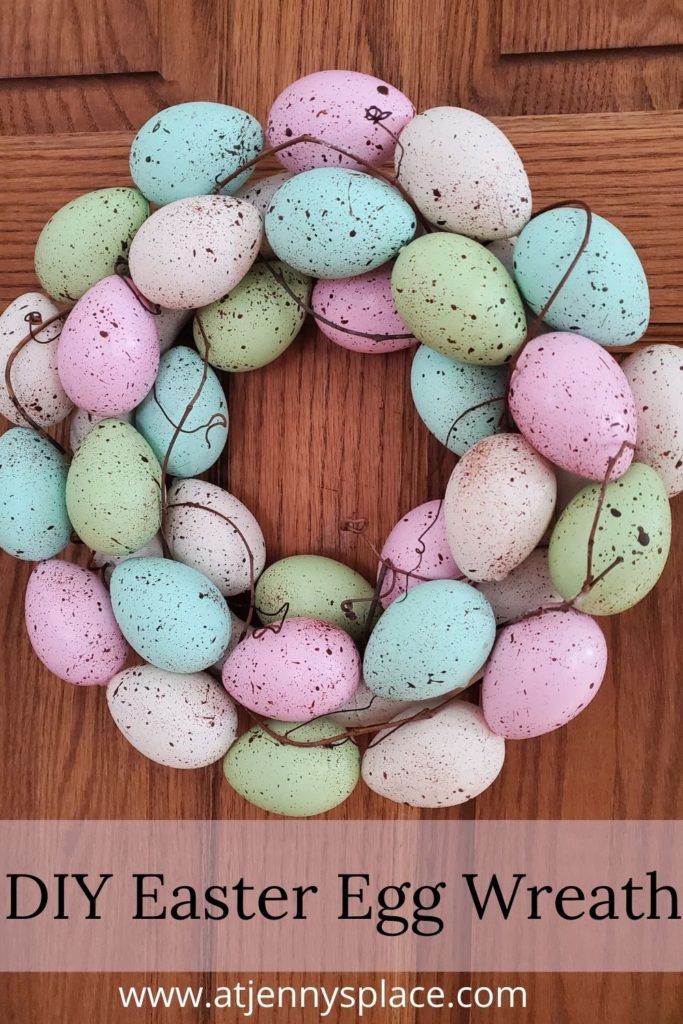
DIY Easter Egg Wreath Simply Gorgeous
Let’s make a dollar store DIY Easter egg wreath from supplies found at the dollar store. Inspired by a wreath from Micheal’s. Will ook fabulous on the front door!
I love wreaths. My husband is of the opinion that wreaths are only for Christmas but I strongly disagree.A stylish wreath looks great anytime of the year and making them is just plain fun. I love walking up to the front door and being created by a beautifully adorned wreath. There are also have several places in our home that just beg for a wreath and I can’t help myself. I love changing them up with the change of the season. I am constantly coming up with new ideas.
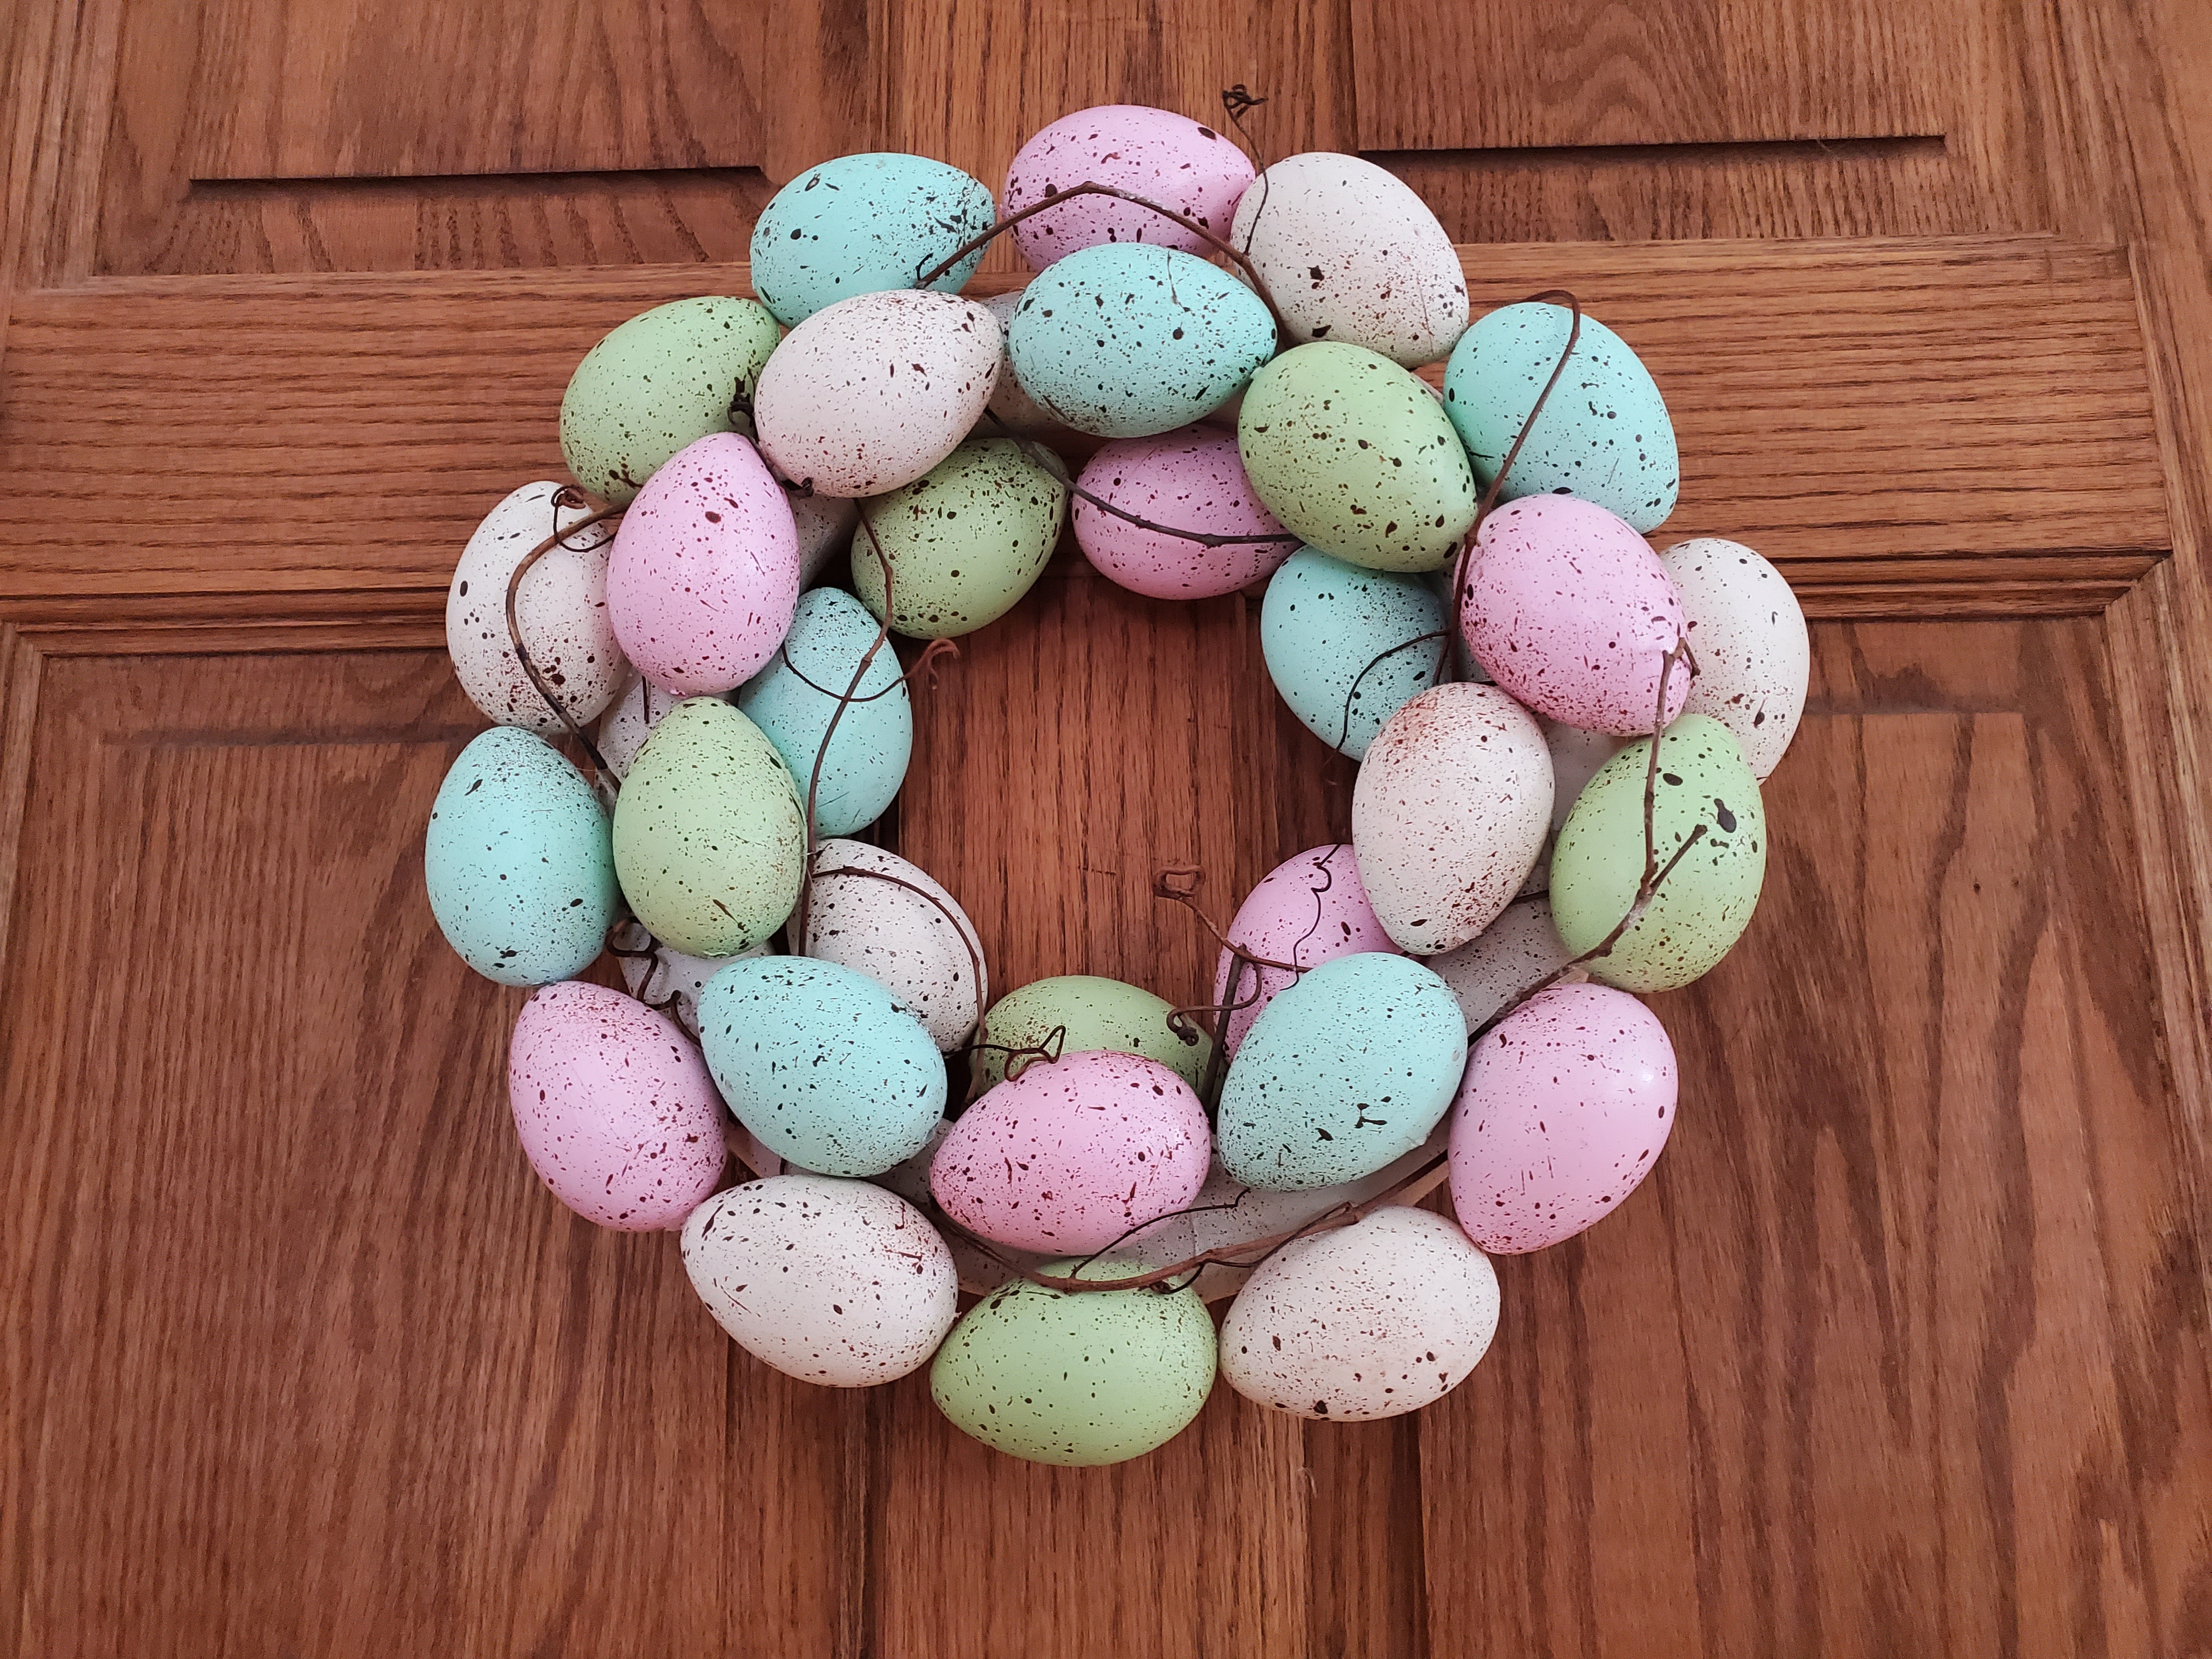
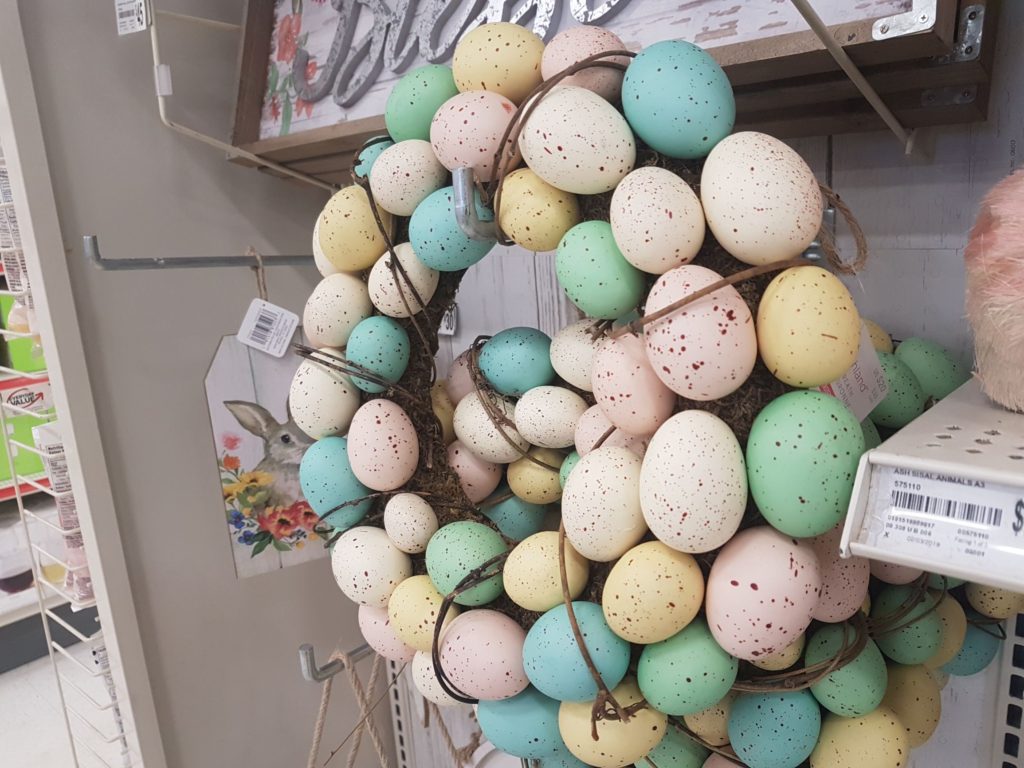
This Easter egg wreath was inspired by one that I spotted a few years ago at Micheal’s. I was hunting for spring ideas to dupe and came across the wreath shown on the right. It was love at first site but the $30.00 price tag was a bit steep for me. I knew I could make it for way less with products from the dollar store and was I ever right! I love how this wreath turned out and think it looks fabulous hanging on our backdoor.
Tips How To Make Easter Egg Wreath Easier
Tip #1: Let the dollar store help you “cheat”
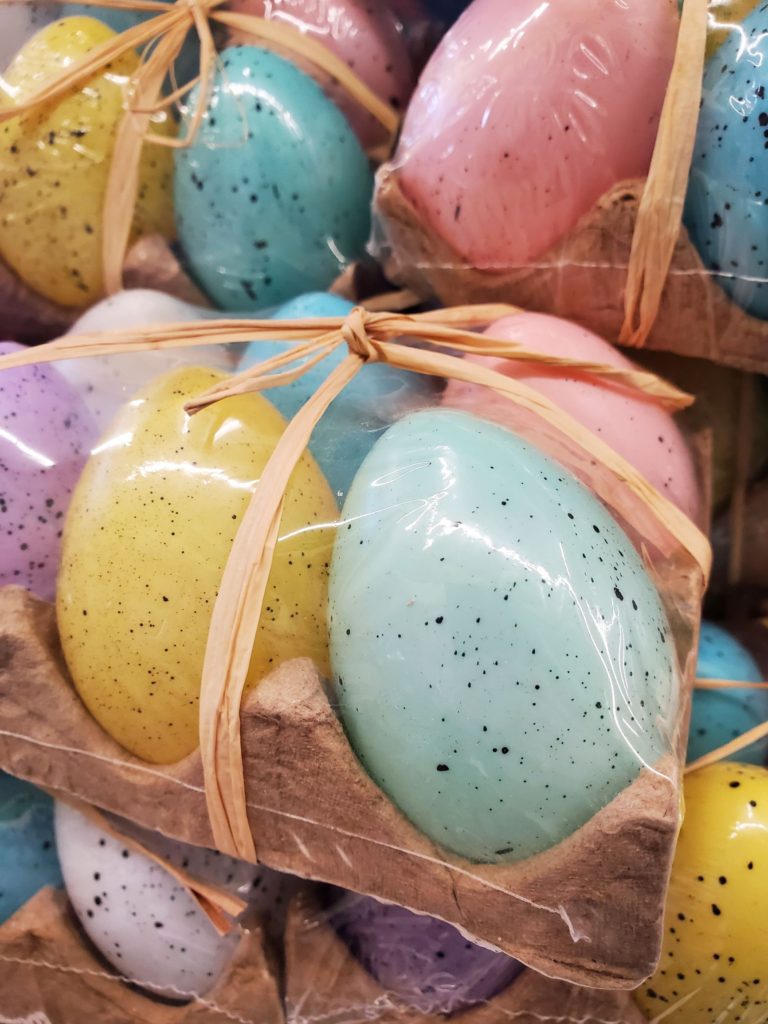
I choose to paint the plastic eggs because I wanted control of the colour. I would be a liar if I said this wasn’t a ton of work. Personally, I found painting the eggs relaxing and a good excuse to catch up on my Netflix but if you want to make this simple wreath even simpler… your local dollar store will likely have pre-painted, speckled, foam eggs that you can use instead.
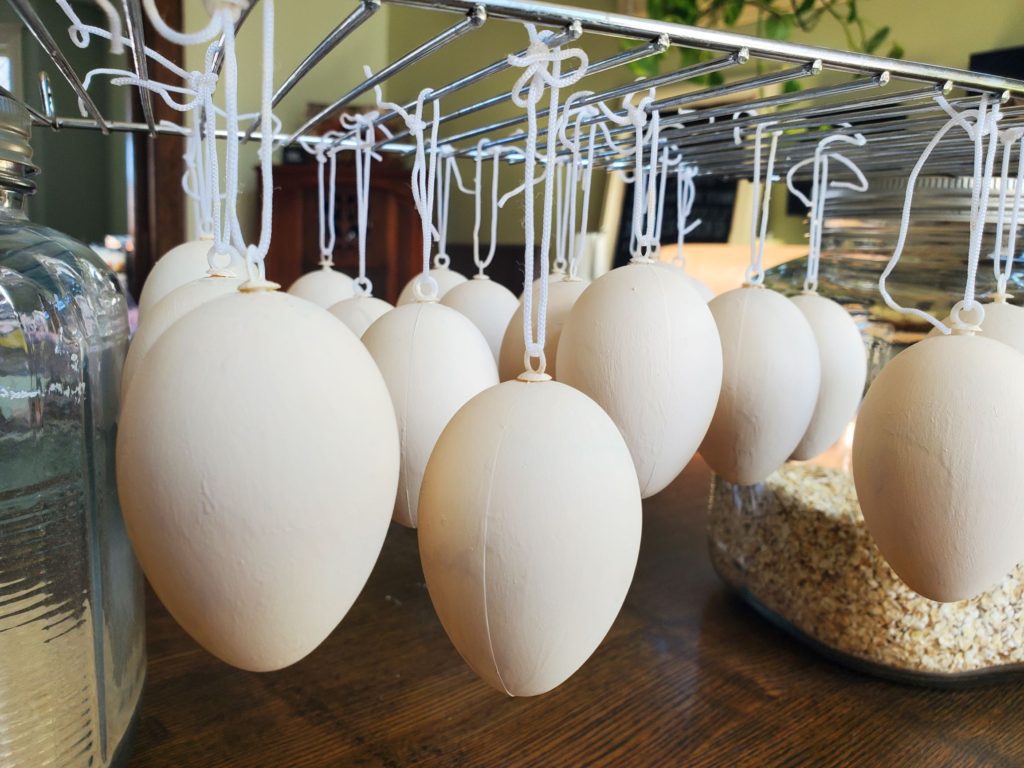
Tip #2: Hang the plastic Easter eggs to dry
If you decide to use the same eggs I used try propping a wire cookie rack between two tall objects. Place this over a plastic tray or a cloth. Holding the egg up by the string on top, fully coat the plastic egg with a final coat of chalk paint and then tie each painted egg to the wire rack. Let t them hang until completely dry. This will prevent a paint line from forming in the middle of each egg. But if they get away from you, they bounce, and you will have paint marks to clean up.
Tip #3: Use chalk paint to paint dollar store Easter eggs
Yes, you can use acrylic paint but chalk paint dries faster, doesn’t require scuffing up the plastic or priming, and it gives a really attractive and realistic matte finish to the eggs.
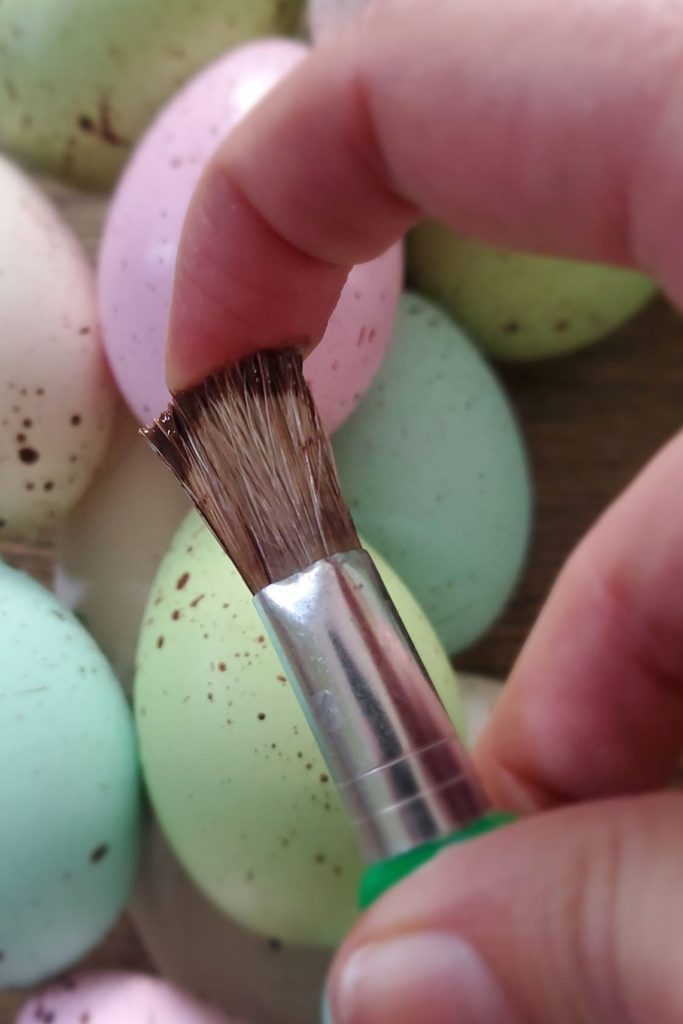
Tip #4: A dry brush is best
I know I mentioned this above but it bears mentioning again, use a dry stenciling brush instead of a paint brush. It just spatters nicely and creates smaller specks than a regular paint brush. I also found that I had to switch out my stenciling paint brushes once they became saturated with paint. A dry brush just works best.
Supplies You Will Need To Make DIY Easter Egg Wreath
With the exception of the chalk paint, most of the supplies needed for this project can be found at the dollar store.
- 10″ Green foam floral ring
- ArtMinds chalk paint in Blush
- FolkArt Chalk Paint in Java
- ArtMinds Chalk Paint in Sea Glass
- ArtMinds Chalk Paint in Succulent
- Paint brush
- ArtMinds Chalk Paint in Simply White
- Stencil paint brush
- 2.5 cartoons of plastic crafting eggs
- Glue gun and glue sticks
- Bendable twigs (*optional)
- Faux flowers (*optional)
- Twine
How To Make DIY Easter Egg Wreath
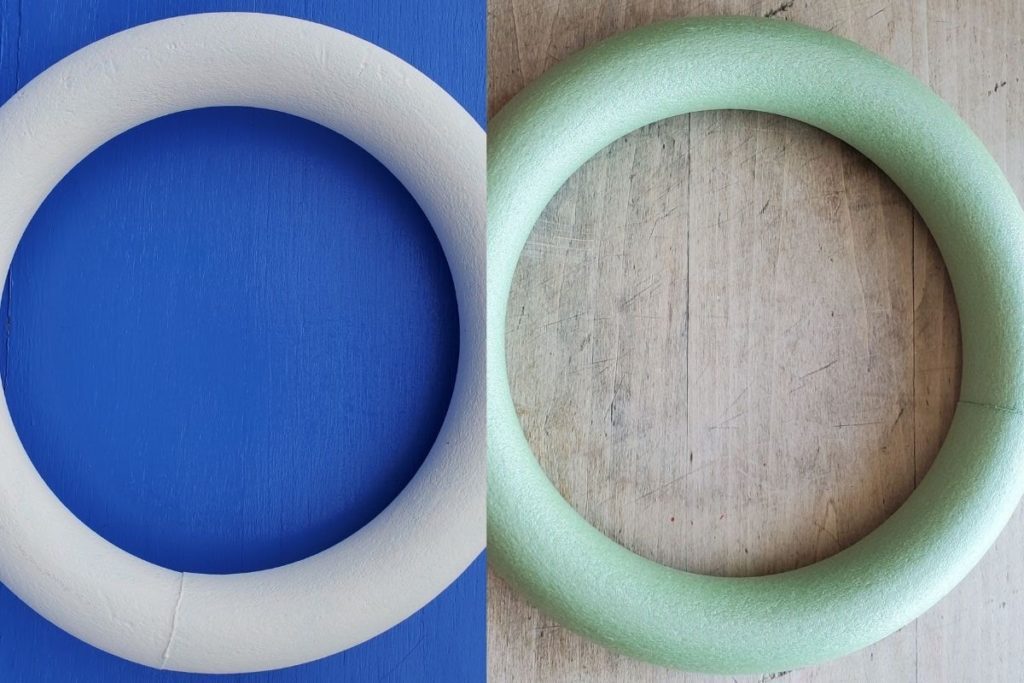
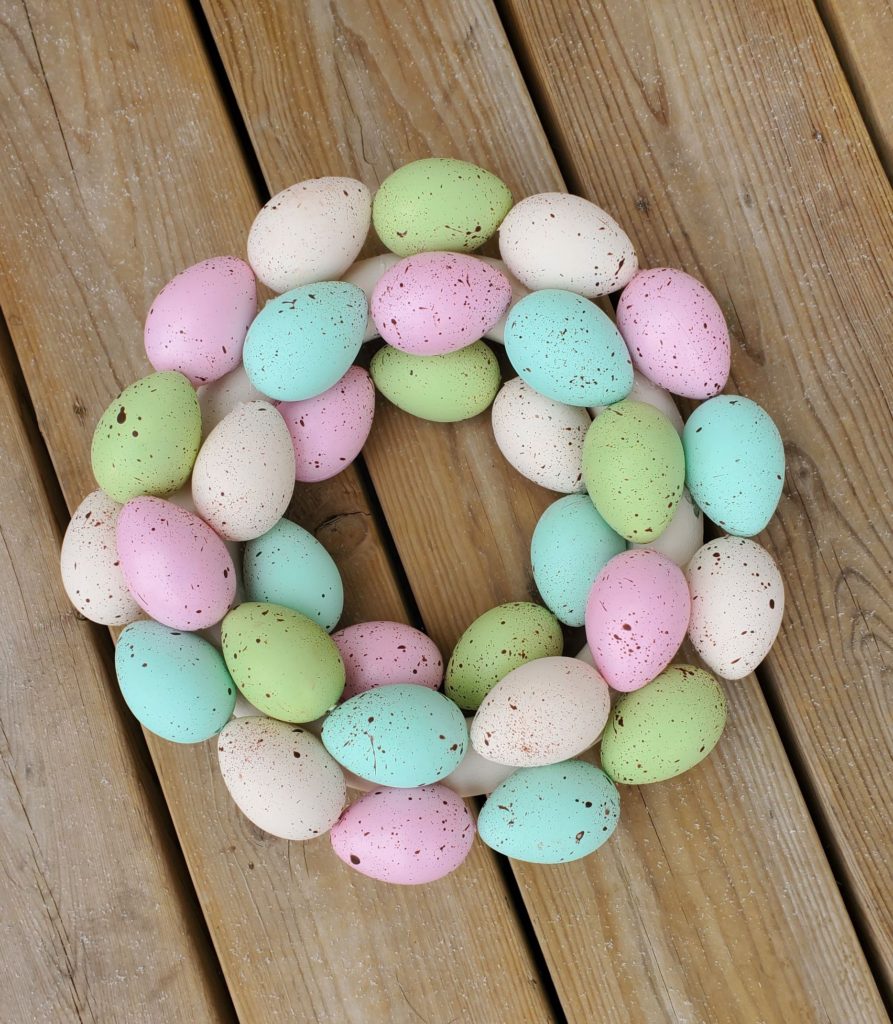
Begin by painting the green foam floral ring with chalk paint. I used Folk Art’s Milk Jug chalk paint. One coat was enough but if you prefer a second coat for full coverage feel free to do so. I recommend using chalk paint for painting the foam ring and the eggs because it will stick on nicely, it dries quickly and it has a matte appearance when dry.
PRO TIP: Later on, after I had glued the Easter eggs on to the painted foam wreath form I realized that if I speckled the wreath form with brown paint it would be better camouflaged. (Outlined further down this post.) I would suggest that you do that step now. With your brown paint and a dry stencil brush flick the brown paint onto the foam wreath form and let dry.
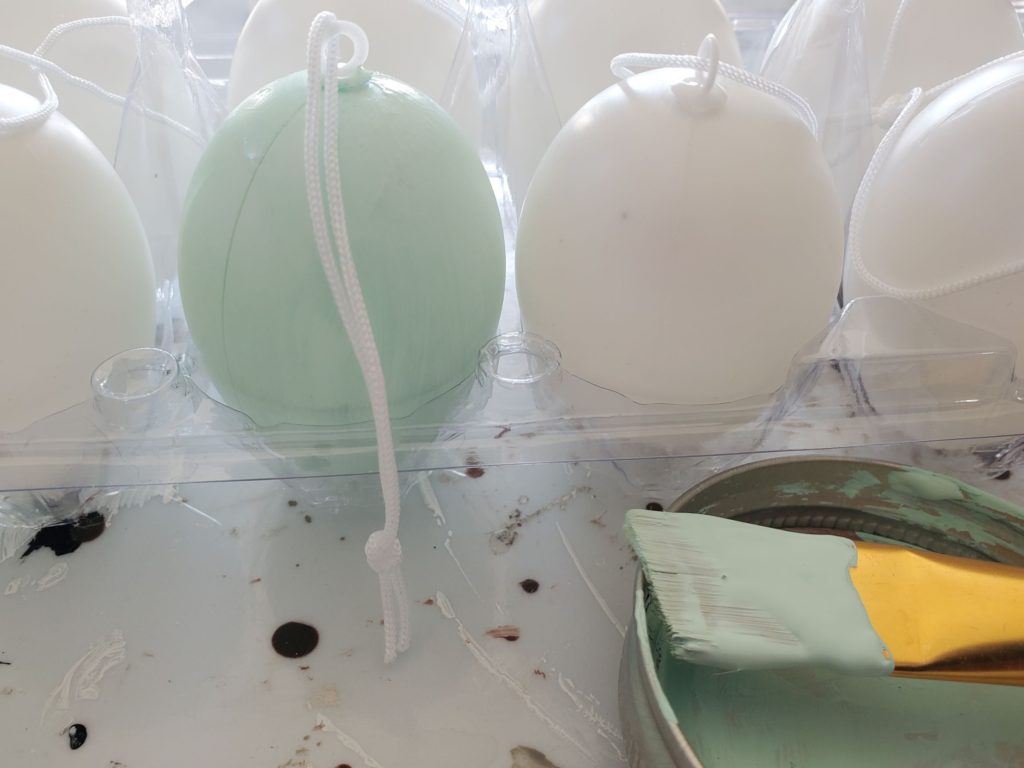
Next, paint the plastic Easter eggs. If using the same plastic eggs shown, I found it best to paint the eggs by holding it by the string and then painting half of the plastic egg. Once the top half was dry I painted the bottom. Each egg took 2 coats of chalk paint. I decided to go with lighter versions of teal, pink, cream, and green. You can use any colours you wish. Maybe go neutral or use brighter more vibrant colours.
PRO TIP: I found that using a dry stenciling brush worked the best for this. A regular paint brush created large speckles and sometime made lines. Whereas, the stencil brush created smaller, neater flecks.
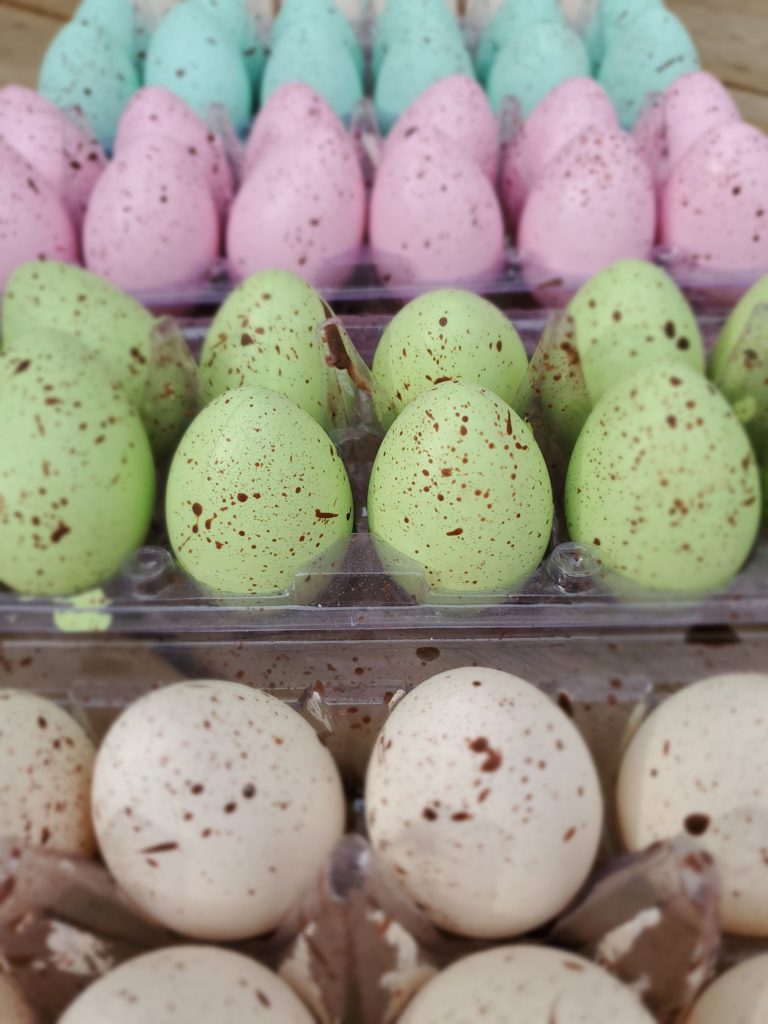
Now, using brown paint and a dry stenciling brush flick specks of brown paint onto each egg. Make sure you lay a drop cloth down because in this step the paint flies! Let dry completely.
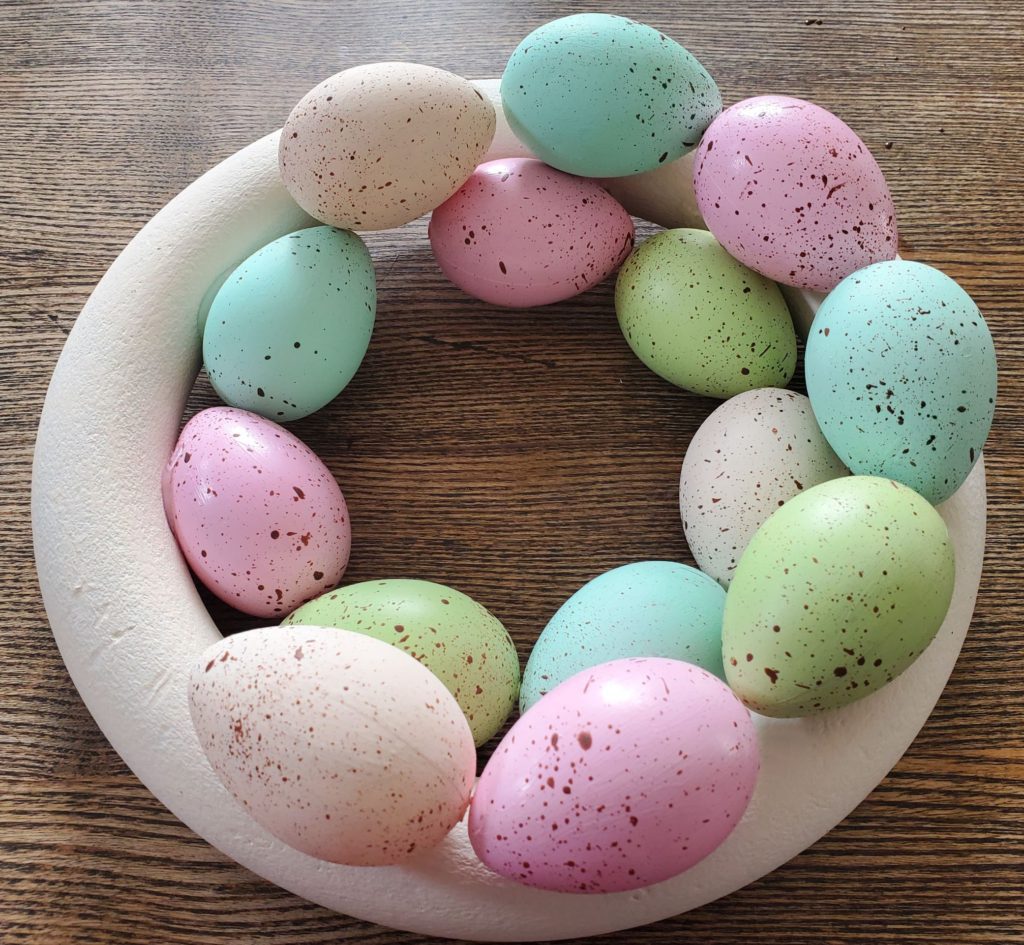
Using your hot glue gun attach the painted eggs to the foam floral ring. Begin gluing the eggs to the center of the wreath form and then work your way out.
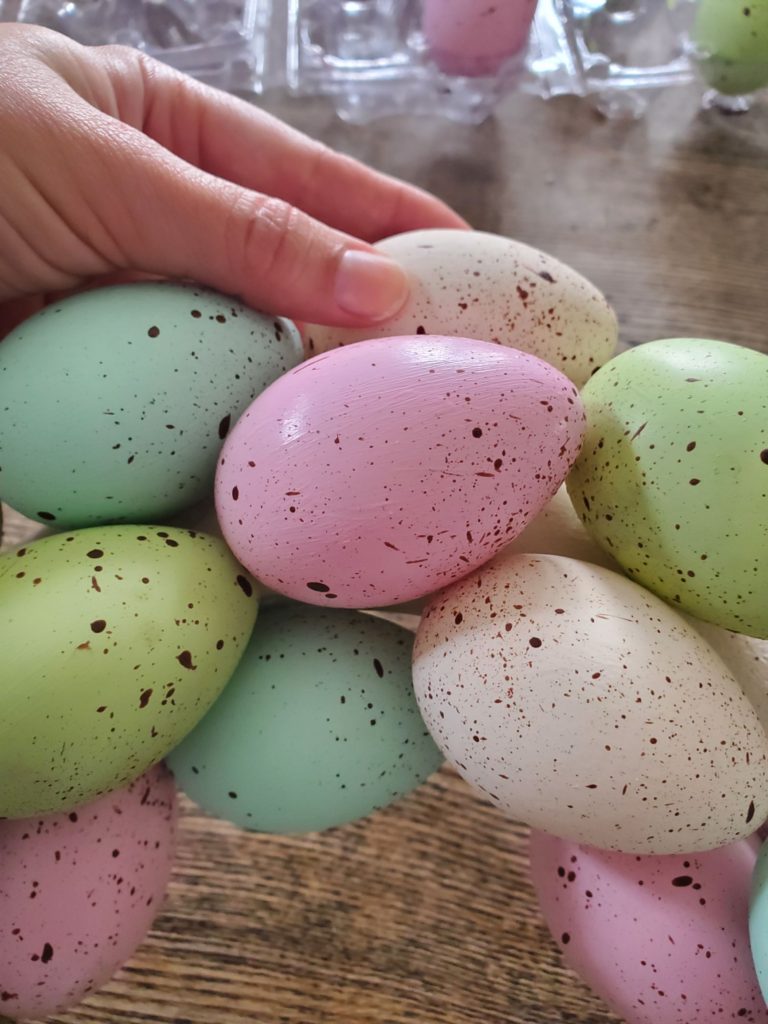
Glue the eggs as close to each other as possible. Glue the eggs on so that the tips are facing in the same direction. Next add the middle ring of painted eggs and then lastly fill out the outer circle.
NOTE: This is where I noticed that the wreath form its self could use some speckling. It just helps to camouflage the wreath form and looks better in the end. Again, using brown paint and a dry stenciling brush I flicked paint on to the foam ring. I recommend you do this step before you glue on the painted Easter eggs. It’s just easier and will prevent any paint mishaps.
And Voila! Secure a hook on the back with hot glue or hang with ribbon. And now you have a beautiful, Easter egg wreath that would have cost you a whole lot more at Michaels.

More Decorating Options:
Now you could stop here if you like. This is a perfectly lovely and simple Easter egg wreath but I wanted to take it a step further.

Get Twiggy With It
Using a hot glue gun attach the flexible twigs to the wreath so that they periodically wrap around the eggs on the wreath. Tuck the twig ends in between the eggs so that it appears as though they are growing out of the wreath. Personally, this was my favourite look. But because I couldn’t help myself I took things even further.
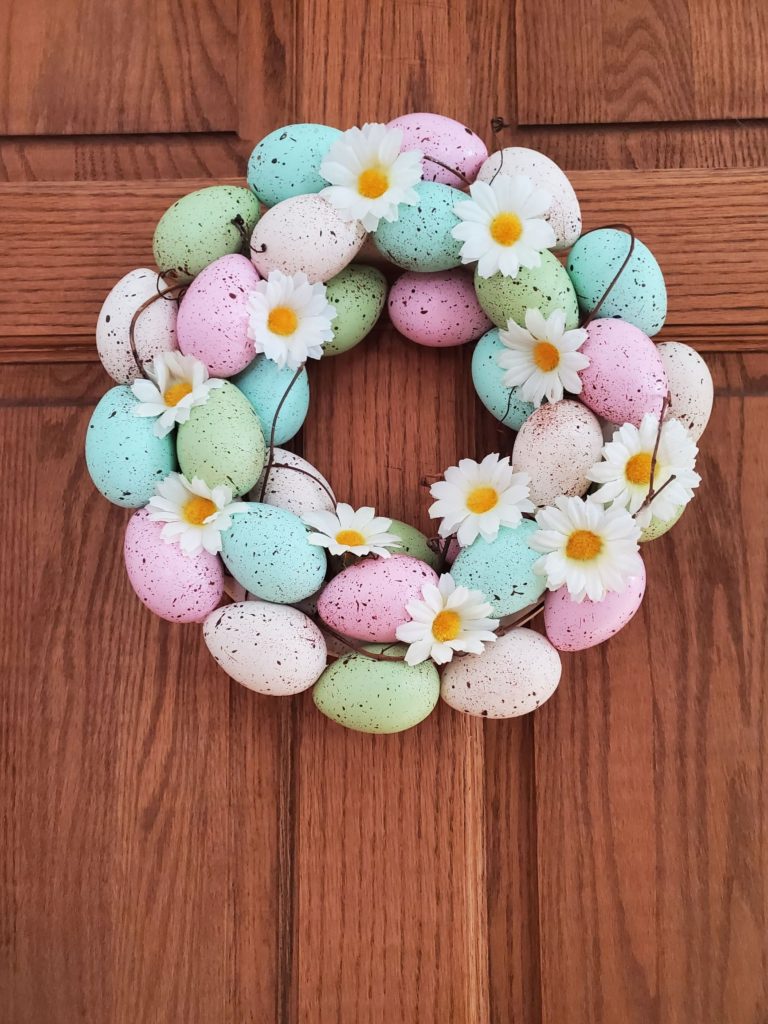
Flower Power
Using any faux flowers of your choice and a hot glue gun, attach the flowers to the the sides of the eggs. I decided to go with daisies because I thought the yellow went really well with the pastel colours and because they are just plain cheerful. Love the happiness it exudes.
Lastly, hang your new Easter egg wreath on the front door and let the compliments pour in.
Jenny’s Finishing Thoughts on this DIY Easter Egg Wreath
Decorative wreaths are for all times of year and all types of occasions. Your front door is the first thing people see when they arrive at your home so why not make it a great first impression. I think this DIY Easter Egg Wreath is perfectly adorable and so easy to make. The fact that it costs a whole lot less than one’s you can find.
Did you find this post helpful or inspirational? Save This Pin to your Easter Decor or Easter Wreath board on Pinterest