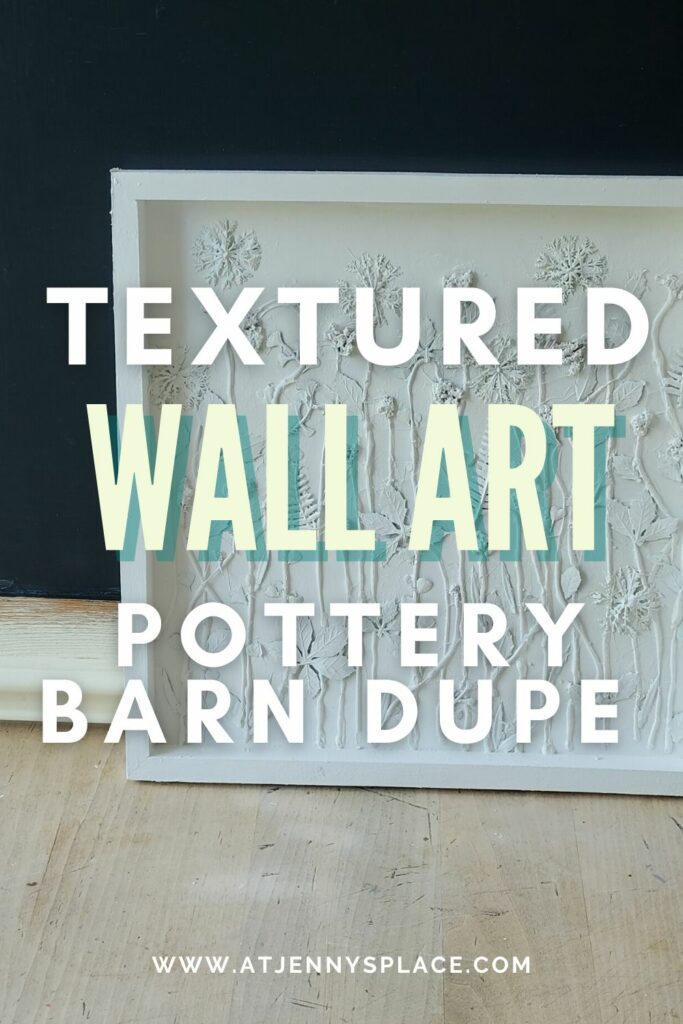
DIY Textured Wall Art: Pottery Barn Dupe
Get the look for less ! Create your own pottery barn inspired DIY textured wall art with these easy to follow steps.
Find Your Inspiration
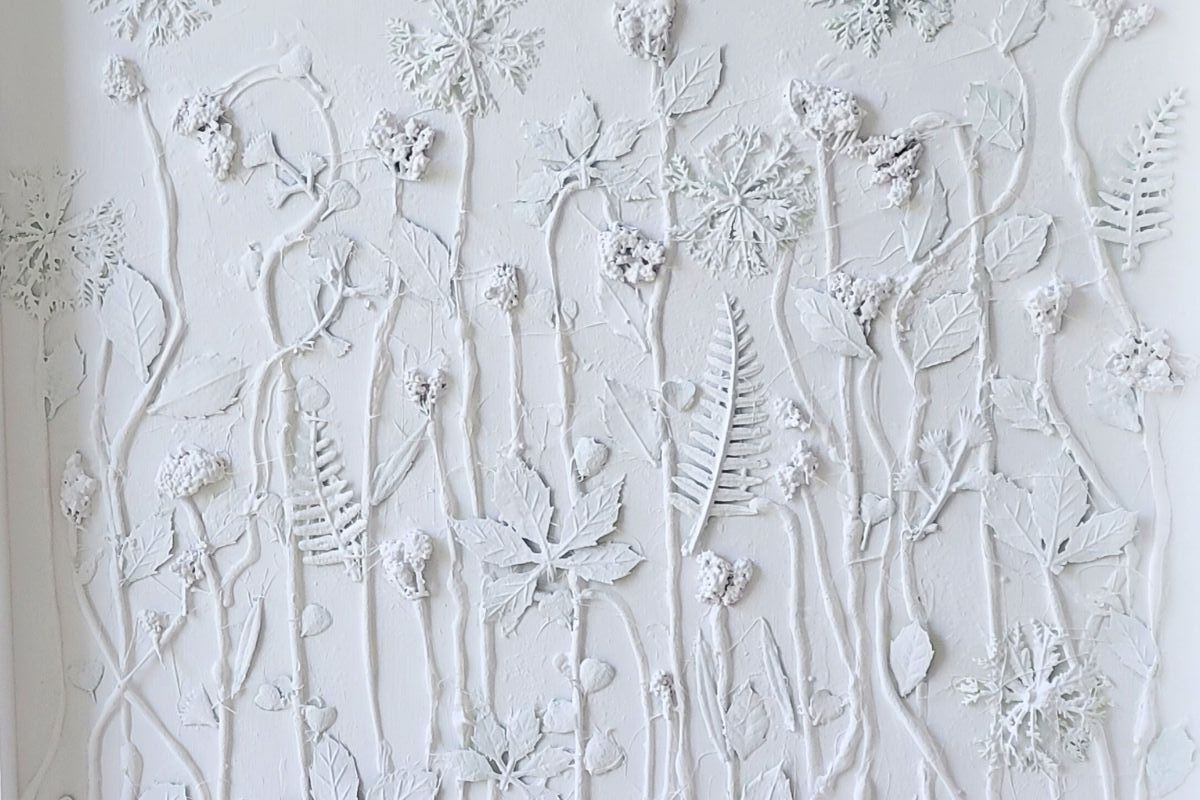
Do you love the look of high-end, white on white textured wall art from Pottery Barn – but not the price? Then you’re in luck! With just a few basic supplies and a little bit of know-how, you can create your own beautiful, wall art dupes for a fraction of the cost.
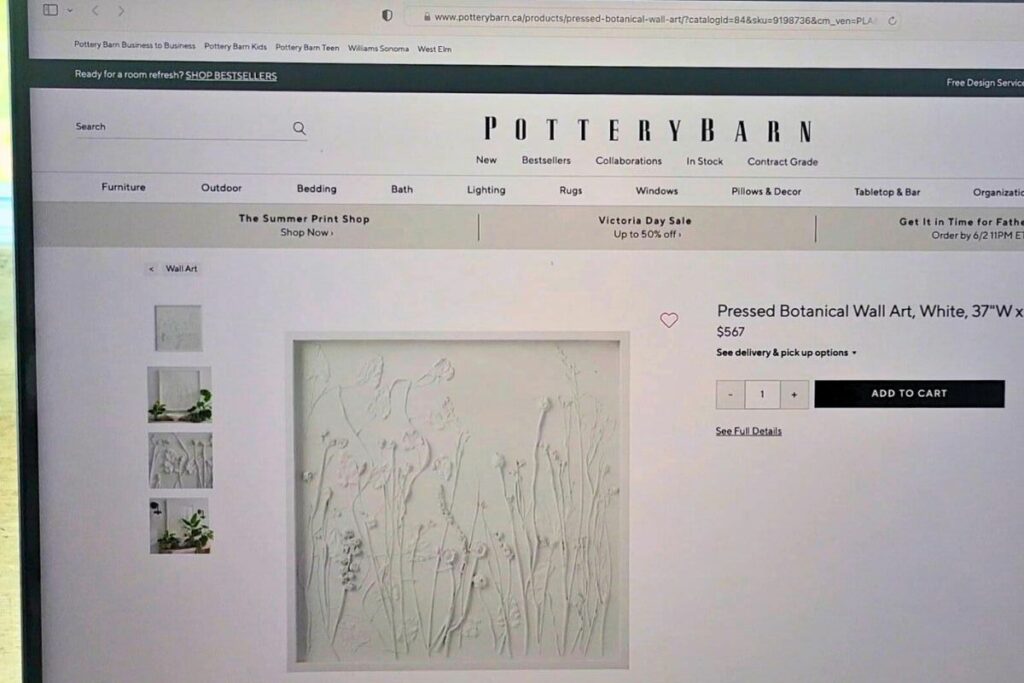
Pottery Barn is asking for close to $600 for this piece of art work! Yep, ya read that right. They want several hundred dollars for this art piece. And, while I agree it’s an intriguing and unique piece of art, the price tag blows my mind.
Now, admittedly the one I make here is smaller than the original. But that is an easy fix. All you need to do is find or make a larger wood frame. I know that the dollar store near me has a couple of sizes up from the one I went with.
That being said, all in I’m at about $10 and that still leaves me with plenty of left over supplies for another project. So, let’s call it a $550 dollar saving. (Maybe a bit more if you go for the original size.)
Creating your own white on white textured wall art is a beautiful and creative way to add a unique look to any room. With just a few simple supplies it’s possible to create a stunning design that looks much more expensive than it really is.
Supplies You Will Need
Let me walk you through the simple process of making your own white on white textured wall art. There’s no need for any special tools or complicated instructions. A couple of bucks, and quick trip to the dollar store is all it takes to recreate this stunning wall art piece.
- Wood art frame
- White acrylic paint (or chalk paint in white)
- Foam brush
- Small paint brush
- Random greenery (Go for smaller, plastic leaves that have varied shapes and textures.)
- Puffy blooms – these are the ones from Dollar Tree that are made of clusters of tiny foam balls.
- Hot glue gun and hot glue sticks
- Wire clippers
PRO TIP: For the greenery and flower clusters it’s best to look around during the spring and summer time.
Watch the video to see my other Pottery Barn DIY Dupes!
How To Recreate This DIY Textured Wall Art Dupe
Whether you’re looking for a budget-friendly way to spruce up a living room or you just want to add a decorative touch to a hallway, this DIY project is a great option. Not to mention, the satisfaction of having created something beautiful with your own hands for a lost less money is truly priceless. So, what are you waiting for? Let’s get creating and saving today.
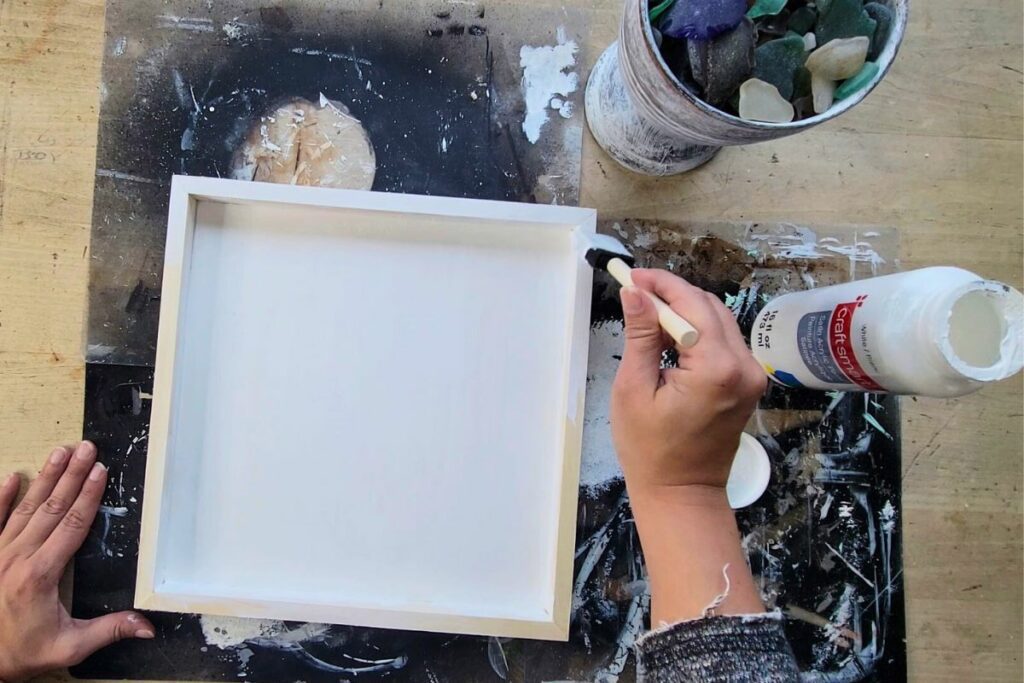
Start by painting the wood art frame in the acrylic white. You can use chalk paint, as well. I went with acrylic because it’s cheaper and there won’t be any distressing in this project. But if you would prefer more of a matte like finish then chalk paint is always an option.
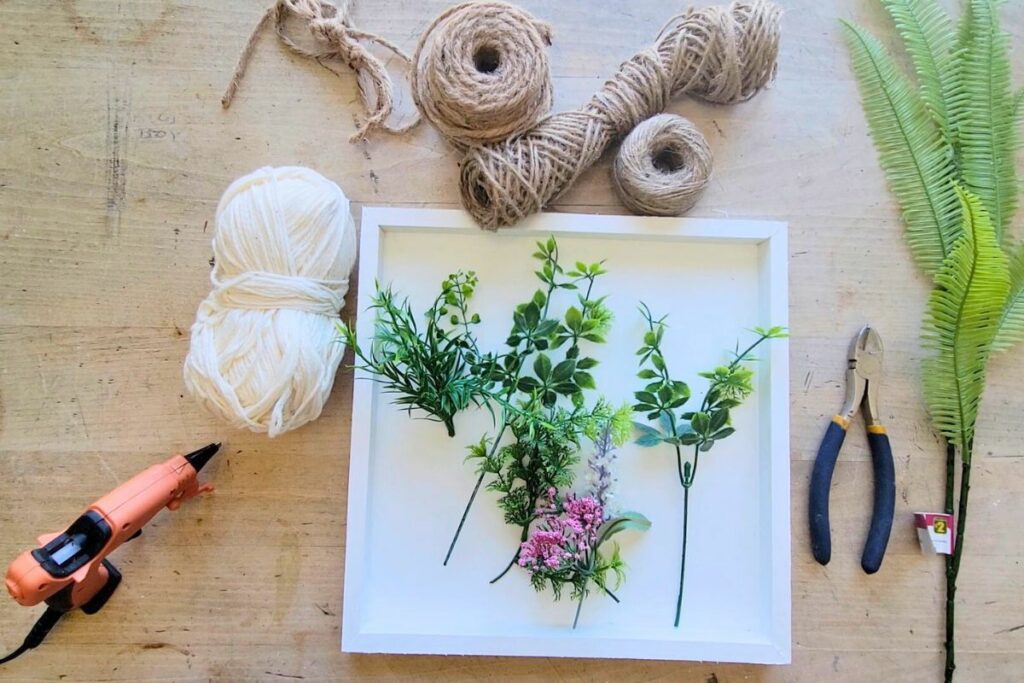
Select a few different greenery stems. Go with ferny textures and stems that have an interesting leafy structure. You want them to be smaller in size and to have varying shapes. Add to that, some puffy textured flower stems. During spring and summer Dollar Tree often has flower stems made from teeny, tiny foam balls glued together into clusters. These work perfectly.
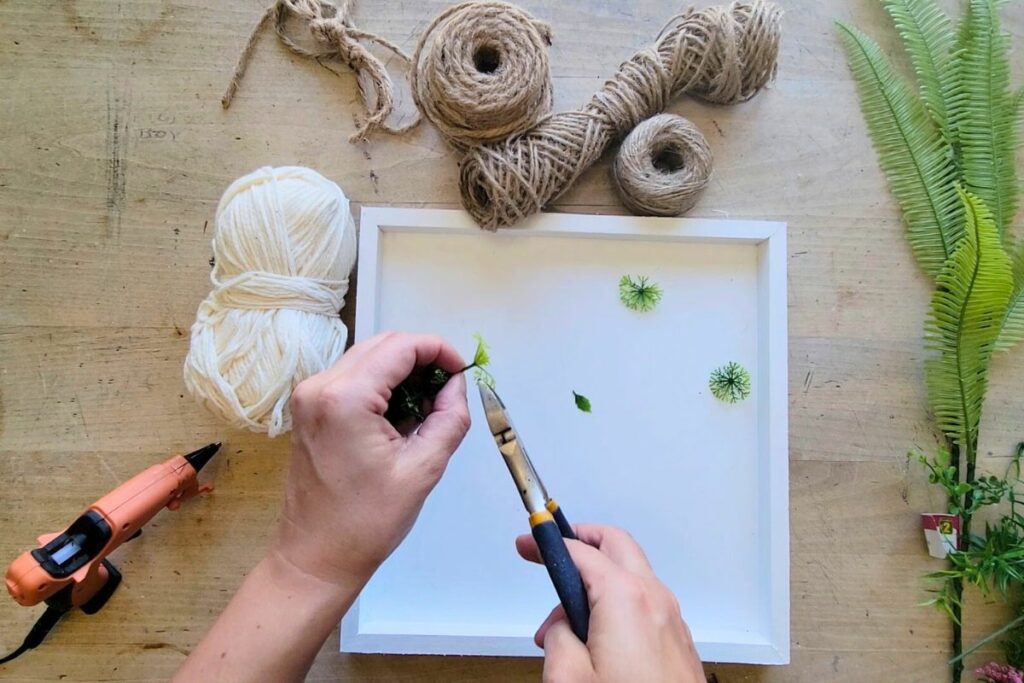
Clip these into smaller sections and separate leaves. You want the leaves to be able to lay flat. You can clip these with scissors but wire clippers make it easier.
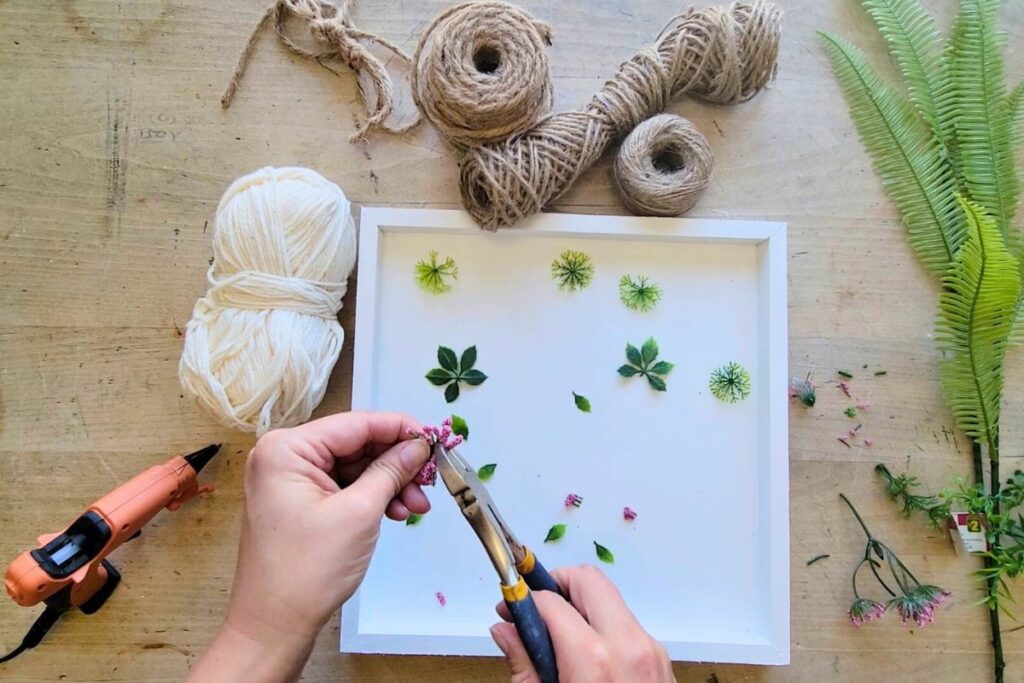
Next, do the same with the flower clusters. Cut these down into smaller bits and work with the the ones that you can glue down so that they lay flat.
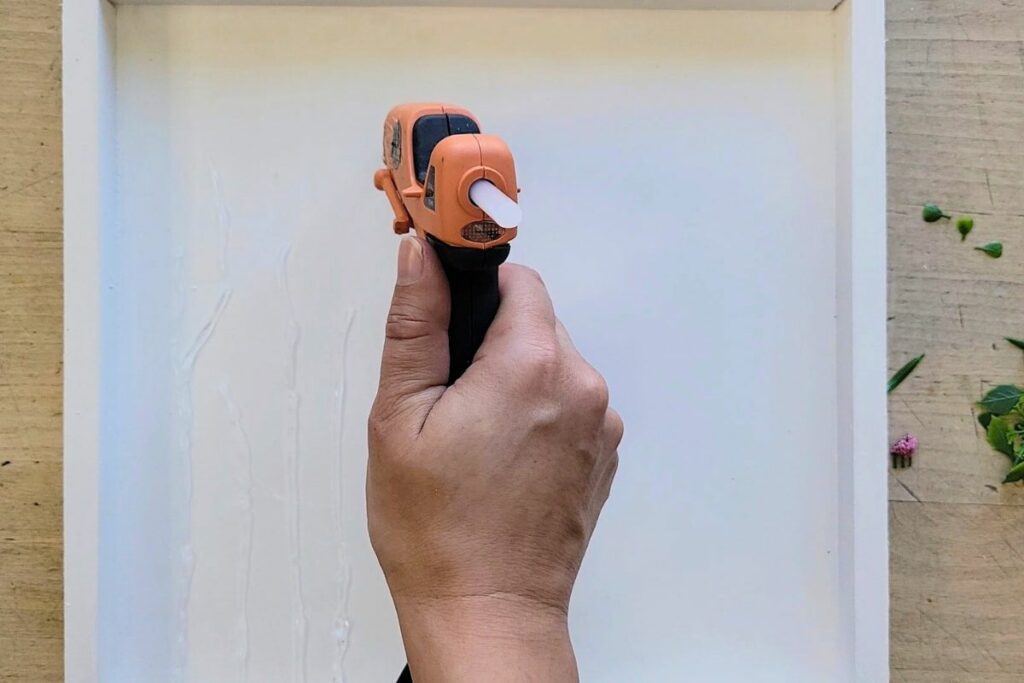
Now, using your hot glue gun, create “stems” for the flowers by making lines with your hot glue. Create longer and shorter lines. Make some lines curvy and others poker straight. Criss cross over the other or create branches off the sides of a longer stem. Basically, let your hair down and go with it!
Now the fun starts!
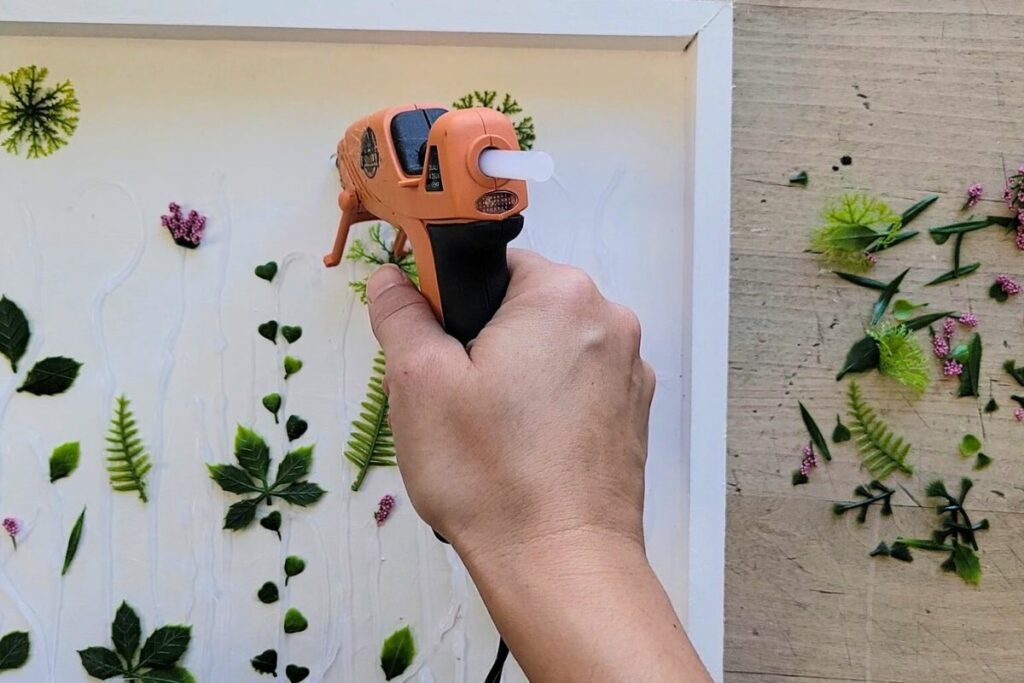
Again, using your hot glue gun adhere the pieces of leaves and flower clusters to the the newly created stems. Don’t take this part too seriously. Just make sure to work within the spaces between stems and mix up the textures a bit.
PRO TIP: Don’t get too picky with your hot glue. Yes, these leaves are on the small side but in the end you won’t be able to see any of the glue. So, don’t be sloppy but at the same time don’t be a perfectionist either.
Get All The Printables!
Sign up now to receive unlimited access to the At Jenny’s Place Free Printable Library. By signing up, you will gain unlimited access to all past, present, and future printables available in the library.
Join now and unlock the full potential of the At Jenny’s Place Free Printable Library!
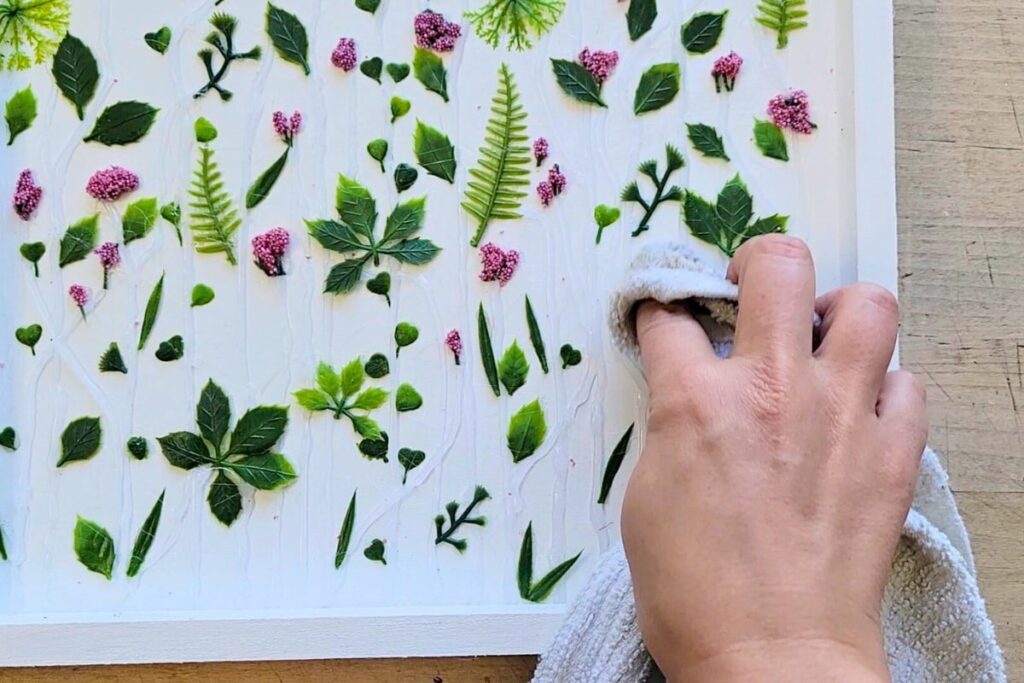
Using a damp cloth, wipe away any annoying, stray hot glue strings. Again, clean things up but don’t be obsessive with this part either. Wipe away any obvious strings and give it a good once over but in the end ya ain’t gonna see it.
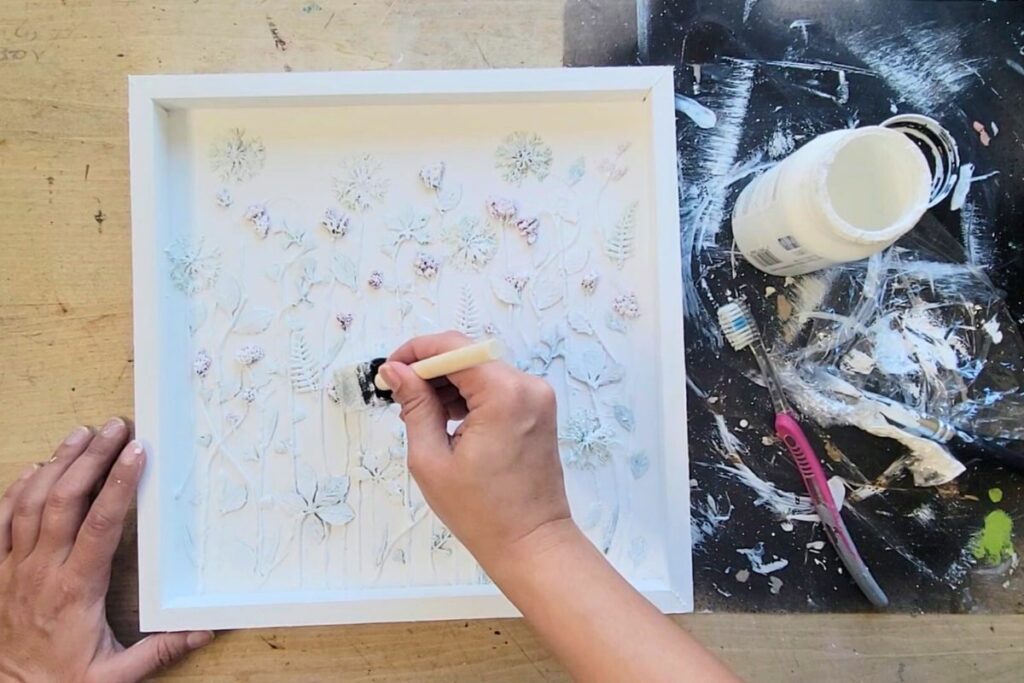
Grab that foam brush, dip it into the white acrylic (or chalk) paint and start covering the hot glue stems, leaves, and flower clusters with it. Avoid going in thickly with the paint layers. Take the time to paint on several thinner coats. You want the texture from the leaves and stems to show through.
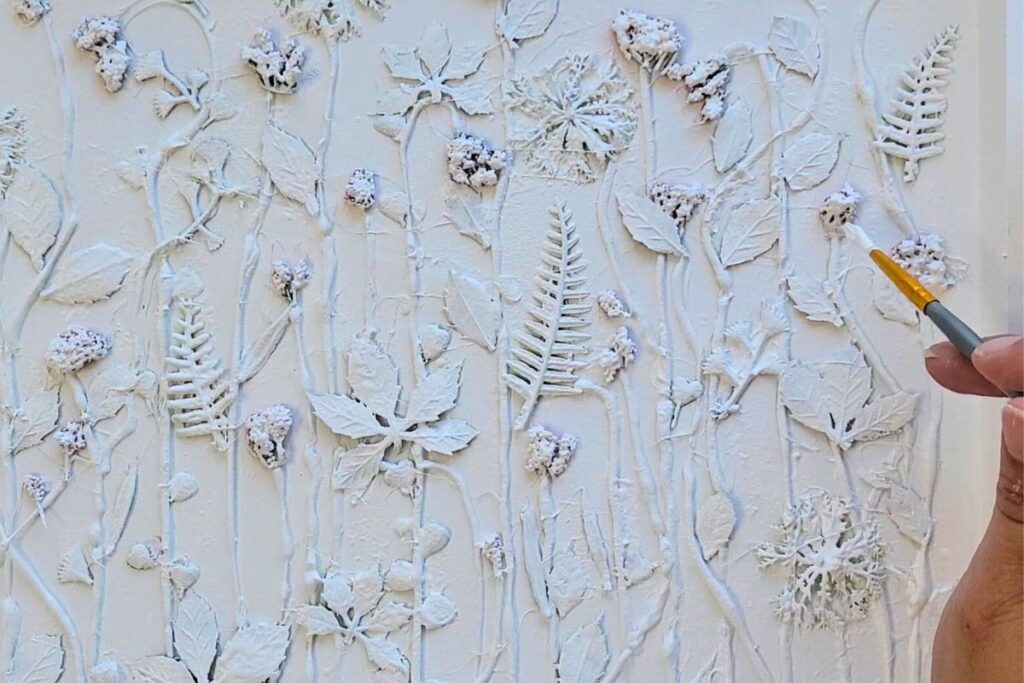
The coloured flower clusters are a bit harder to paint than the leaves and stems. I found it easier to go back in with a smaller paint brush to get that white paint into all of the crevices and bits.
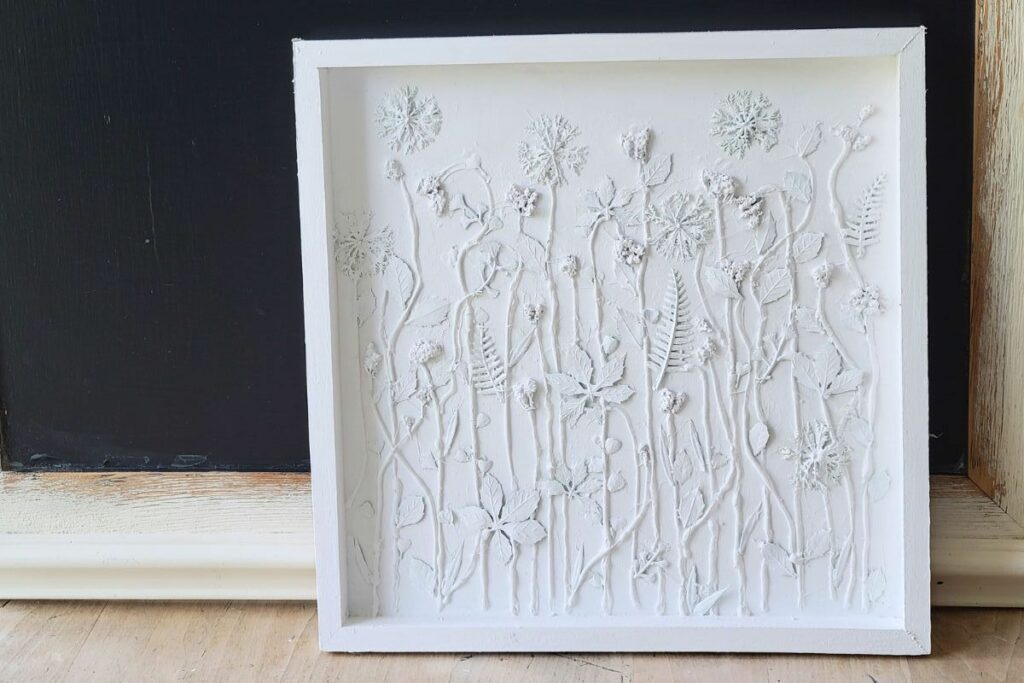
And Voila! You now have the look but for a whole lot less. I mean, I don’t know about you but I just wouldn’t pay hundreds of dollars for this piece. Don’t get me wrong, there are plenty of amazing pieces from Pottery Barn that I would splurge on but this one is so easy to recreate for pennies on the dollar. It really is a no brainer.
Jenny’s Finishing Thoughts On DIY Textured Wall Art
See how easy it is to dupe this Pottery Barn wall art? And all of it can be done for very little money because all of the supplies can be readily found at your dollar store. Not only does this art piece give a room a unique and decorative touch, but it also makes a great conversation starter.
Whether you’re an experienced crafter or just starting to get into DIY projects, this tutorial is a great way to get creative and add your own touch to any room. Turns out – replicating Pottery Barn style doesn’t have to be expensive!
But you tell me, how do you think of this DIY dupe? Is it a flop or does it look like the real McCoy?
Did you find this post helpful or inspirational? Save This Pin to your Wall Art board on Pinterest.
If you liked this post you may also enjoy:
Magical Fairy Lights DIY Picture Frame