
Easy Dollarama Christmas Ornaments
Make changing up your Christmas decor a snap with these 8 easy Dollarama Christmas ornaments. Let’s get crafting!
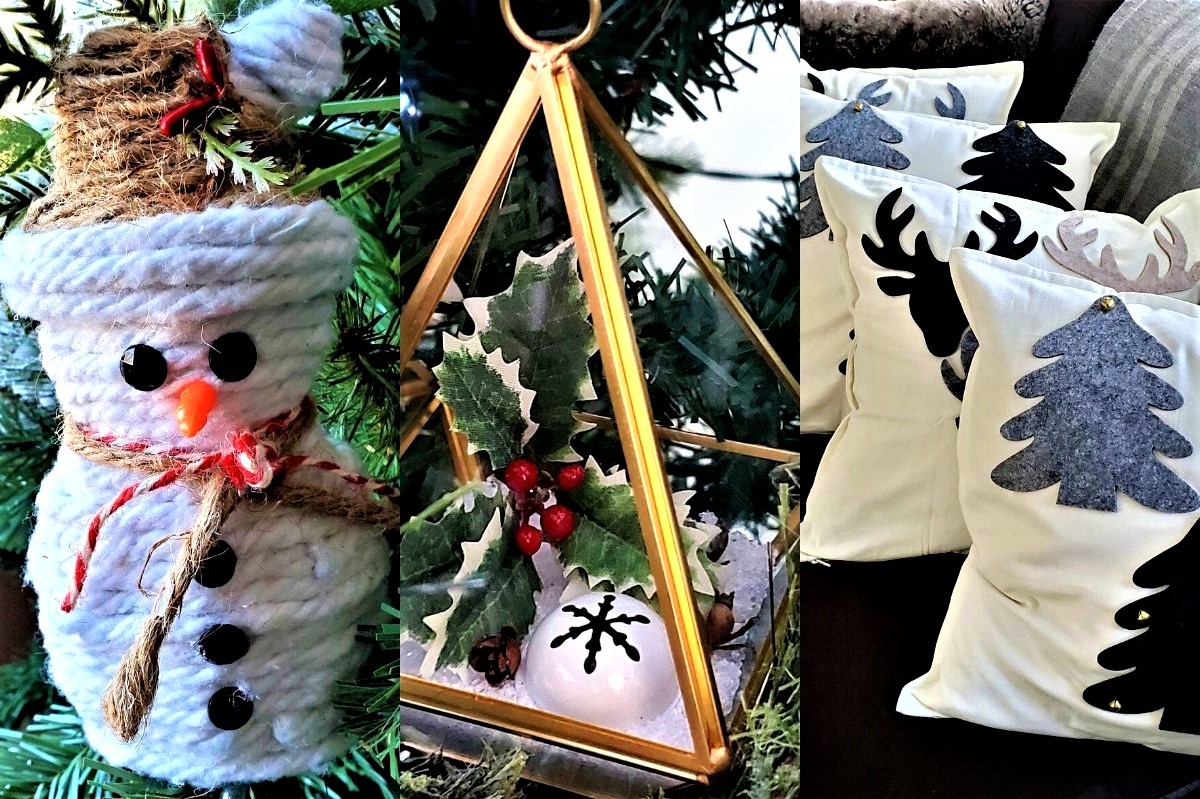
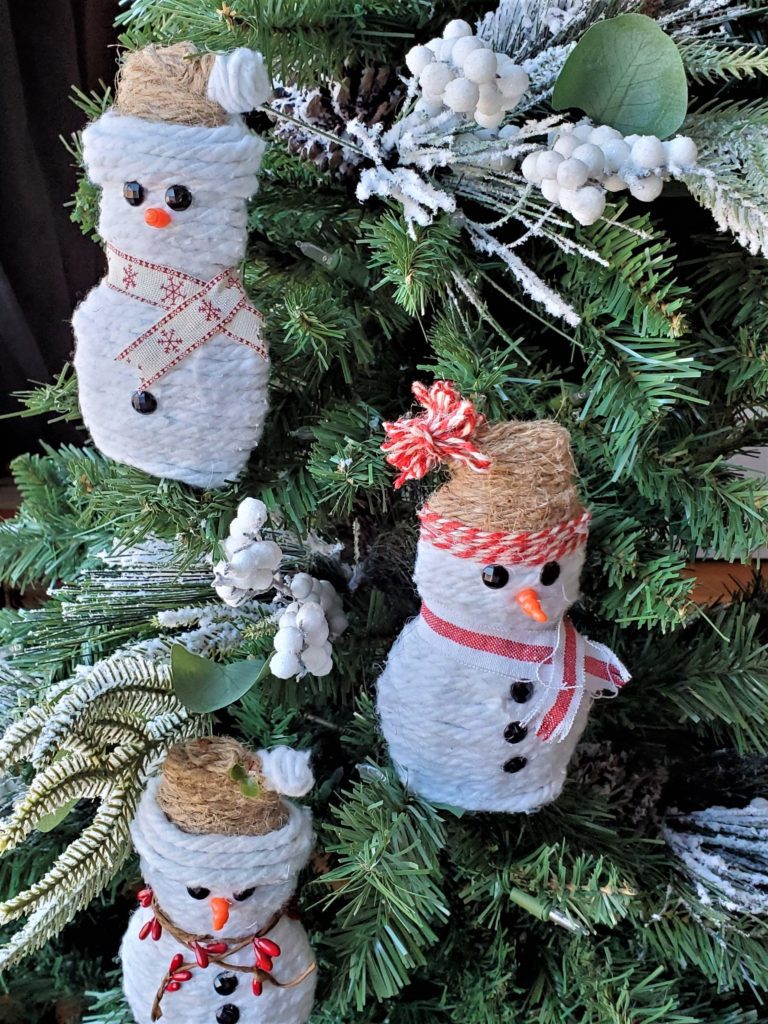
#1 Beyond Adorable Snowmen Ornaments
Oh, my goodness these snowmen are beyond adorable. Even hubby had to admit that he found them to be super cute. Frosty ain’t got nothing on these guys!
Supplies You Will Need
- Tinsel Snowmen
- Mop Head
- Cloth Strips
- Twine
- Hot Glue Gun and Glue Sticks
- Scissors
How To Make Beyond Adorable Snowmen Ornaments
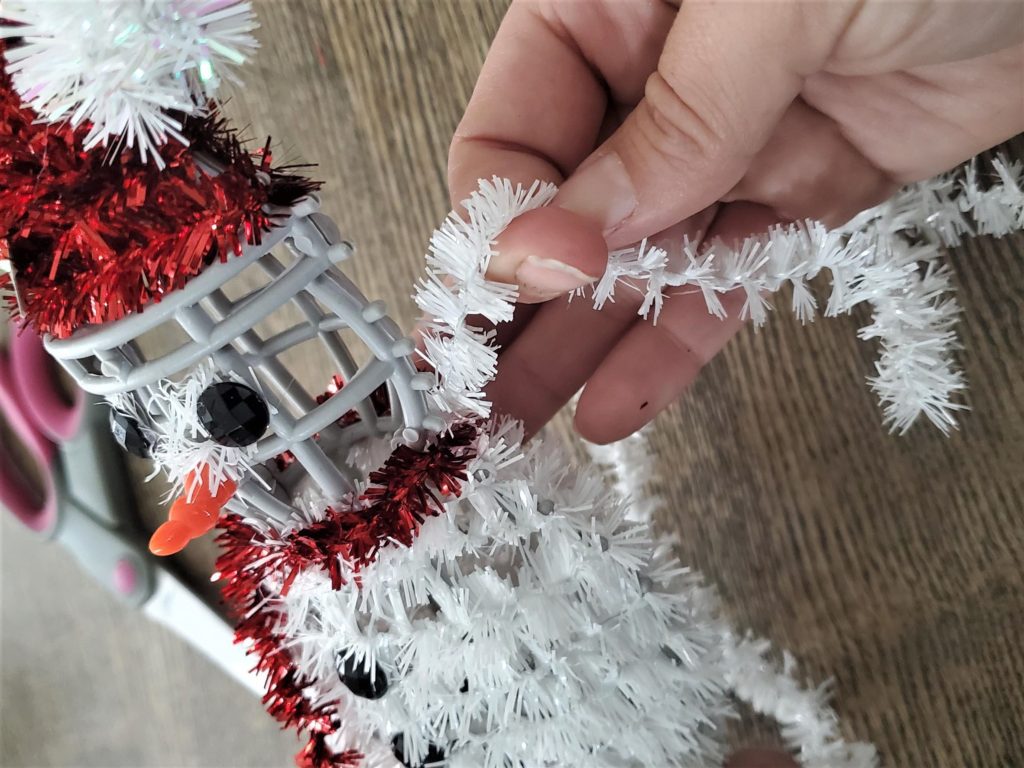
- Start by removing the tinsel from the snowmen. Put the buttons, eyes, and nose aside.
- Take the mop head out of the packaging and pull the mop head strings out. This is really easy. All you need to do is start with just one string and tug. Once a few are loosened the rest come out in clumps.
- These mop head strings are so plushy and soft and I love that they are so bright white.
- Starting at the bottom edge of the snowman, hot glue the mop strings on to the frame. Wind the mop strings around and around, adding small dabs of hot glue as you go around.
NOTE: Make sure that you start applying the mop strings at the back of the snowman. You will need to know which side of the snowman is the front so that you can reapply the carrot nose.
PRO TIP: I earned this tip the hard way. Watch your finger when holding the snowmen and adding the hot glued strings.
If you would like to make an actual mini pompom for the hat start by:
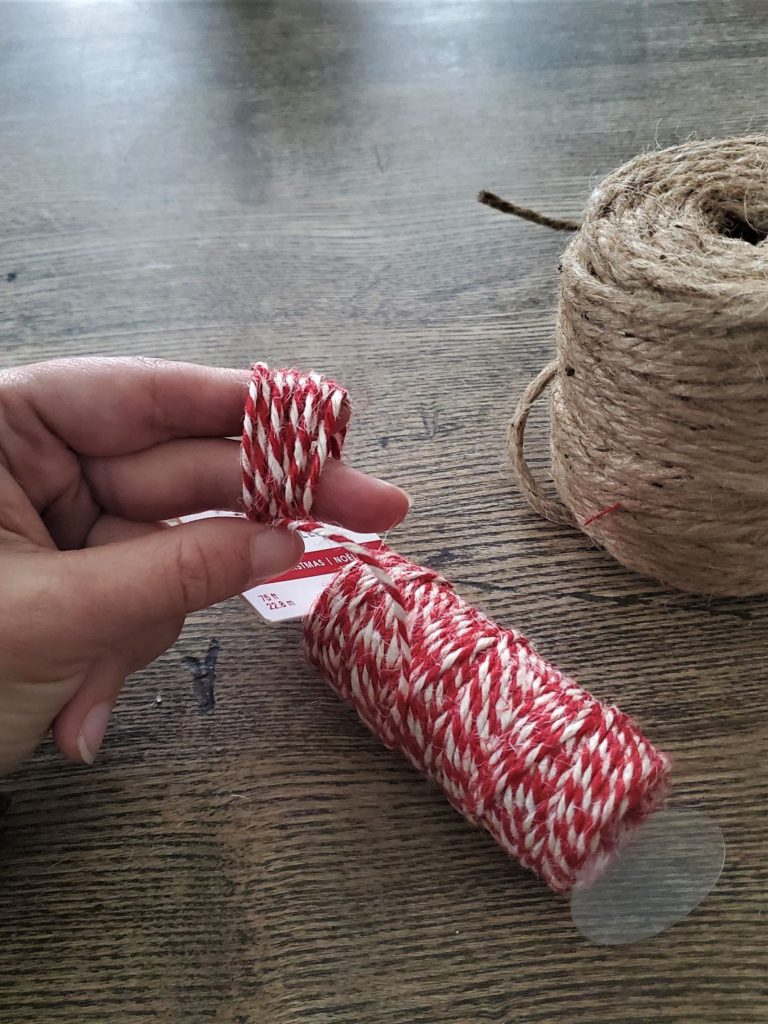
Wrap the twine around 2 of your fingers several times.
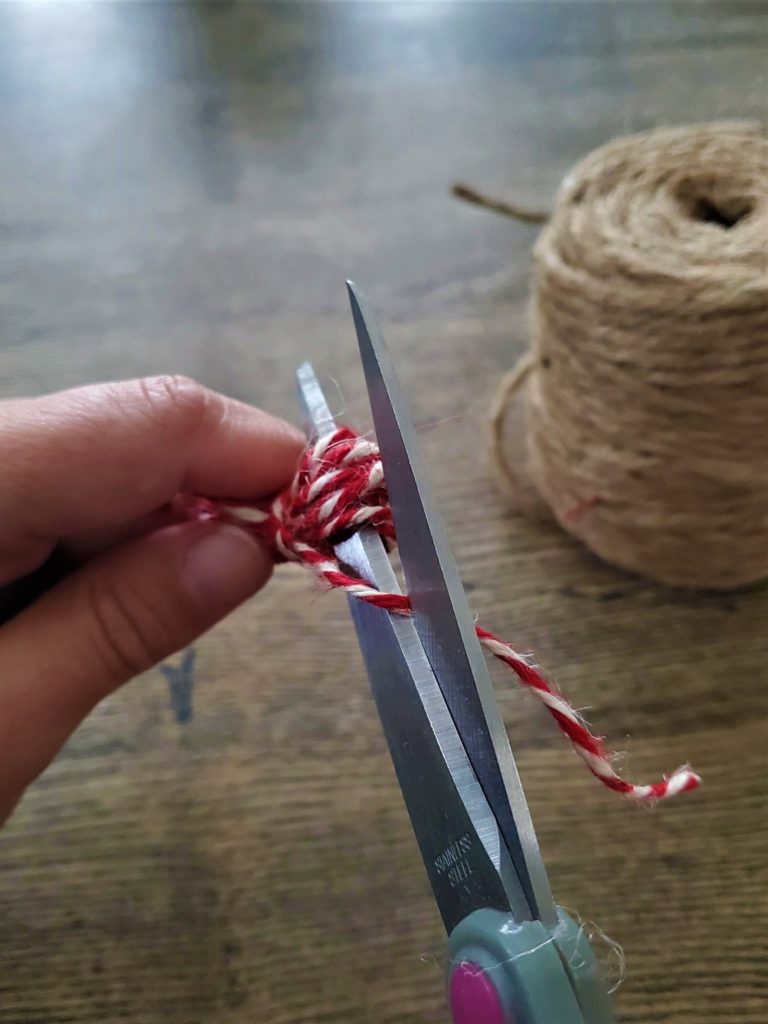
Tie a small piece of twine around the center of the loop you formed.
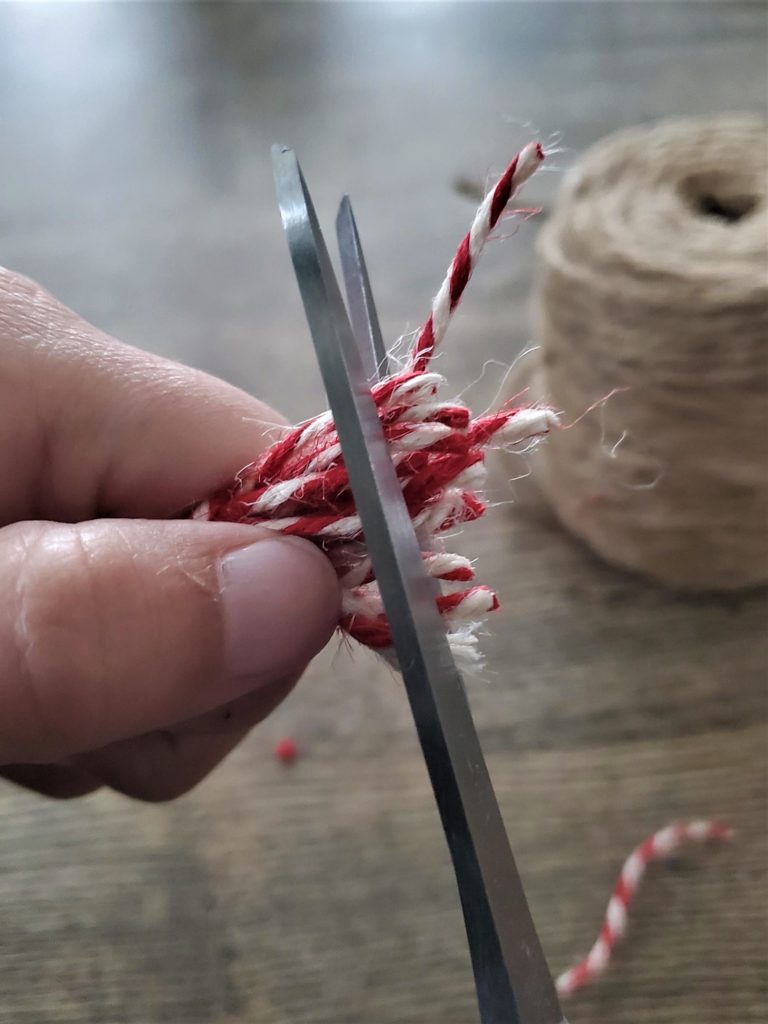
Cut the end of the loops and spread out the strings to form a pompom.
- Now start on the hat portion of the frame. Using twine do the the same as you did for the snowman’s body.
- Use yarn, faux fur, mop head strings, or cloth strips to cover the trim portion of the hat.
- Do the same for the pompom part.
- Using a dollop of hot glue, affix each of the eyes and buttons to the front of the snowman.
- Next, gently probe to find the hole for the carrot nose. If you want you can add a touch of hot glue.
- Lastly, add the scarf. This can be made out of scrap materials, twine, or yarn.
- Slip an ornament hook into the back of the snowman and hang it one your tree.
NOTE: Leave the trim part of the hat and the pompom part until last.
And there you have it. The most ridiculously adorable snowmen.
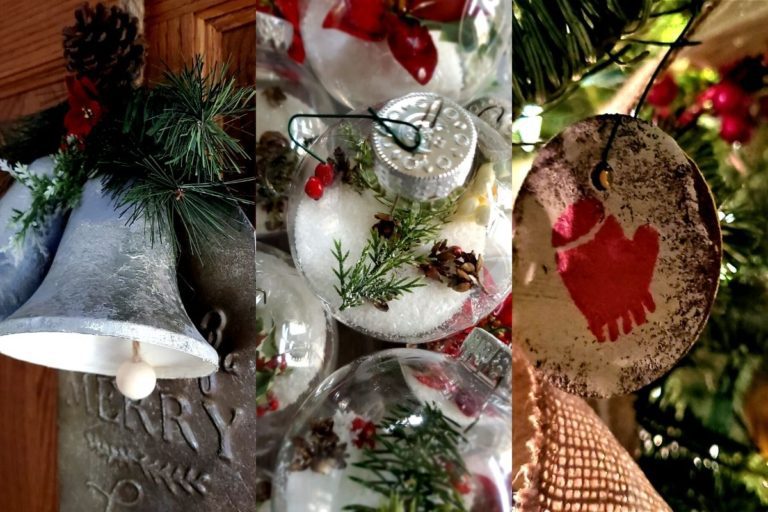
#2 Elegant Christmas Terrarium Ornaments
These ornaments are absolutely breath taking. They are so quick and easy to make. They cost around $4 each but the impact they make is beyond impressive. Best part, all the piece aren’t permanent so you can switch things up and reuse these gorgeous, glass holders in other DIY decor projects.

Supplies You Will Need
- Gold Glass Hanging Terrarium
- Epson Salt
- Faux Greenery
- Faux Poinsettias
- Pinecones
- Faux Berries
- Metal Bells
- Mini Ornament Balls
How To Make Elegant Christmas Terrarium Ornaments
- Remove the Dollarama sticker from the bottom of each of the terrariums.
- Each terrarium has an open back. Carefully pour in a bit of Epson salt to each. The salt is optional but it does at height and sparkle to the finished look.
- Add in any of the embellishment pieces that you wish.
- I decided to use Epson salt in some of the pieces but others were simply filled without the salt. Both looks are fabulous.
And Voila! Positively stunning Dollarama Christmas ornaments that look they you purchased them at Crate and Barrel or some other high end decor store. So simple and fast to make.
I am so excited to show these off this year!
PRO TIP: To hang these ornaments use extra strong ornament hooks or if yo are using an artificial tree, hang the ornaments directly on a branch. Remember, the further down the branch and towards the trunk you go the sturdier it will be.
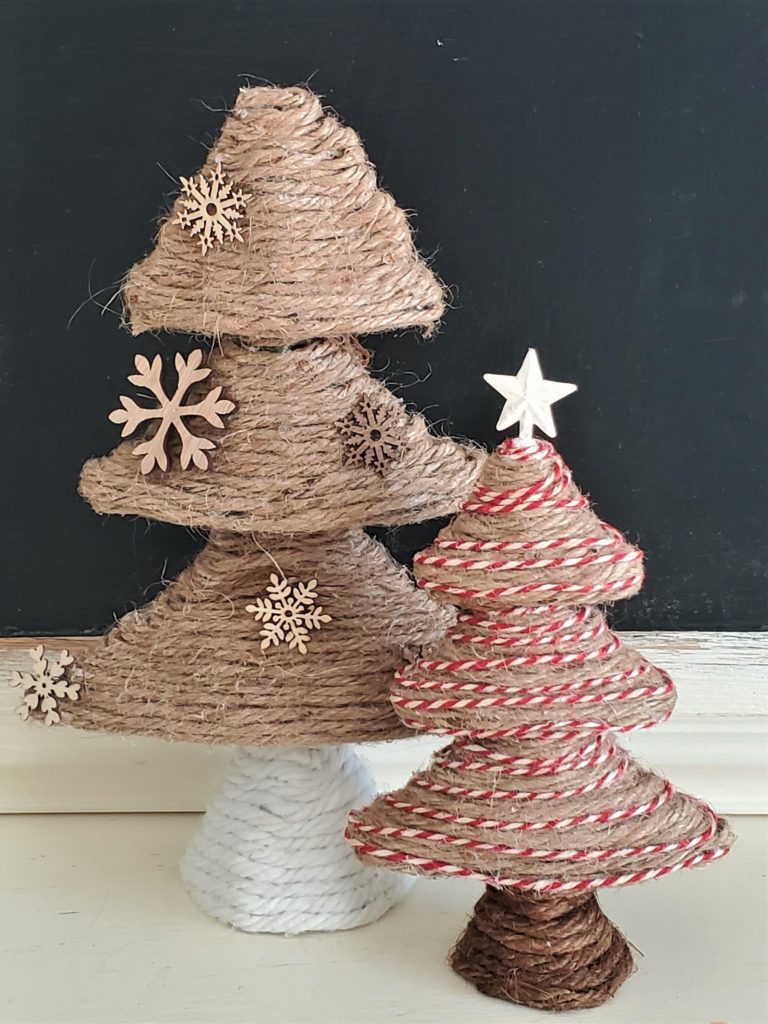
#3 Rustic Twine Christmas Trees
I make a new one of these every year because I just can’t help myself. I am always amazed at how easily a tacky, tinsel Christmas tree can be transformed into such rustic, understated beauties.
Supplies You Will Need
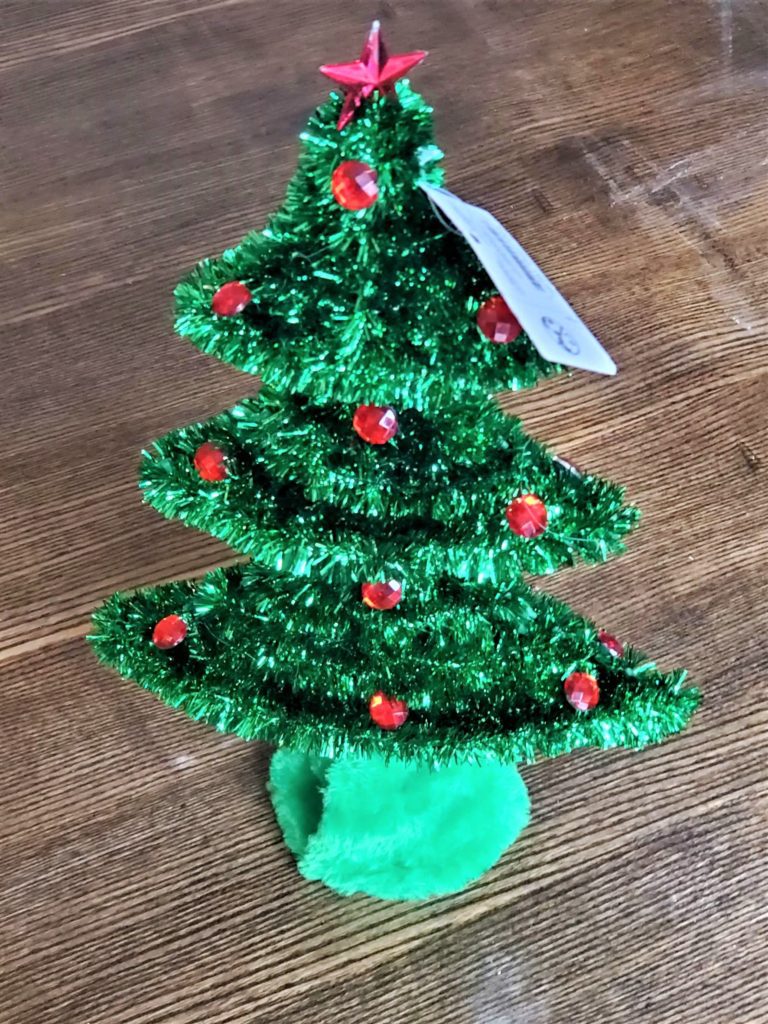
- Tinsel Christmas Tree
- Twine
- Mop Head
- Mini Holiday Wood Cut Outs
- Hot Glue Gun and Glue Sticks
How To Make Rustic Twine Christmas Trees
- Remove the plastic star and snowflakes and place these aside. You can choose to use these later on or not.
- Unravel the tinsel from the tree form. You won’t be needing it.
- Using a piece of paper and pencil carefully trace out each of the 3 bottom sections of the tree. Trace these onto fabric and cut out. In the middle of each fabric piece, cut a slit half way in.
- Hot glue each of the fabric pieces to the bottom of each section of the tree.
- Hot glue the twine around the bottom edge to cover up the fabric edges.
- Work you way around the tree edge adding dabs of hot glue as you go.
- When you reach the part of the frame where there are separated slats just keep adding dabs of hot glue to each slat and then pressing the twine on to them.
- When you reach the top of each section cut the twine and hot glue the ends down and start again on the next section. Do this until you reach the top of the tree.
- When you are done wrapping up the tree, start wrapping around the tree base with the mop head strings. Or using Artminds Antique Wax, wrap the base in twine that has been stained with the wax. Again, start at the bottom and work your way up using dabs of hot glue.
- Add the wooden snowflake cut outs with hot glue.
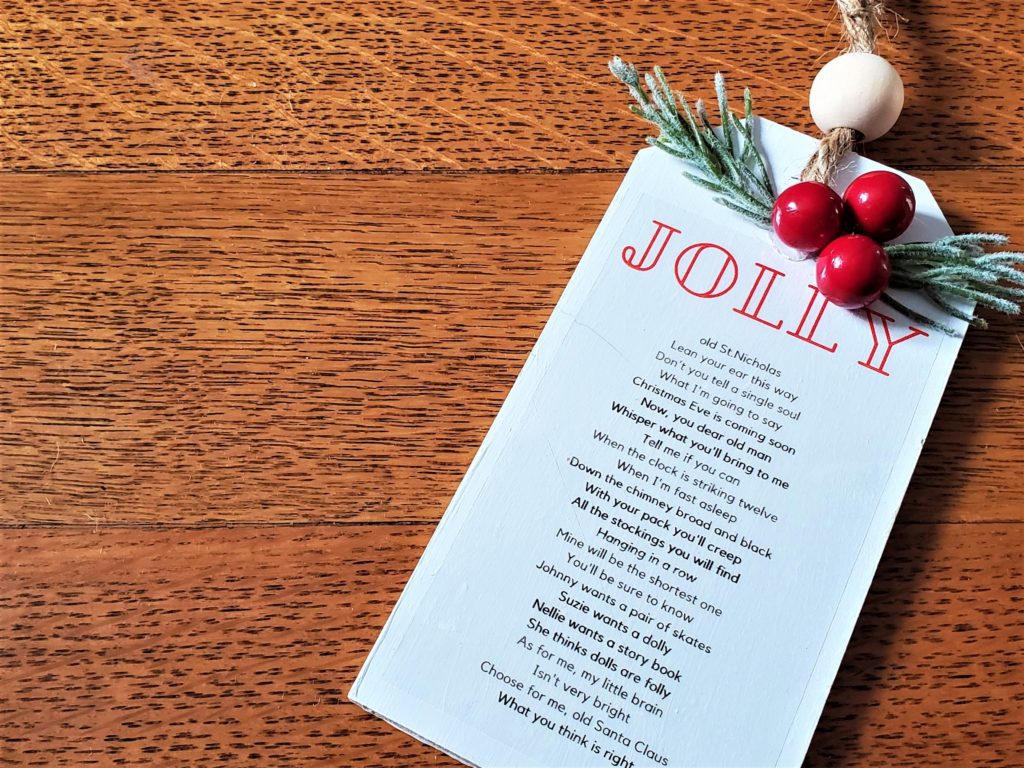
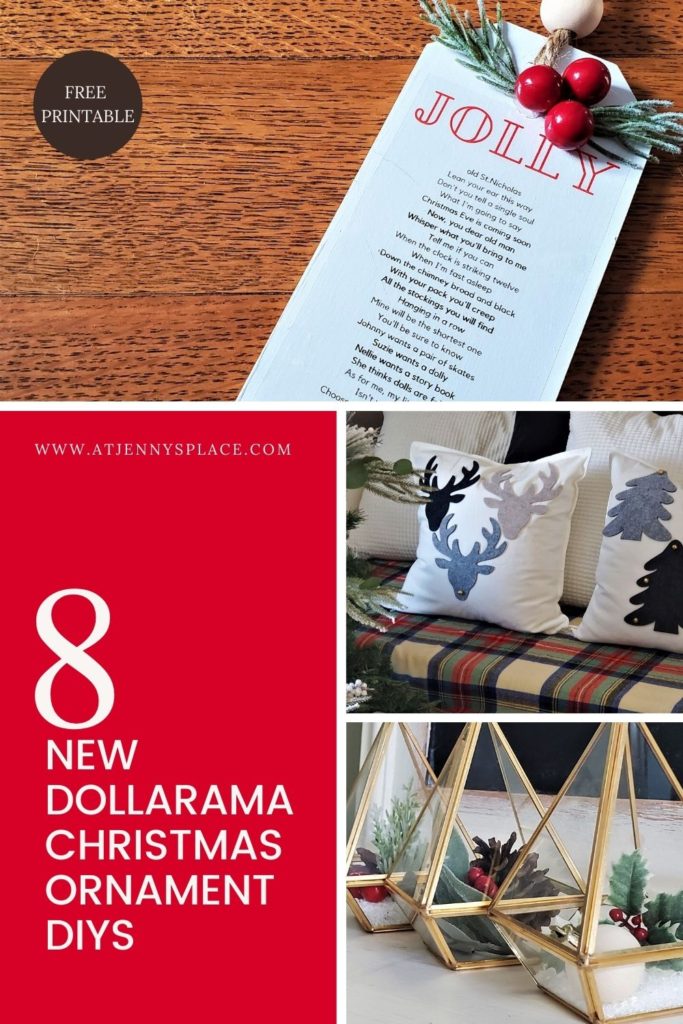
Dollarama Christmas Ornaments DIY #4 Christmas Song Ornament Tags
Upcyling preexisting Dollarama Christmas ornaments is an inexpensive and effective way to decorate your Christmas tree. These simple but stunning Christmas song ornaments require a computer. printer, and some adhesive printing paper to create.
No Cricut Needed
Supplies You Will Need
- Wood Gift Tags
- ArtMinds Chalk Paint in White
- Paint Brush
- Avery Clear Full Sheet Shipping Labels Glossy Clear
- Faux Winter Greenery, Berries, and Embellishments
- Hot Glue Gun and Glue Sticks
- Optional: Wood Beads
- Twine or Ribbon
How To Make Christmas Song Ornament Tags
- Paint each of the wood gift tags with the white chalk paint. This will take several coats of paint to cover the lettering. Let dry between each coat.
- Now, you can create and print out your own Christmas song lyrics
OR …
- Once you have download the AJP Song Lyric PDF, print it out onto the Avery Clear Shipping Labels.
- Cut the songs out and one at a time peal the backing away. Stick the adhesive paper onto each of the wooden tags. Make sure that the words are centered.
- Gently remove the paper backing and carefully line up and place the adhesive sticker down onto the front of the wood tag.
- Thread some ribbon or twine through the hole. Slide a wooden bead through both ends of twine, tie in a simple loop knot, and then trim off any of the access. Hang on the Christmas tree.
- To add even more holiday cheer to these charming Dollarama Christmas ornaments decorate ornaments with twine, faux greenery, mini pine cones, wood beads, berries or other embellishments to the ornament tags. Attach each of these with a little hot glue.
NOTE: If you want the red in some of the lettering to show up make sure you are printing in colour.

Free Christmas Printable
Looking for a fun and easy way to add some Christmas cheer to your home? Look no further than our free Christmas printable! This downloadable PDF is packed with Christmas song lyrics, perfect for creating DIY ornaments and decor. Just print, cut out, and enjoy!
This printable is a great way to get into the Christmas spirit, and it’s totally free! So what are you waiting for? Download our free Christmas printable today and start getting creative!
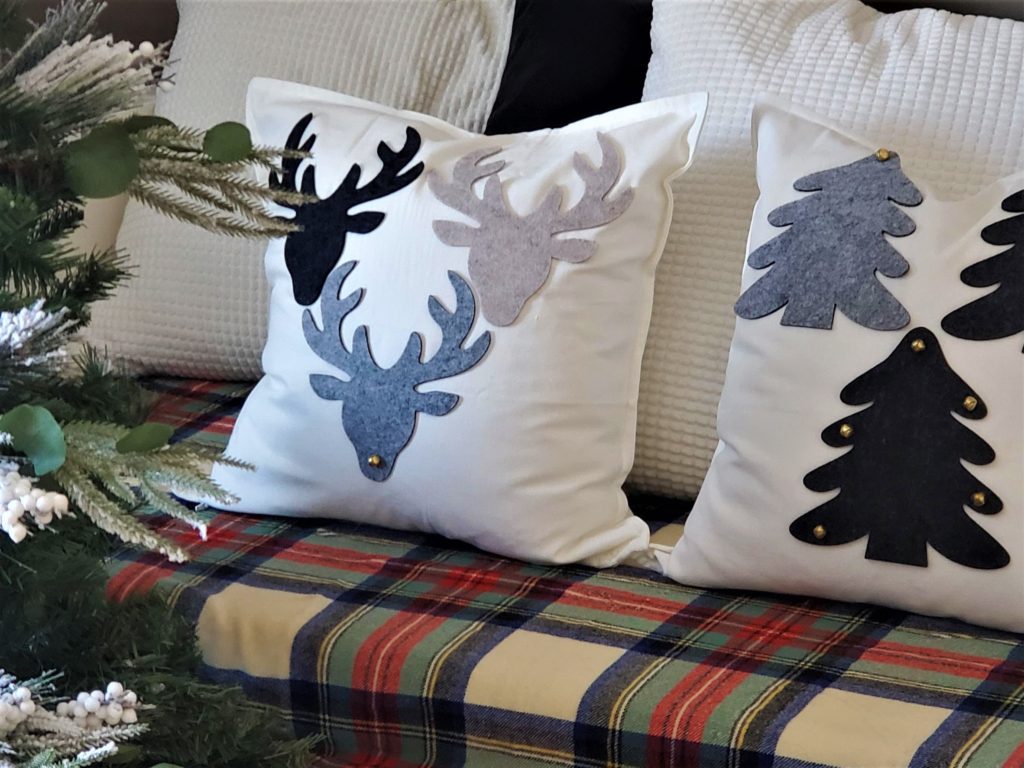
#5 No Sew Holiday Felt Throw Pillows
You aren’t going to believe how easy or how cheap it was to create these super cute and festive holiday Throw pillows. I mean, ya simply won’t believe it.
Pssst… $5.50 each!
Supplies You Will Need
- Ikea Throw Pillow Covers
- Holiday Felt Shapes from Dollarama
- Optional: pompoms, bells, yarn, chalk paint, tassels, buttons
- Fabric Glue
- Hot Glue Gun and Glue Sticks
- Throw Pillow or Pillow Filler
How To Make No Sew Holiday Felt Throw Pillows
- Using fabric glue, adhere the felt cut outs to the front of an Ikea pillow case. (Or any other inexpensive throw pillow cover you can find.)
- Leave the pillow covers as is or play with embellishing them with pompoms, bells, yarn, chalk paint, Cricut vinyl, tassels, or buttons.
- Stuff a pillow into each and you have yourself beautiful and festive pillow cases that cost next to nothing to make but look like a million dollars. Seriously, you would pay a lot more for these in any home decor store. Best part? Because they’re only pillow cases they take practically no room to store.
PRO TIP: Sure, you can holiday these up but if you are wanting these pillow cases to get you through the holidays and into the winter months keep the embellishments to a minimum. I plan on keeping these guys around until spring hits.
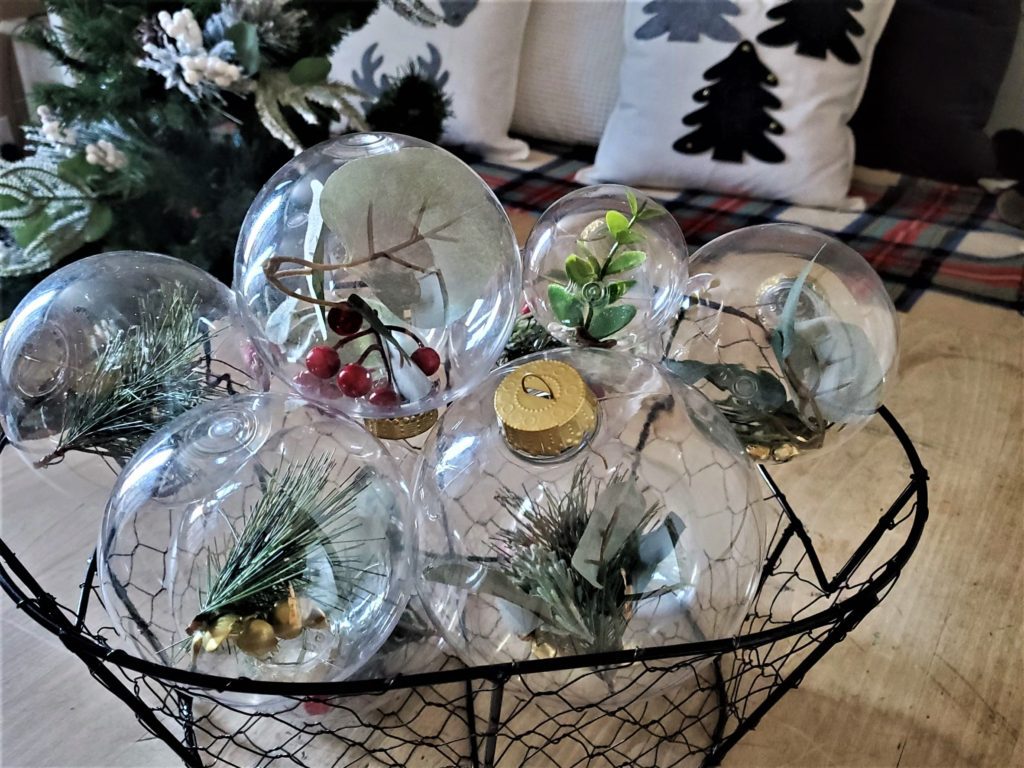
#6 Simple Scandi Inspired Greenery Ornaments
Every year I decorate our home for Christmas in a different style. This year I embracing a Scandi Meets Recycled Beauty in reds and golds. These ornaments are the perfect addition to this years Christmas tree. And because these are true Dollarama Christmas ornaments they only cost about $1.50 each to make!
Supplies You Will Need
- Clear Christmas Balls
- Eucalyptus leaves
- Faux Pine Branches
- Faux Berries and Mini Bells
- Optional: Gold Spray Paint
How To Make Simple Scandi Inspired Greenery Ornaments
- Optional: his step is completely optional but I do think that it makes a huge difference in the end result. It just gives them that high end touch.
- Spray paint the ornament toppers with gold (or any other metallic or coloured) spray paint. Let dry.
- Clip the eucalyptus greenery down into individual sections. Do the same with the pine branches.
- Stuff the greenery into the top of the plastic ornament. Add mini bells, mini pine cones, vase filler, or faux berries. Replace the topper.
Voila! Seriously, that’s it. These lovely ornaments are perfect in their simplicity. When the Christmas lights shine through they provide a brilliant pop of colour and they add that touch of Scandinavian influence I am craving.
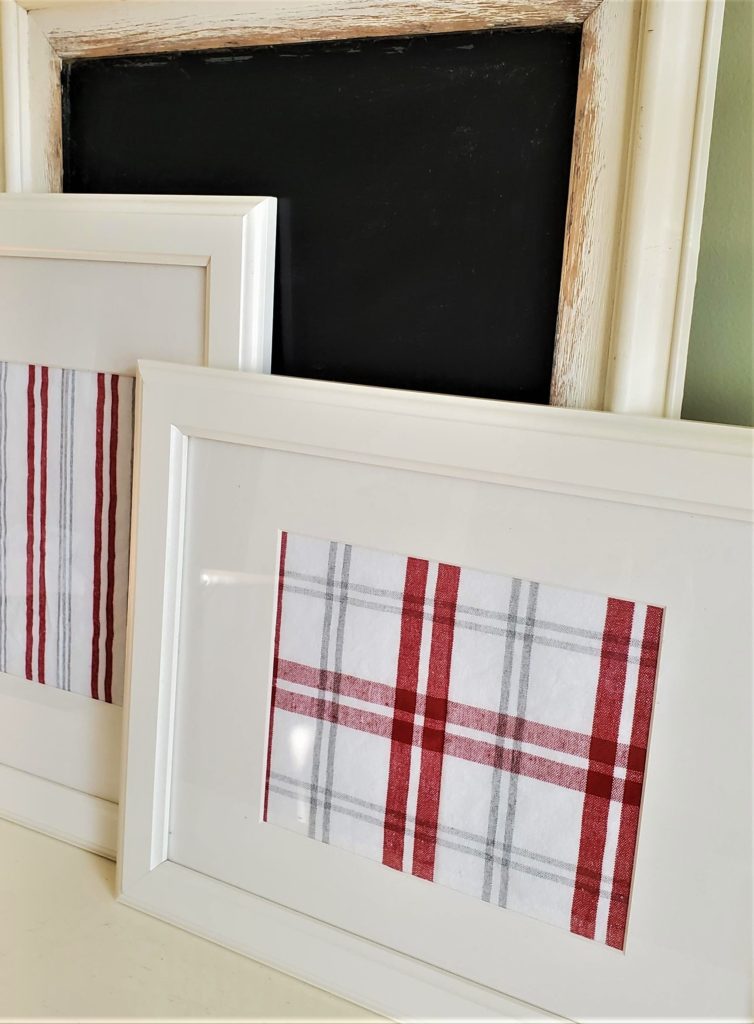
#7 Tea Towel Wall Art
These tea towel holiday pictures are beyond simple and cheap to make but the end look is nothing short of awesome.
Supplies You Will Need
- Picture Frames With Matt (I got mine form Ikea years ago)
- Tea Towels in Christmas Colours
- Scissors
PRO TIP: Sure you can go with a “hit you over the head” holiday print tea towel but I recommend using tea towels that come in Christmas colours but aren’t necessarily holiday themed. A subtler nod to the holidays. Classy.
How To Make Tea Towel Wall Art
- Take the backings off of the picture frames and remove the picture. Leave the mat in.
- Cut the tea towel down so that it fits about an inch past the edges of the picture make sure that the yea towel is straight before replacing the backing and hanging them on the wall.
- Simple, inexpensive but makes quite the statement.
OPTIONAL: Iron the tea towels first. I didn’t do this but with high site, I wish I had.
PRO TIP: I reuse these frames to update our kitchen decor all the time. I’m still fond of the original print so I just stick it in between the new image and the backing. This way, I always know where my original print is and it stays unharmed.
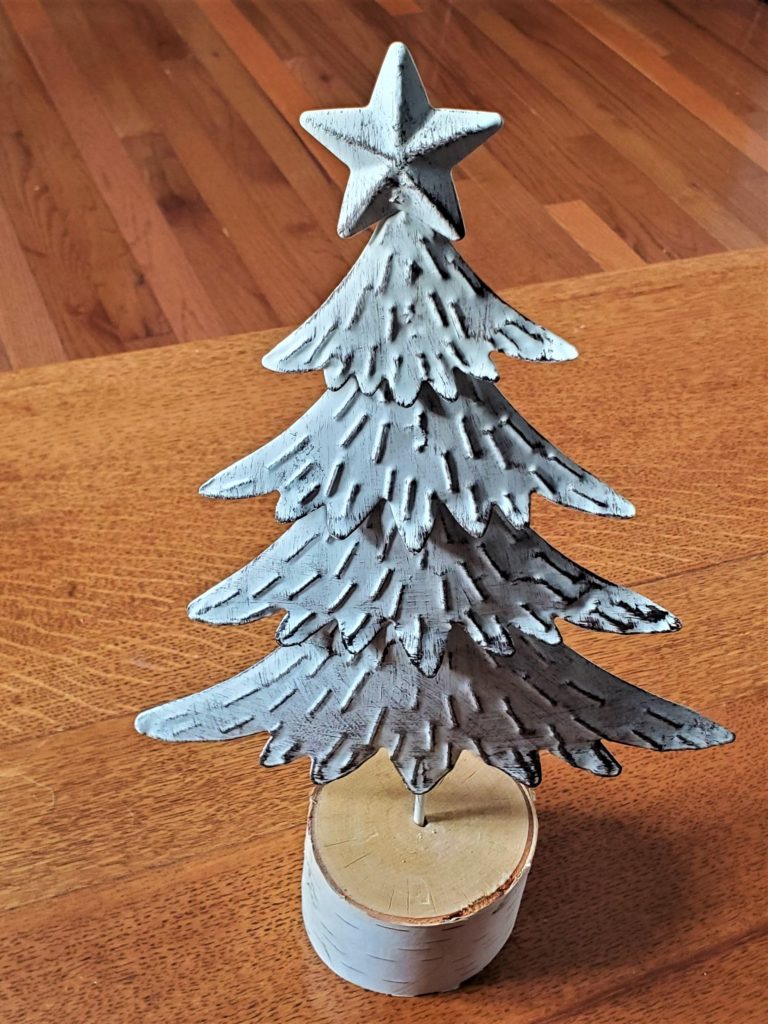
#8 Rustic Winter Pine Tree
This Dollarama Christmas decor piece gets it’s appeal from it’s pure simplicity.
Supplies You Will Need
- Metal Christmas Tree Yard Spike
- Hack Saw
- Wood Stump 4 -5 “tall and –” in diameter
- Drill Bit
- Hot Glue Gun and Glue Sticks
How To Make Rustic Winter Pine Tree
- Using a hack saw and a vice, cut the decorative metal yard spike down so that there is only a couple of inches left sticking out the bottom of the tree. I had hubby do this step for me.
- Drill a small hole into the center of the cut log piece and then squirt a bit of hot glue into the hole.
- Slide the metal stand into the hot glued hole. Make sure that the Christmas tree isn’t leaning. If needed, add a little bit more hot glue around the stem. Let dry.
That’s it. So easy and pretty.
Bonus! This piece is so understated that it will get you through the holidays and then well into the winter months.
Jenny’s Finishing Thoughts On Dollarama Christmas Ornaments
Creating new and beautiful memories for our families at Christmas time is one of life’s greatest joys. And if you are anything like me, this includes creating new and beautiful decor to add to past creations and memories.
Making new holiday decor and Dollarama Christmas ornaments is an inexpensive way to create a unique and a festive custom look to your home.
Did you find this post helpful or inspirational? Save This Pin to your Dollarama Christmas Decor board on Pinterest
If you liked this post you may also enjoy:
7 Sensational Xmas Decorations Using Recycled Materials
25 Unexpected Dollar Tree Craft Supplies For A DIY Christmas

I’m going to make #3 the rustic tree, I’ve always wanted one but there so expensive even at Winners.
Next up Christmas masks?! I’ll have to post my Alex in his 🙂
I can’t blame you. I love these trees too. And they cost about $3 each, so really affordable. Can’t wait to see your Christmas face masks! Please share.