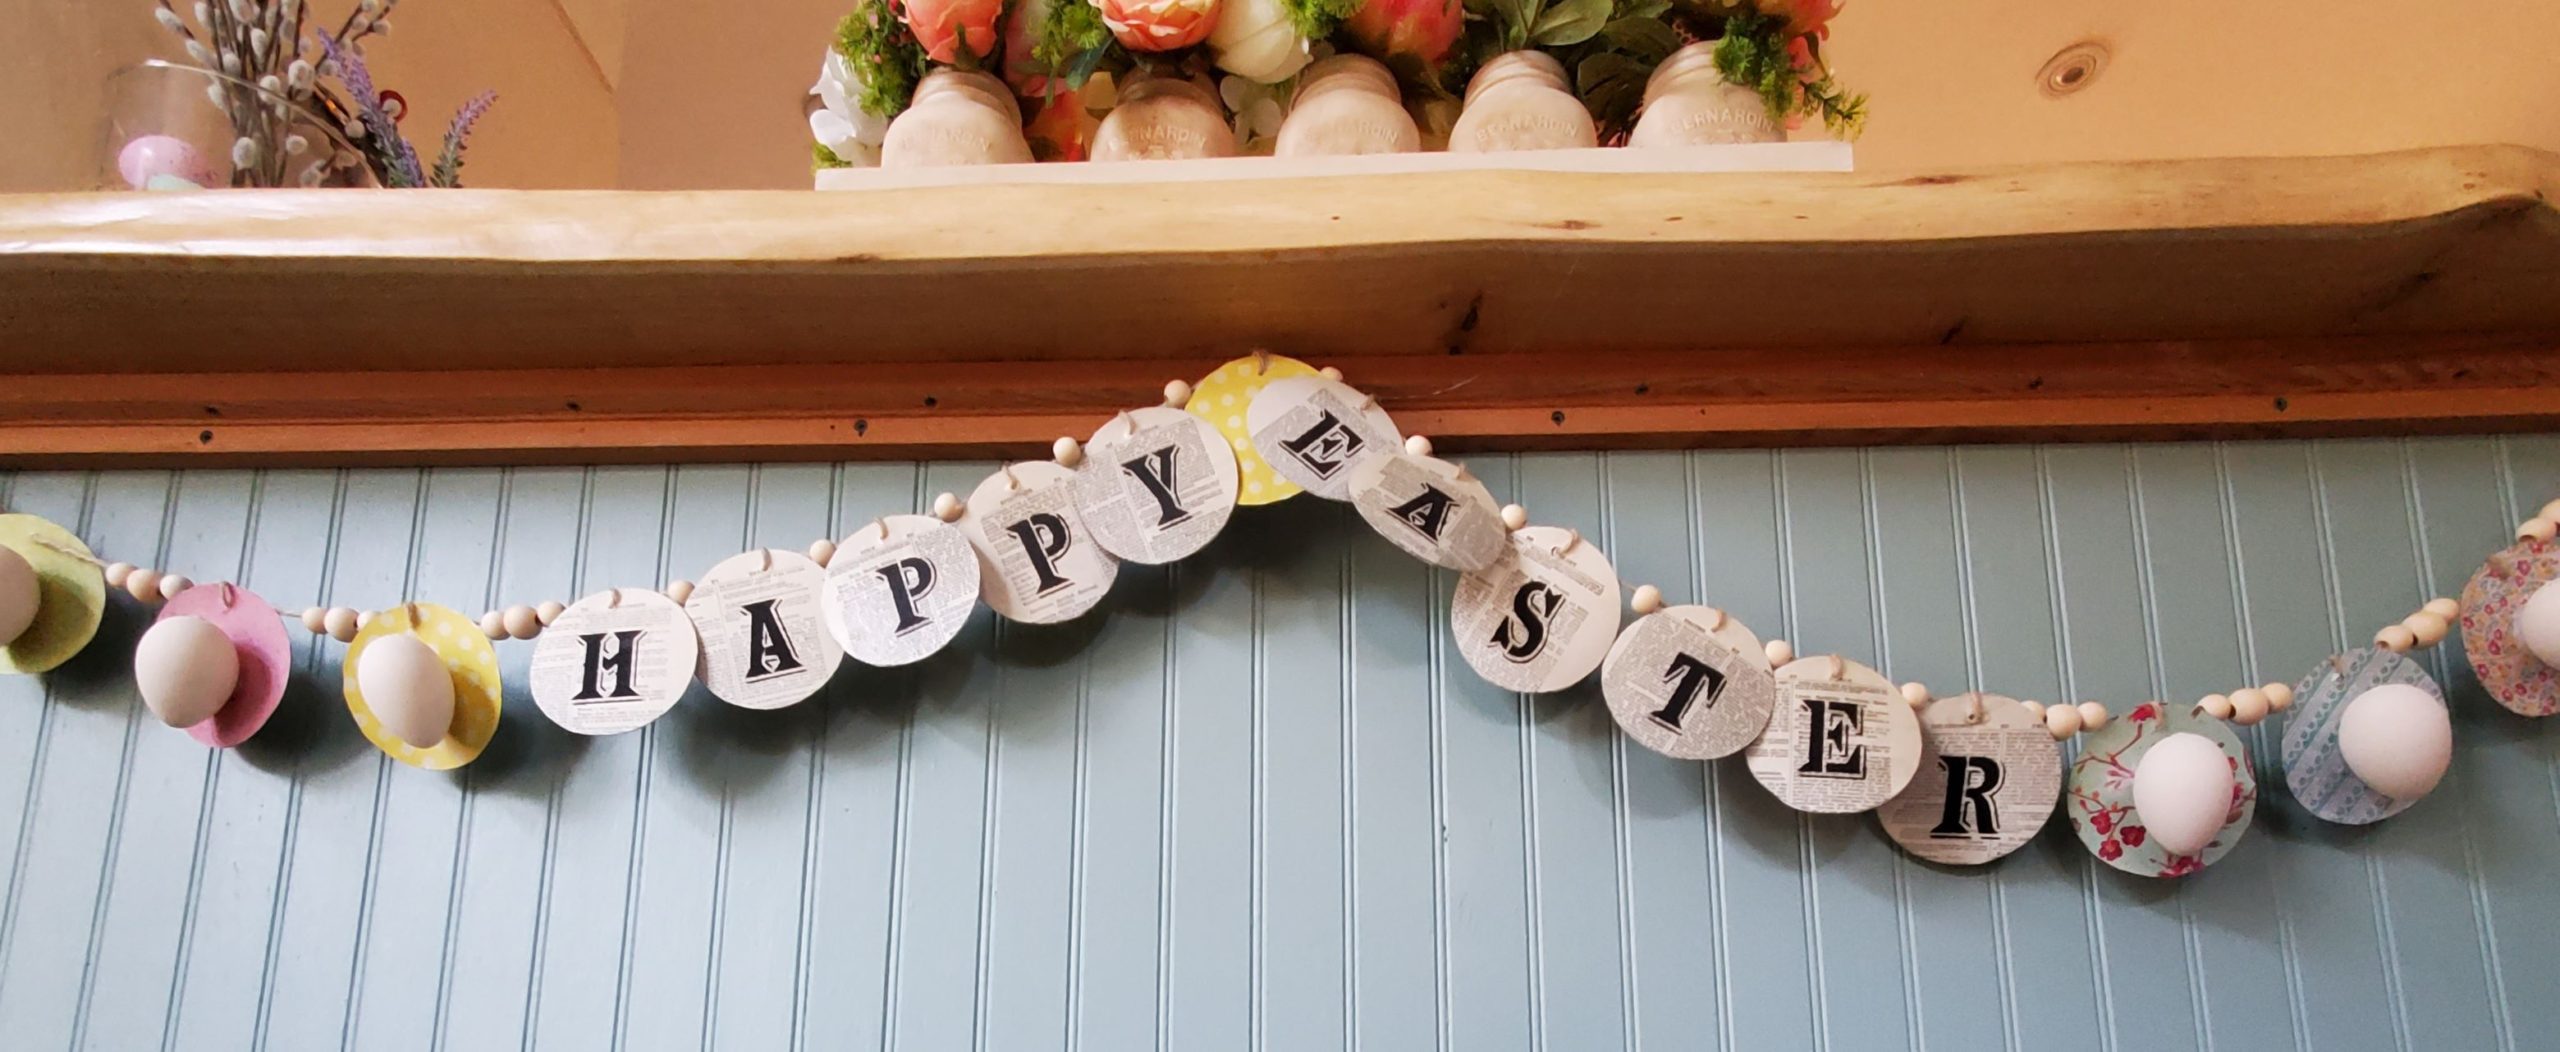
Easy Easter Banner
What’s not to love about this charming and easy Easter banner? I love it’s rustic simplicity and how easy it was to make.
Easy Easter Banner
I don’t know about you but this spring I feel particularly motivated to decorate my home. The challenges and isolation that has been experienced by the whole world this past year seems to be making me more determined to search for small blessings, find things to celebrate, and to make my family home as comfortable and happy as possible. I truly can’t think of a better way to achieve this then to fill our home with tiny bunnies, beautiful florals, chocolates and this beautiful and easy to make Easter banner.
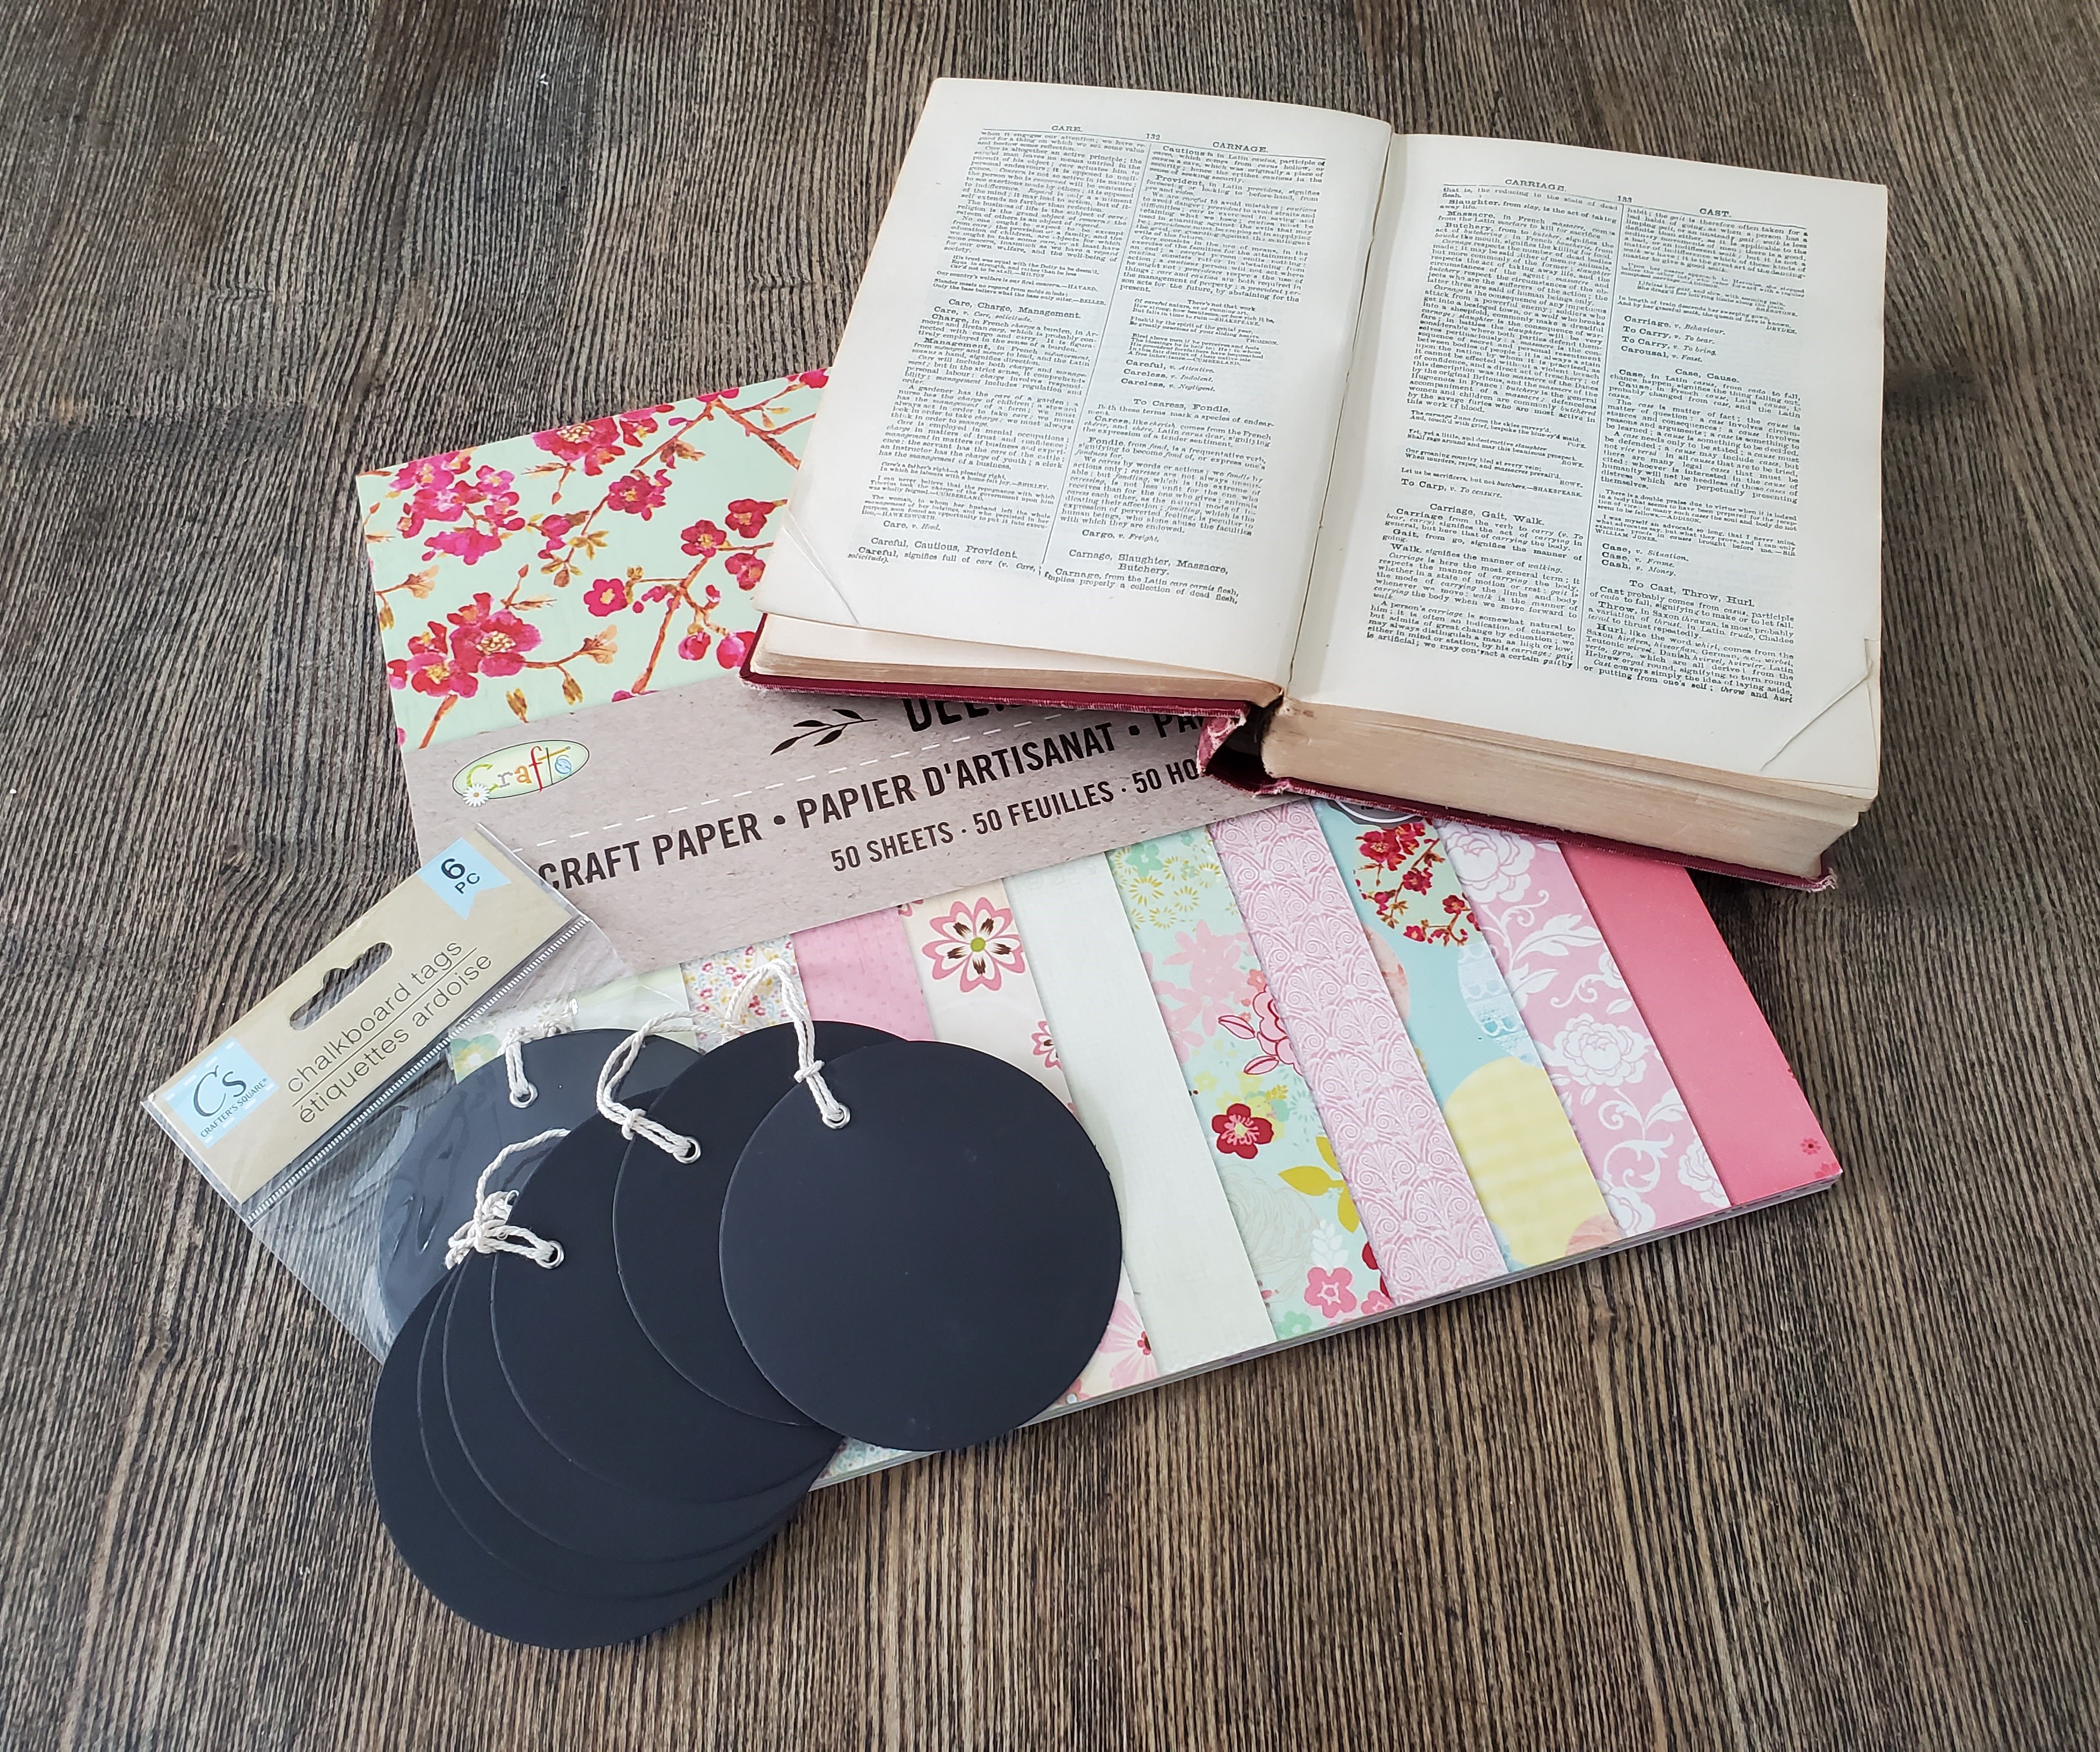
Supplies You Will Need
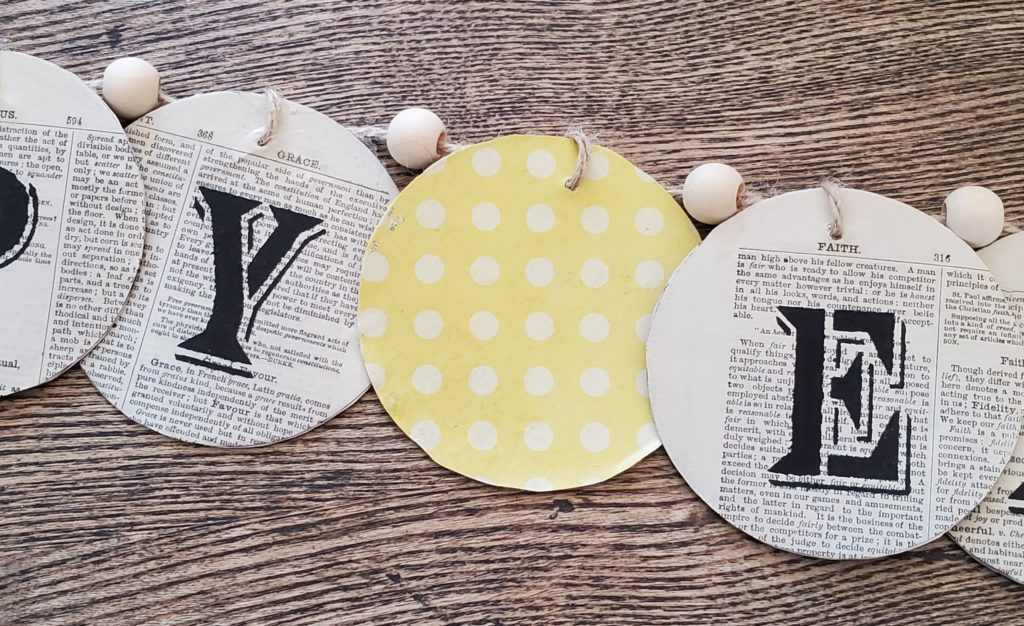
The colourful circles behind the eggs at each end adds a touch of whimsy that I thinks perfectly compliments the whole look. I don’t have a fire place mantel so I decided to hang this in the dining room and it is so festive. The family just loves it. The best part about this DIY is that almost all of the supplies can be found at the dollar store.
- Round Chalk Board Tags
- Decorated Craft Paper
- Wooden beads in 16 mm and 20mm
- 6 Plastic or foam Easter eggs
- Chalk board paint and letter stencil or sharpie marker or sticker letters (*See explanation below)
- Mod Podge
- Foam brush or paint brush for Mod Podge
- Scissors
- Old book (I choose a book that had Easter related words in it and yellowing pages.)
- Twine
- Hot glue gun and glue sticks
How to Make Easter Banner
Start by cutting out 7 squares of the decorated craft paper and 11 pages of the book so that the papers are slightly larger than the chalk board tags. Using the foam brush paint the Mod Podge (I used matte but that is up to you) on to the back of the tags and firmly press down on the paper. Press out the paper so that it lays smoothly. You can use a bone folder Let dry.
Once dry, cut out the circle and discard the unneeded paper remnants. Do this to all 18 circles. You should end up with 7 coloured tags and 11 pages of book page covered tags.
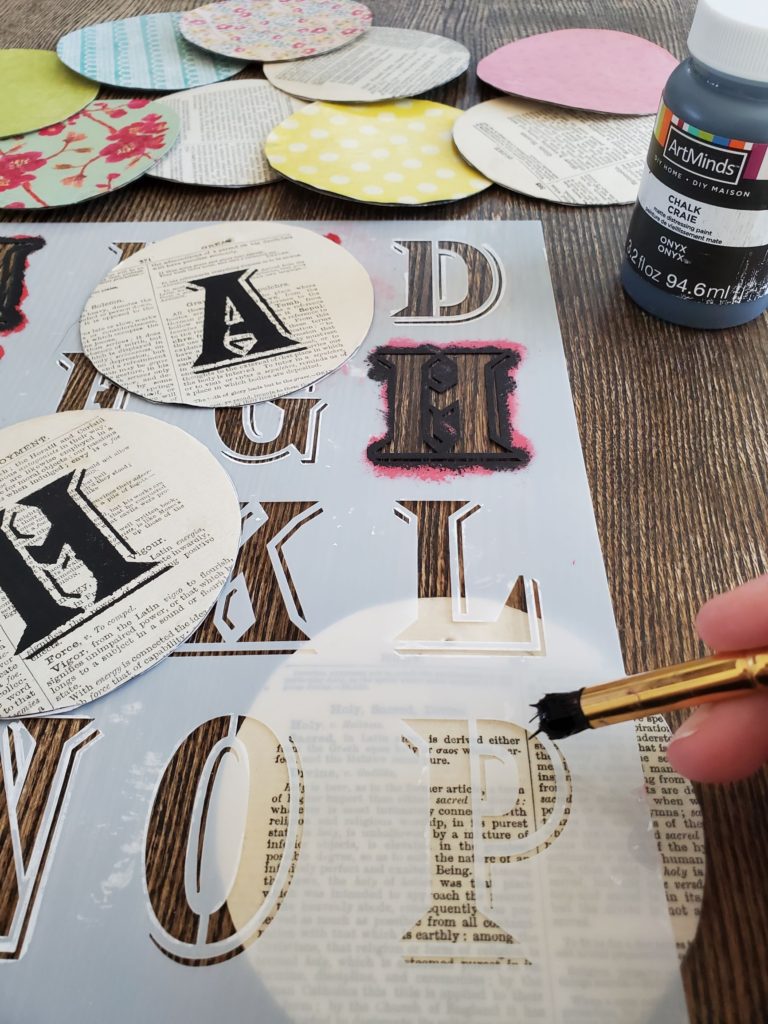
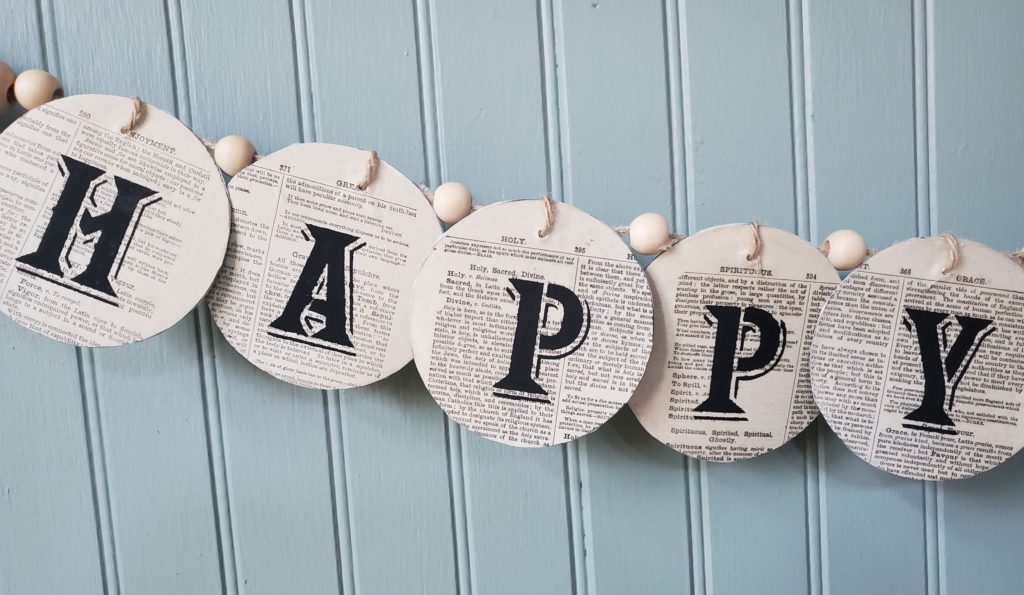
Each book page covered circle gets a letter. Spell out the message Happy Easter.
Now, you get to make a choice. You can either use letter stickers, sharpie marker, or stencil and chalk paint. I chose to use stenciling and chalk paint. First I painted on a thin coat of Mod Podge over the papered tags. I find this prevents bleeding when stenciling. I wanted to use my Folkart painting stencil, peddler alphabet with black chalk board paint.
PRO TIP: If using stickers just stick them on. However, if you want to prevent pealing cover with a coat of Mod Podge. Using a sharpie? Then simply write out Happy Easter on the tags.
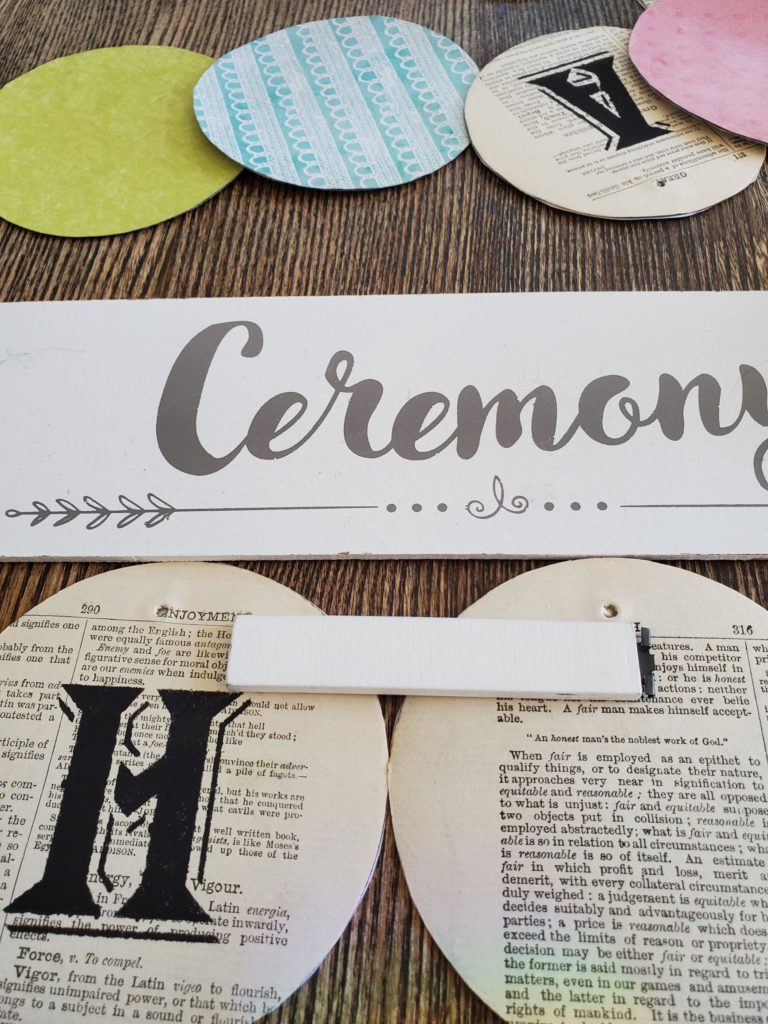
To keep my letters aligned when hanging, I used a piece of spare wood as a guide to keep all the letters straight. Next, using a mechanical pencil with the lead retracted, I poked a hole into the top of each tag.
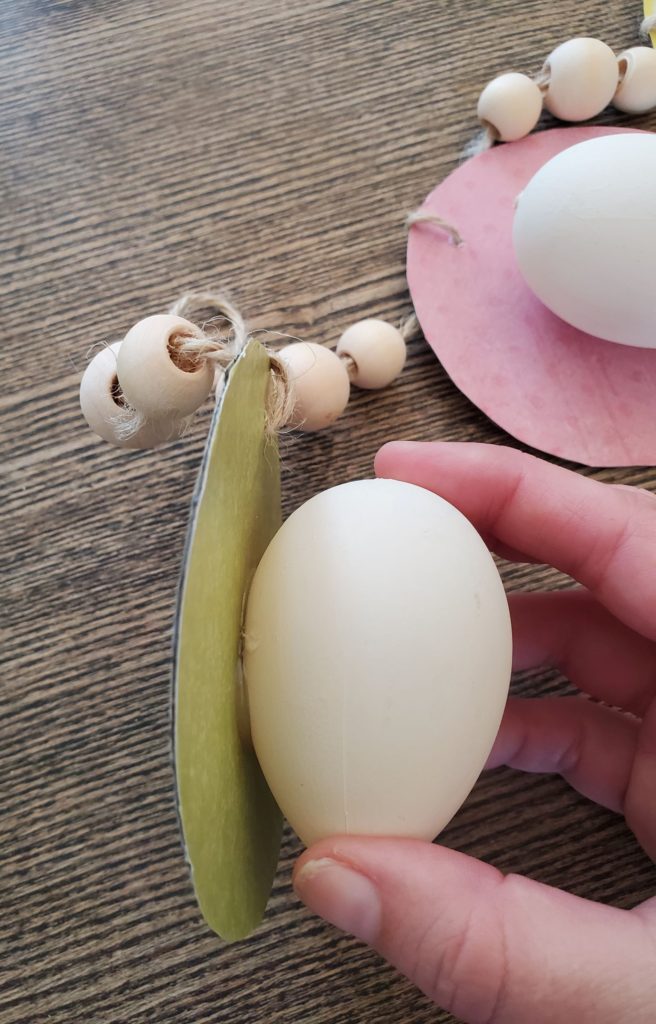
Using your hot glue gun, glue an egg onto each of the coloured, craft paper tags. You should end up with 6 tags with eggs attached and one coloured, craft paper tag left. This leftover tag will be used to separate the words Happy and Easter.
Adding the beads:
- Make sure that you have at least 5.5 feet of twine. This finished banner will be 5 feet long.
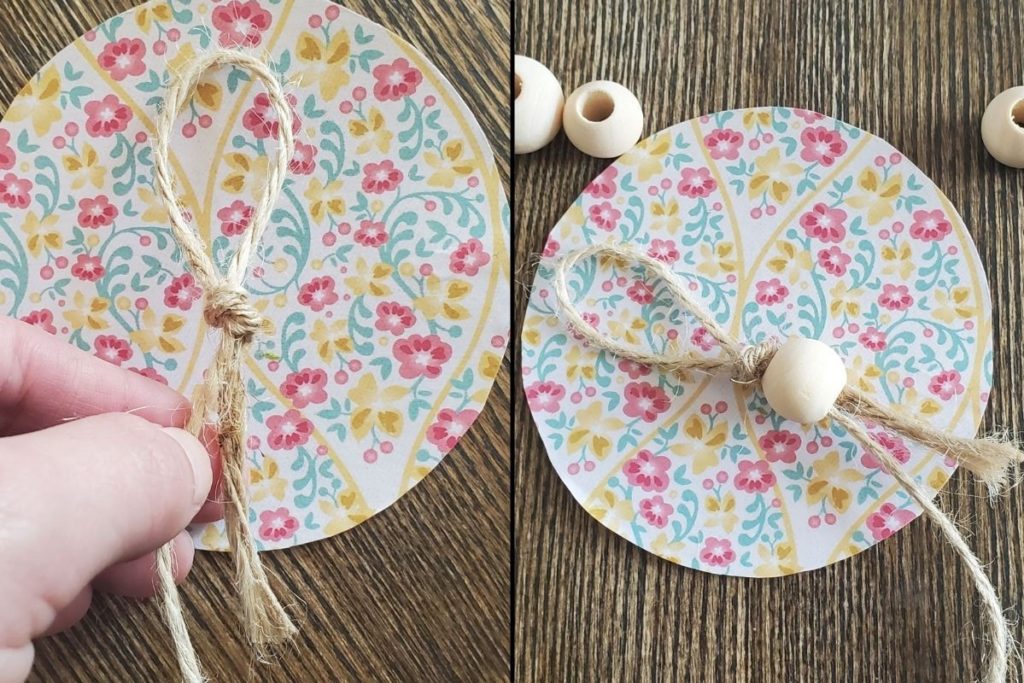
- Tie one end into a loop. (Shown above on the left)
- String a 16mm bead, followed by a 20mm bead, and then another 16mm bead.
- Stick the loose end of the twine back into the beads so that you can’t see it. (As shown above on the right.)

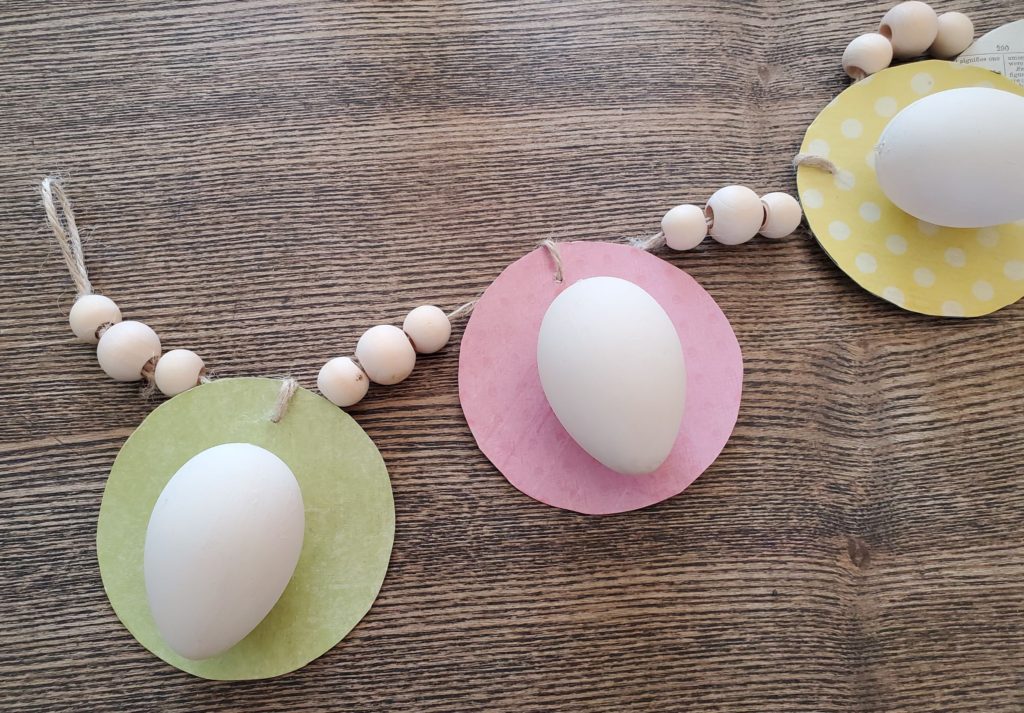
After the 3 wooden beads, start with an egg and craft paper tag. Follow this with the triple bead pattern again and then another egg tag. Repeat this until you end up with 12 wooden beads and 3 egg tags.
To add the egg and letter tags to the twine follow these steps:
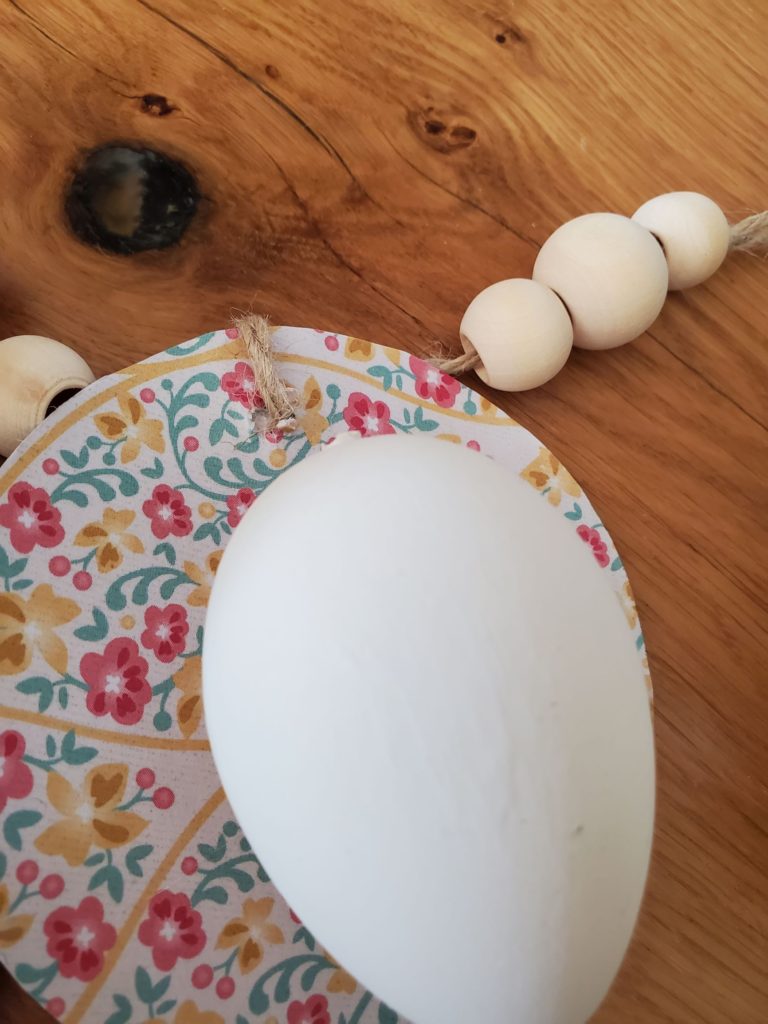
- Slide the twine from the back of the tag to the front.
- Then on the back glue down the twine so that it is near the top of the tag. As shown in picture above.
- Next wrap the twine from the front over the top to the back then glue the twine down in the back.
- Lastly, glue the twine down on the other side of the hole so that the twine is ready for the next 16mm bead, followed by the next letter tag and so on. Each time using this method to attach the tags to the twine.

It’ll end up looking like this. Not so pretty in the back but it looks lovely in the front.
After the egg pattern add the lettered tags. Start with the letter H and then add a 16mm bead. Follow with the next letter. Continue this new pattern until you’ve spelt out HAPPY.
Add the left over coloured, craft paper tag to separate the words Happy and Easter.
Next add the tags to spell out Easter, again separating each letter with a wooden bead.
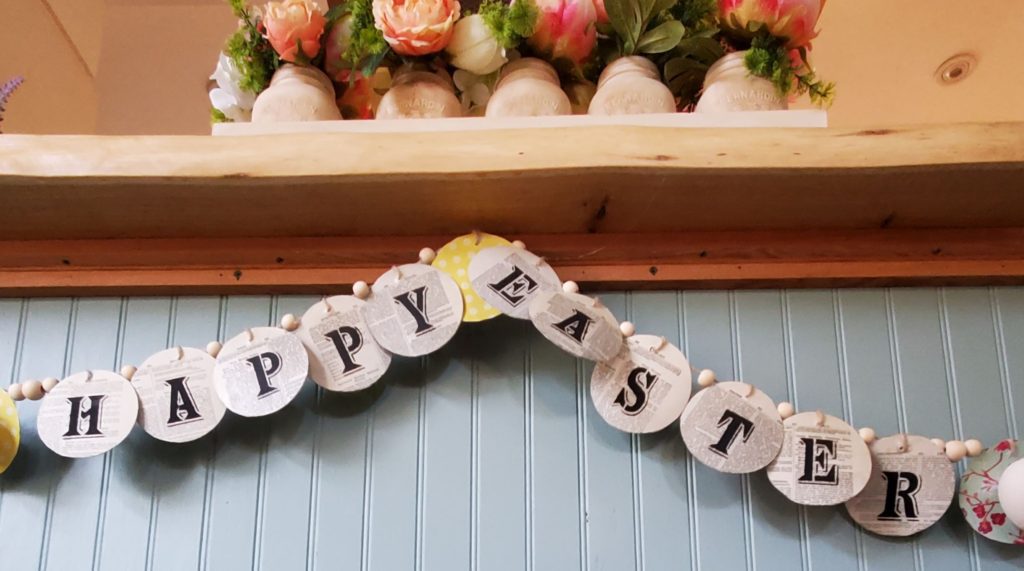
Finish the Easter banner by again repeating the 3 bead and egg tag pattern that you started with. Tie the twine into a loop and once again tuck the ends into the beads.
And Voila! A beautifully rustic Easter banner that you can proudly hang from your mantle, on a ledge, across a window or a mirror.
Jenny’s Finishing Thoughts on Easy Easter Banner
Easter means spring and spring means warmth, flower buds, and beautiful pastel colours. After a long winter of isolation it is such a blessing to be able to once again embrace the beauty this time of year has to offer. This gorgeous Easter banner draws on these elements. It’s rustic charm, pastel colours and whimsical appearance makes for the perfect Easter home decor.
Did you find this post helpful or inspirational? Save This Pin to your Easter Decor board on Pinterest

If you liked this DIY you may also like:
How To Make 3 Easy Reusable DIY Spring Wreaths