4 Stunning Faux Copper Paint Techniques
Copper pots and accessories are all the the rage right now. Let’s explore how to make faux copper using 5 different faux copper paint techniques.
Faux Copper Paint Techniques
Copper pots and accessories are all the the rage right now. Let’s explore how to make faux copper using 5 different faux copper paint techniques. Pick out the one that works best for you and enjoy the latest fad. FYI I saved the best for last!
What is Faux Copper?
Faux copper is when you take a non copper material such as metal or wood and using paint, and a few different faux copper paint techniques, you create the look of high end copper. It costs next to nothing to make but looks exactly like the more expensive pieces found in the high end home decor stores. There are several faux copper looks that can be achieved simply by changing up the paint colours and paint techniques.
Is There A Paint That Looks Like Copper?
Absolutely, there are paints that look like copper. In fact, there are several paint options that look like copper. Add a few simple faux copper paint techniques, one or more of these paints, and a little creativity and you end up with stunning, high end copper replicas that will look like the real deal.
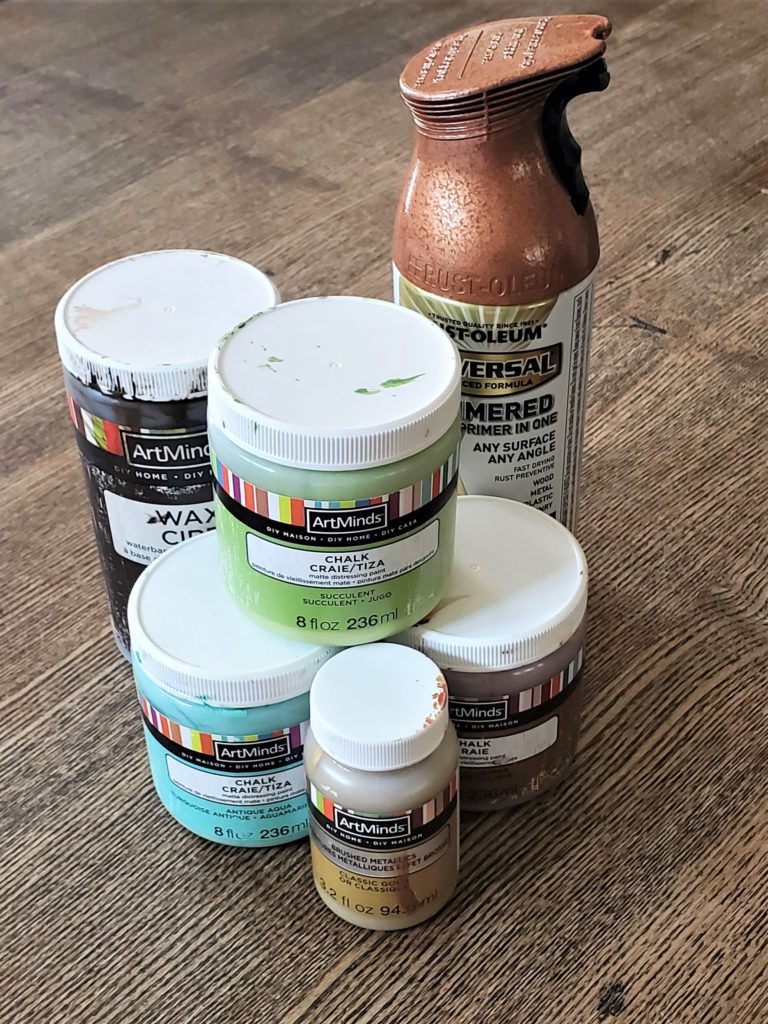
- Copper spray paint
- Hammered copper spray paint
- Chalk paint in copper
- Copper acrylic paint (Full disclosure – I haven’t used this. I am not the biggest acrylic user.)
- Copper paint pens (Best used to add that little touch of copper. Not for turning an entire object copper.)
Best part: All the look; none of the cost.
NOTE: I have listed the options and brands that I have personally used or am aware of. If you have other faux copper paint techniques or product referrals, please share these in the comments. When you share you help a fellow DIYer out by letting us learn from each other .
Faux Copper Paint Techniques
What I am about to share with you is ridiculously easy. All it takes is a couple of dollars, a trip to the thrift store, and a bit of creative play to make yourself some fabulous faux copper that is perfect for decorating your home with. The secret to making something look like copper is simple. You need paint, a few easy faux copper paint techniques, some paper napkins, and a little attention to detail and Voila! Realistic faux copper decor.
That’s it. The most time consuming part is the drying times in between coats of paint and the most challenging part is deciding where you’re going to put your new, gorgeous faux copper piece.
I think that out of all of these faux copper paint techniques this is by far the easiest and fastest. The chalk paint tries quickly and it looks amazing when finished. However, it is the less long wearing of the other options. Over time and use the chalk paint may chip or wear off in place.
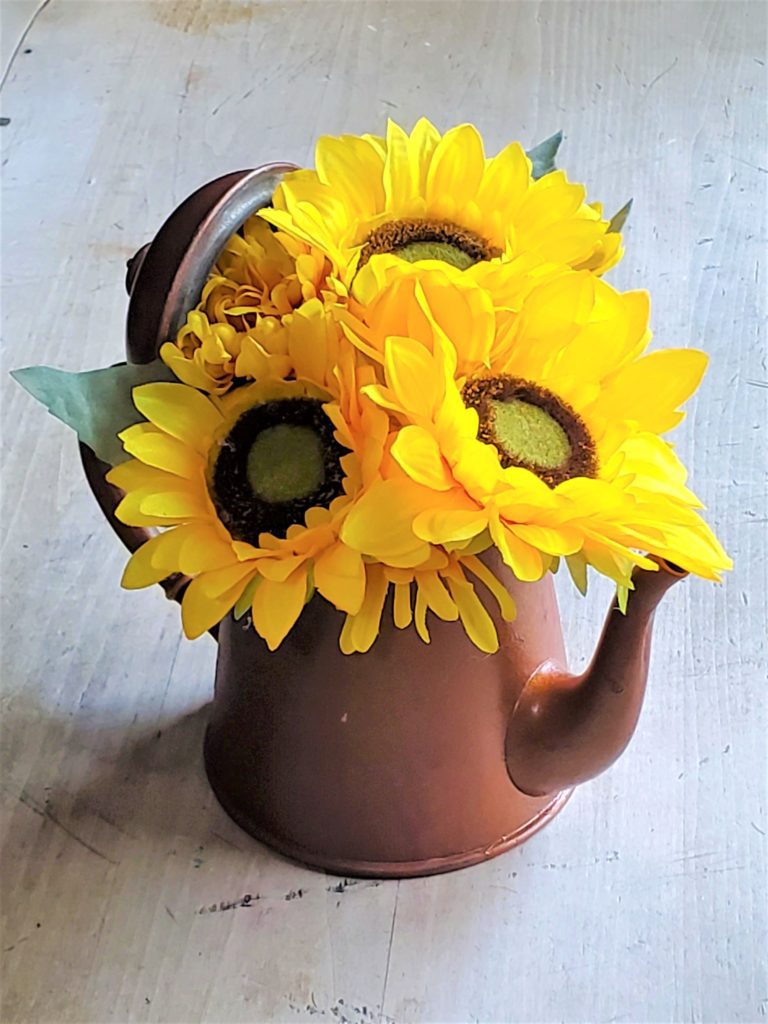
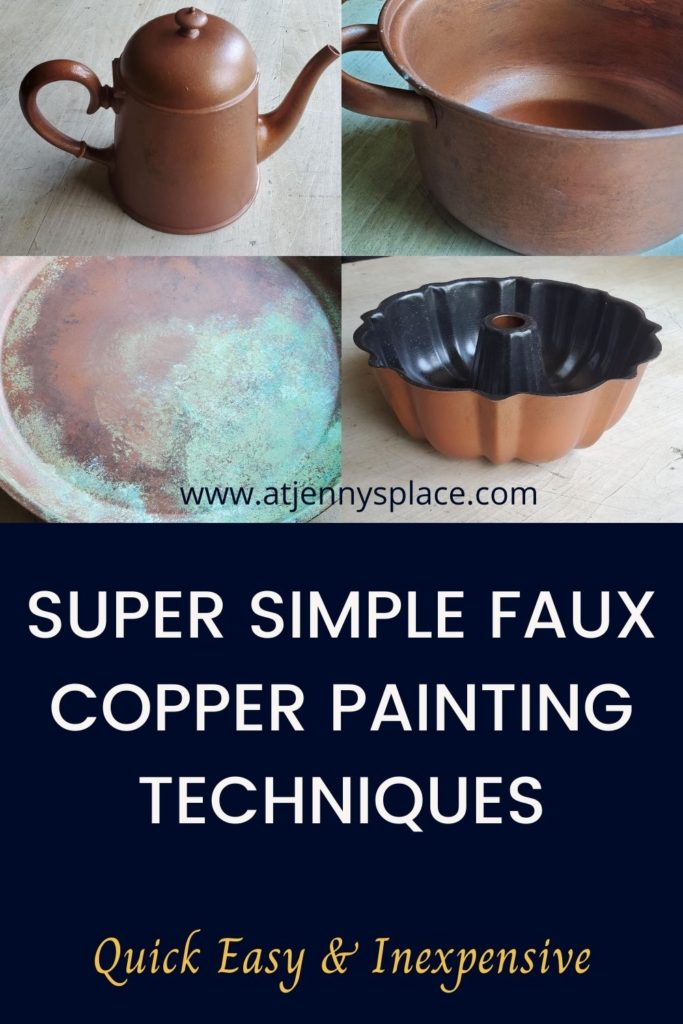
Faux Copper Tea Pot
I decided to paint this old pewter tea pot. It is a tea pot that has been kicking around the house for while. I loved the shape and thought it would make an ideal vase for flowers but I wasn’t loving the cold grey patina. So I changed it.

Supplies You Will Need For Faux Copper Tea Pot
- Metal or Ceramic Tea Pot
- ArtMinds Chalk Paint in Metallic Copper
- ArtMinds Chalk Paint in Classic Gold
- FolkArts Wax in Antiquing
- Chalk Paint Brush
- Stenciling Paint Brush
- Paper Towels
- Rust- Oleum Chalked Protective Topcoat Spray Paint in Matte
Steps to Make Faux Copper Tea Pot
- Start by cleaning the tea pot with a bit of dish soap and warm water.
- Paint the tea pot with the first coat of copper chalk paint. Let this dry and then apply a second coat.
- Using a stenciling brush pounce on some gold paint.
- Using a stenciling brush pounce on some antiquing wax. And then, use the paper towel to pounce on the wax in order to sponge away some of the access and blur the wax paint lines in with the copper paint.
- To finish the piece you want to apply a topcoat. Chalk paint on metal seems to work best with a spray on topcoat. When you paint on the topcoat it tends to remove some of the paint. I had originally wanted this piece to be shiny but Home Depot was all out of their shiny spray topcoat so I went with the matte version.
- And Voila! So easy and beautiful. I think that this copper tea pot will look best used as a flower vase but you could used it in a kitchen open shelf display as it is.
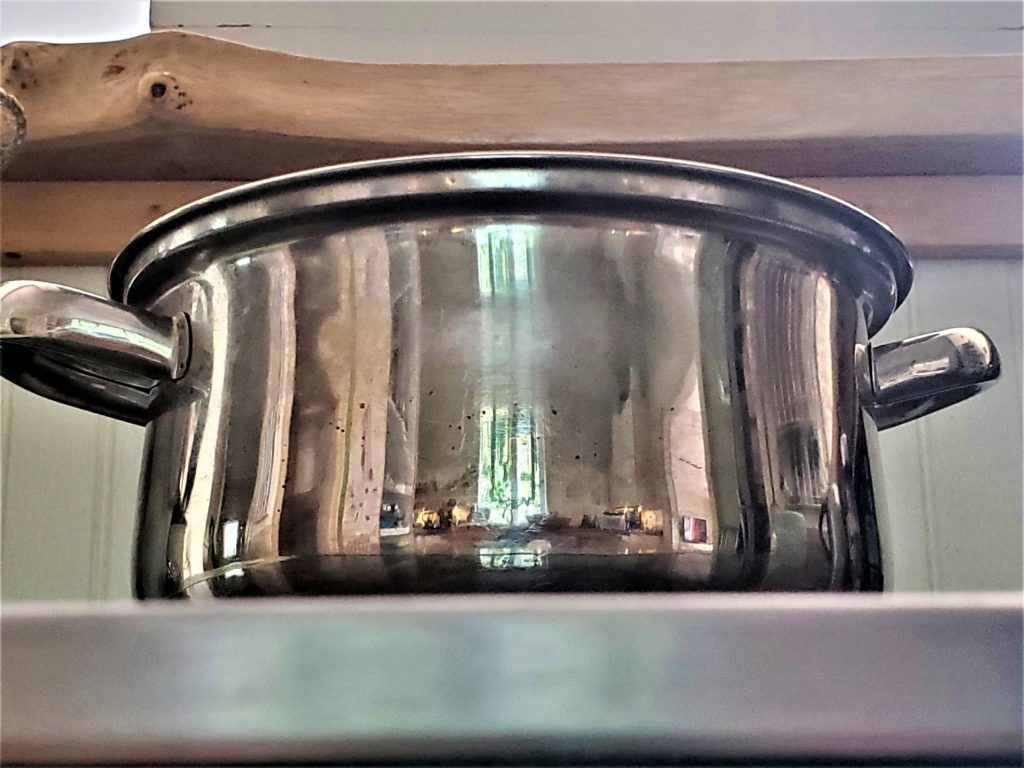
Rustic Farmhouse Faux Copper Cooking Pot
This rustic, aged faux copper cooking pot looks like a million dollars but it sure didn’t cost a million dollars. On the weekend, I headed to the thrift store so that I could find the perfect pot for this project. I wanted a pot with metal handles and I was careful to find a pot that didn’t have a logo imprinted in the handle. I was really pleased with the end result.
Supplies You Will Need
- Metal Cooking Pot
- Rustoleum Universal Hammered Copper Spray Paint
- ArtMinds Chalk Paint in Metallic Copper
- ArtMinds Wax in Antique
- Chalk Paint Brush (or stenciling or chip brush)
- Paper Towels
- Rust- Oleum Chalked Protective Topcoat Spray Paint in Matte
Steps to Make Faux Copper Cooking Pot
- Paint on some of the copper chalk paint. I found it easiest to use my thick chalk paint brush to do this.
- Grab that paper towel and pounce it on the copper chalk paint in order to sponge away some of the access and blur the paint lines. I kept doing this: applying copper chalk paint and dabbing and wiping some of it away until I ended up with the look I liked.
- Because this faux copper pieces leans more on the rustic farmhouse look I thought it should be matte. So, using the Rustoleum matte spray on topcoat I applied a nice coat of protection to the piece and it was done!
Five reasons why I love this rustic, faux copper cooking pot:
- Simply gorgeous
- Perfect for faux or real flower arrangements
- Looks gorgeous on an open shelf display
- Is long lasting because of the spray paint base

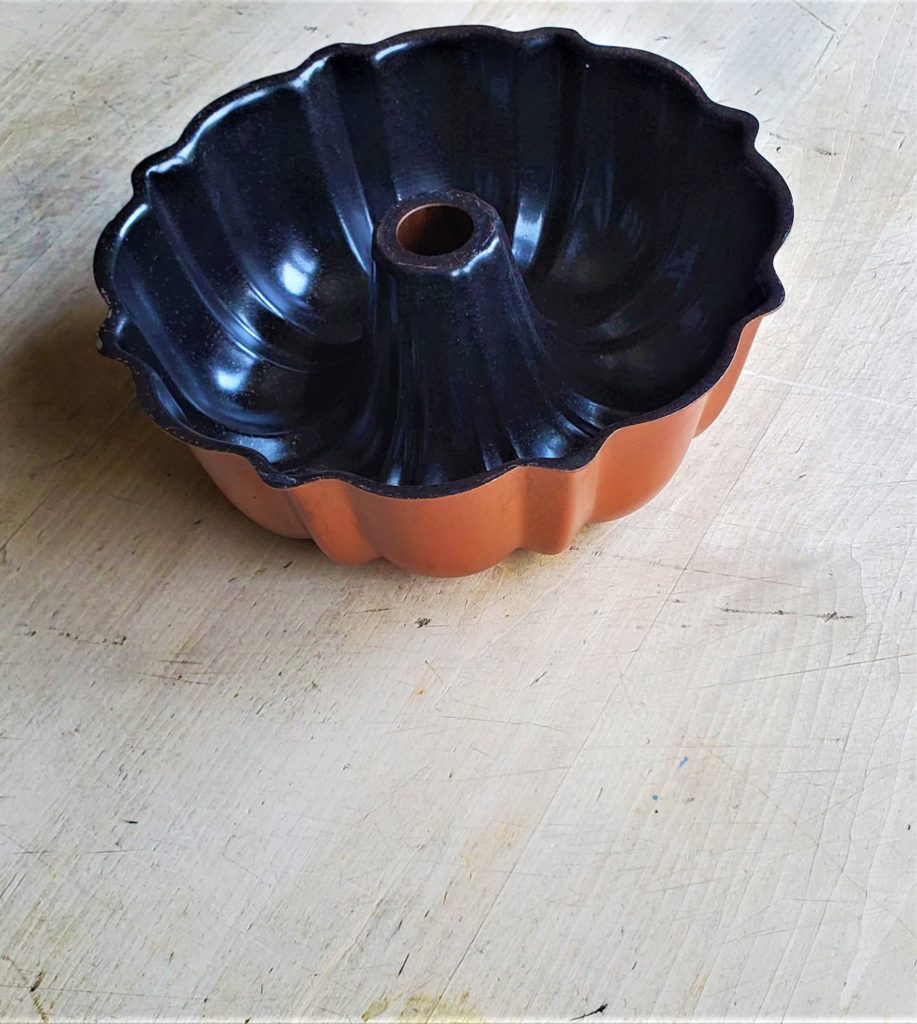
Faux Copper Two Toned Bundt Pan
This is just a classy piece. I know I said that the chalk paint faux copper paint technique was the easiest but honestly it’s a toss up between that and this one. All you need to make this happen is a well vented area, a couple cans of spray paint, and an old ugly bundt pan from the thrift store. The end result is nothing short of sophisticated elegance.
Supplies You Will Need to Make Two Toned Bundt Pan
- Bundt Pan
- Rustoleum Spray Paint in Black
- Rustoleum Universal Hammered Copper Spray Paint
- Artminds Wax in Antique
Steps to Make Two Toned Bundt Pan
- Start by spray painting the inside of the bundt pan with the black spray paint. Keeping applying coats of spray paint until the entire inside is covered. Let dry.
- Using the Rustoleum Hammered Copper spray paint, paint the exterior off the bundt pan. Let dry.
- Holding the copper spray paint can up high above the interior of the bundt pan, spray out short light bursts of the copper spray paint. You are doing this so that you make beautiful tiny specks of copper on top of the black colour. This gives it a little sparkle and interest.
- Using the antiquing wax, add colour to any detailing or raised portions on the pan. Try not to over do this part. It’s to add dimension. It’s not to make the copper bundt pan look worn or rustic.
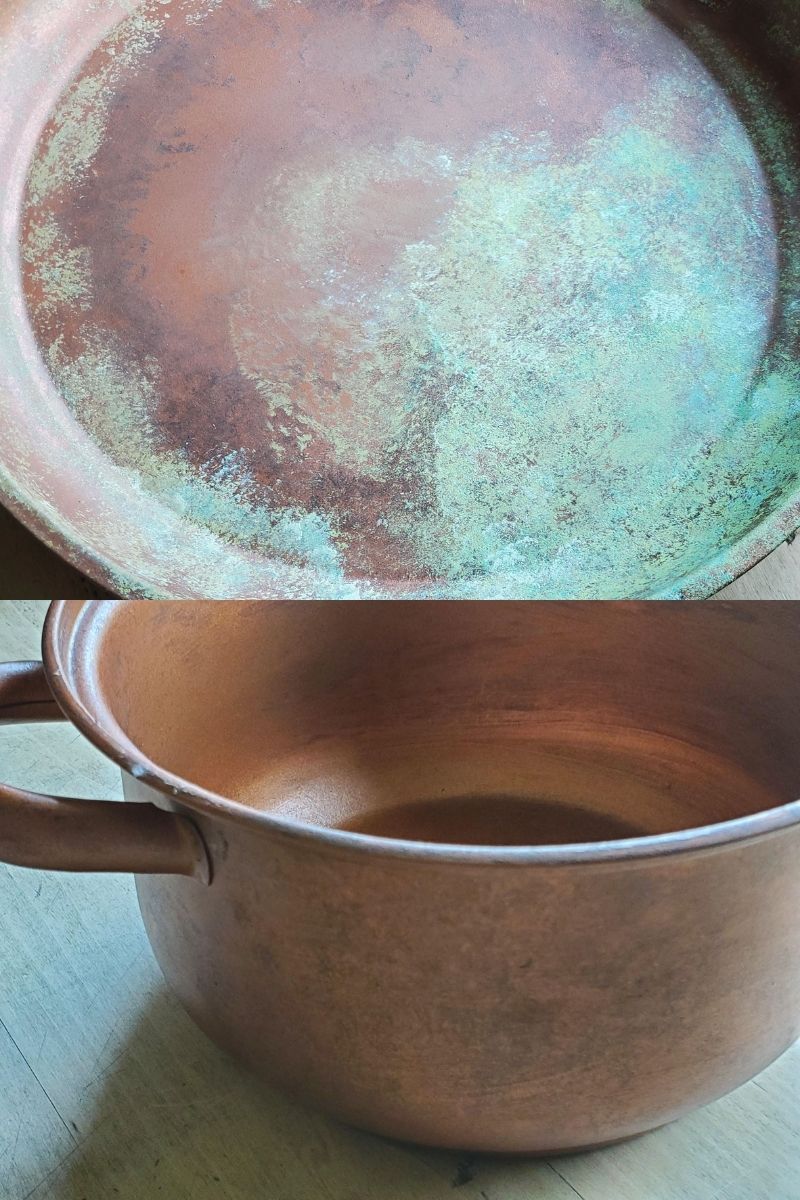
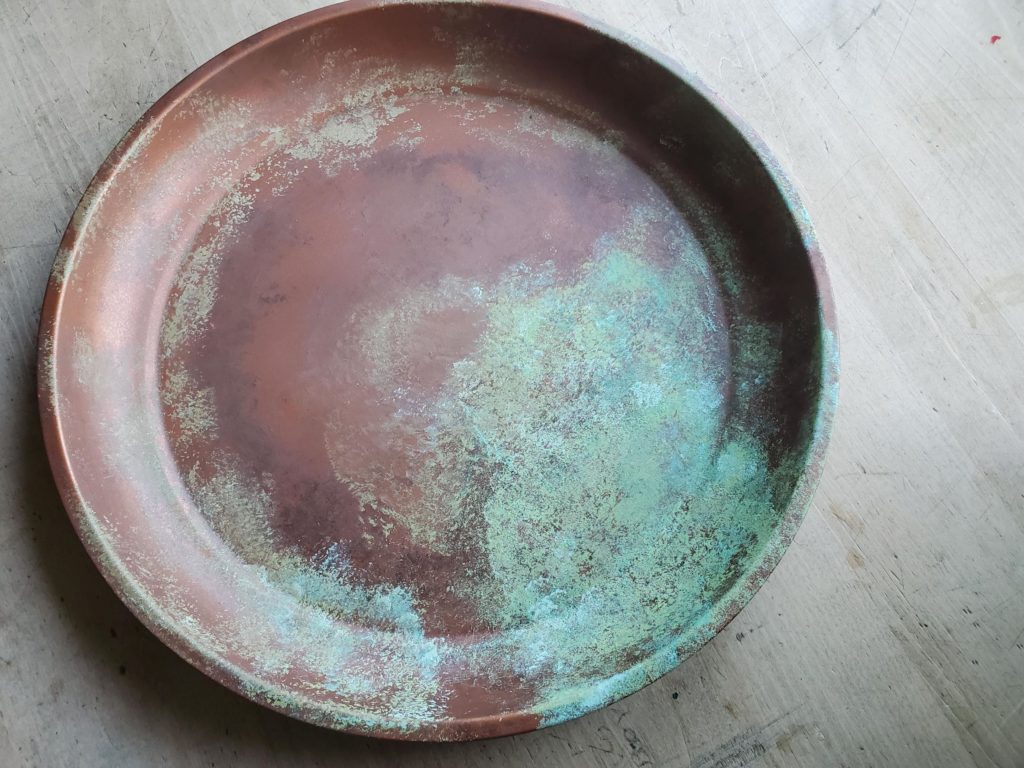
Faux Copper Oxidized Tray
OK, hands down my ultimate favourite of the faux copper painting techniques of the bunch. Admittedly, this particular project takes more time than the rest but the end result is well worth the effort.
Supplies You Will Need to Make Faux Copper Oxidized Tray
- Dollar Store Round Metal Serving Tray
- Rustoleum Hammered Copper Spray Paint
- ArtsMinds Chalk Paint in Succulent
- Artminds Chalk Paint in Antique Aqua
- Artminds Chalk Paint in White
- Chalk Paint Brush
- Stenciling or Chip Brush
- Paper Towel
- Rust- Oleum Chalked Protective Topcoat Spray Paint in Matte
Steps to Make Oxidized Tray
- Start by Follow this up by having a little fun with paint mixology. Mix the ArtMinds chalk paint in Antique Aqua with ArtMinds chalk paint in white. You are going for a pastel teal colour.
- Spray paint both the top and the bottom of the metal tray with Rustoleum’s Universal Hammered Copper spray paint. I found this took about 3-4 coats of spray paint. Let dry in between coats of paint and then over night.
- Using a chalk paint brush dab on some of the ArtMinds in Copper chalk paint. You are looking to do this in patches. You don’t want to cover the entire piece in the chalk paint. Unlike the spray paint, the chalk paint dries matte and appears darker on the shiny copper spray paint. This will give the tray a bit of an aged look. Use your paper towel to dab away at the excess and to soften the lines.
- Next, using a chalk paint brush again, dab on some of the ArtMinds Antiquing Wax exactly as you did the chalk paint. Dab in patches. Let dry overnight.
- Next, using you chalk paint brush dab on some of the ArtMinds chalk paint in Succulent and then dab with a paper towel.
- Now use the chalk paint that you mixed at the start of the project and dab this with the paper towel. Follow this with just the Artminds chalk paint in Antique Aqua and again use that trusty paper towel to dab away the extra paint and blur the lines.
- Use your paper towel to meld the colours together and to add more texture. Don’t be afraid to play. Have fun using the paint brush and paper towel to add more paint and to create a look that mimics genuine oxidized copper.
PRO TIP: In addition to dabbing with the paper towel try wiping away some of the paint with the damp paper towels. This will help soften the look in some places and will make the faux oxidization appear more realistic.
Jenny’s Finishing Thoughts On Faux Copper Paint Techniques
I fell in love with copper pots and accessories back in the 90’s when Martha Stewart displayed her collection of copper pots in her magazine. It was love at first sight. But I’m no Martha and there was no way I could afford to have my own collection. So instead, I make my own. Sure I can’t cook in it but I can decorate with my faux copper creations and they look divine displayed throughout the home.
I hope that if you love the look of copper as much as I do that you got a little inspiration and some ideas for how you too can create your own home decor using one or more of the faux copper paint techniques I shared.
What is your favourite metal to decorate with and have you ever tried to create a faux version before? I would love to get some more ideas from you. Please share in the comments below.
Did you find this post helpful or inspirational? Save This Pin to your Painting Techniques or Copper Decor board on Pinterest
If you liked this post you may also enjoy:
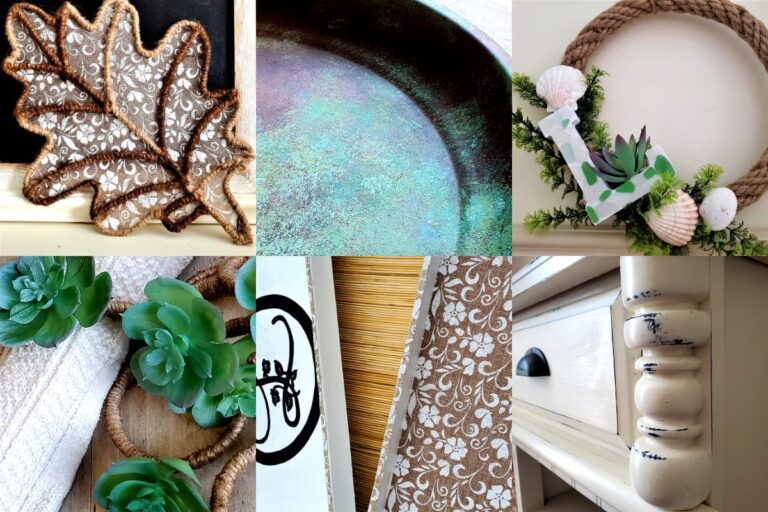
Inexpensive Fall Faux Copper Centerpieces
13 Easy Black And White Halloween Decor With A Stunning Touch of Copper