
Makeover Dresser Into Stunning DIY TV Stand
Today we are going to do makeover dresser project and turn this gaudy thrifted dresser into a gorgeous farmhouse TV stand.
DIY TV Stand
As anyone who has shopped for TV stands knows, it can be difficult to find one that meets all of your criteria. They’re either too expensive, or they’re made of cheap materials. And if you’re looking for a TV stand that fits into a modern farmhouse aesthetic, the choices are even more limited.
But with a little bit of creativity, you can find the perfect TV stand for your home – in an unlikely place. For example, I found this dresser on Kijiji, and with a few minor changes, it made the perfect TV stand for our den makeover. It was inexpensive, made of good quality materials, and it fit perfectly into our farmhouse aesthetic.
With a little bit of creativity, you can find the perfect TV stand for your home – in an unlikely place. So don’t give up – keep looking until you find the perfect piece for your home.
What Can You Do With An Old Dresser?
Old, well-built dressers can make excellent DIY TV stands. With a little TLC, you can end up with a unique, practical, and high-end TV stand. They can be incredibly affordable, and vintage dressers are often made with quality materials. They tend to offer fabulous storage options, and the backs of the dresser hide any electronic wires so you don’t see the mess.
If you pick a dresser that offers the right viewing height and enough length to support today’s huge TV screens, then you are good as gold. Plus, you get the added bonus of knowing you upcycled a piece of furniture instead of just buying another cheap piece of particle board from the big box store.
Go ahead and give it a try – your wallet and your home will thank you!
Can I Use A Dresser For A TV Stand?
Yes, you can absolutely use a dresser for a TV stand. There are just a few things to consider when looking to convert your old dresser into a stylish TV stand. While shopping consider:
How Do You Makeover Dresser Into A TV Console?
Ok, enough chit chat. Let me show you how you too can turn a dresser into a stunning and practical TV console.
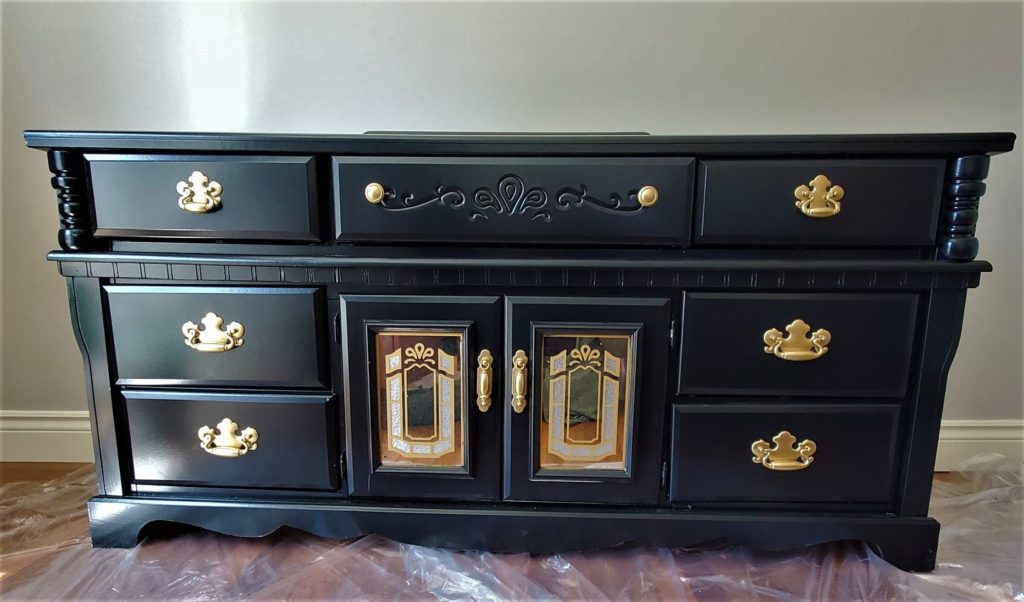
The dresser started out as an ornate black and gold bedroom dresser. It was beautifully painted but was definitely not our style. We live in an old remodeled farmhouse in the middle of an urban city so we definitely lean modern farmhouse. This dresser was so not that but there were some details that I knew that I could work with, the size was perfect and the fact that it was already painted black appealed to me because I knew that I would be eventually distressing it.

I loved the strip of “bead board” along the front. This particular detail ties in perfectly with the rest of the bead board that we have throughout our home. I also really liked the finial detailing on each end of the dresser. The length was ideal for our space and the possible storage options were perfect for our needs.
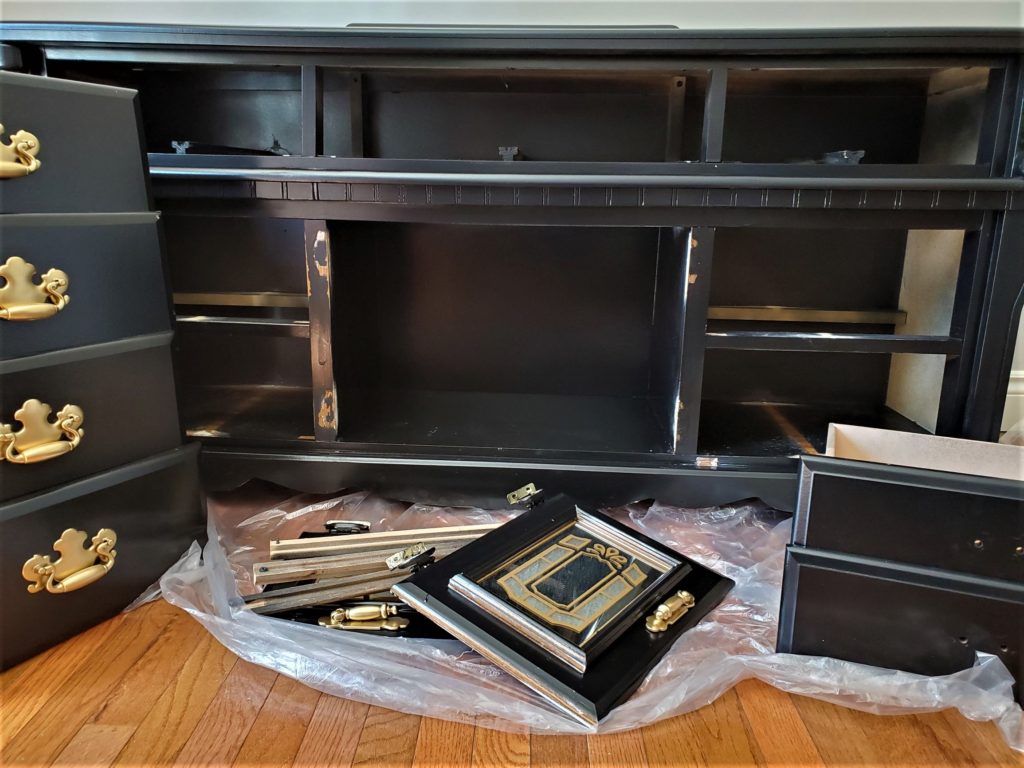
I started by removing all the drawers and then the hardware. Next, I removed the front doors.
I decided to remove the doors and leave them off. I also decided to only keep the three top drawers.
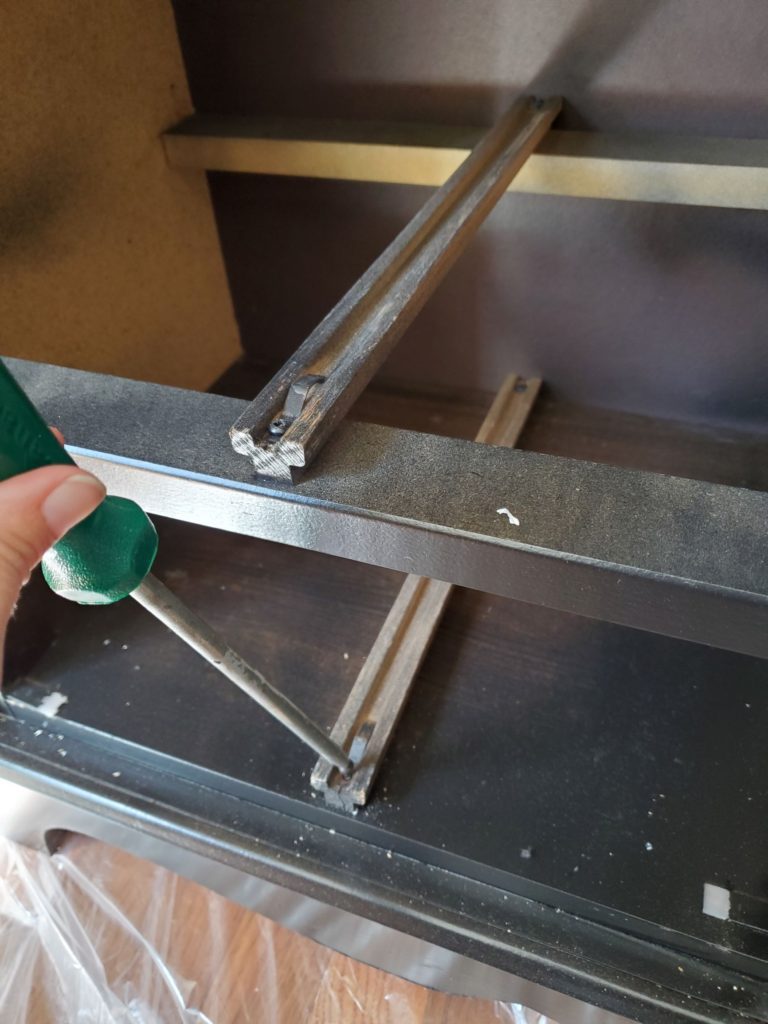
The two set of drawers on each side would have to go. I decided this space would be better utilized as shelving. I removed the old drawer guides from the drawers I would be replacing with shelving. I cut some thin strips of wood to use as supports for the shelves. I nailed these into place and then measured and cut some wooden boards to use as the actual shelves. I sanded down the edges of the boards so they would be smooth and then stained them.
Once the stain was dry, I placed the shelves on the supports and screwed them in place. And that’s how you create additional storage space in your home without spending a lot of money!
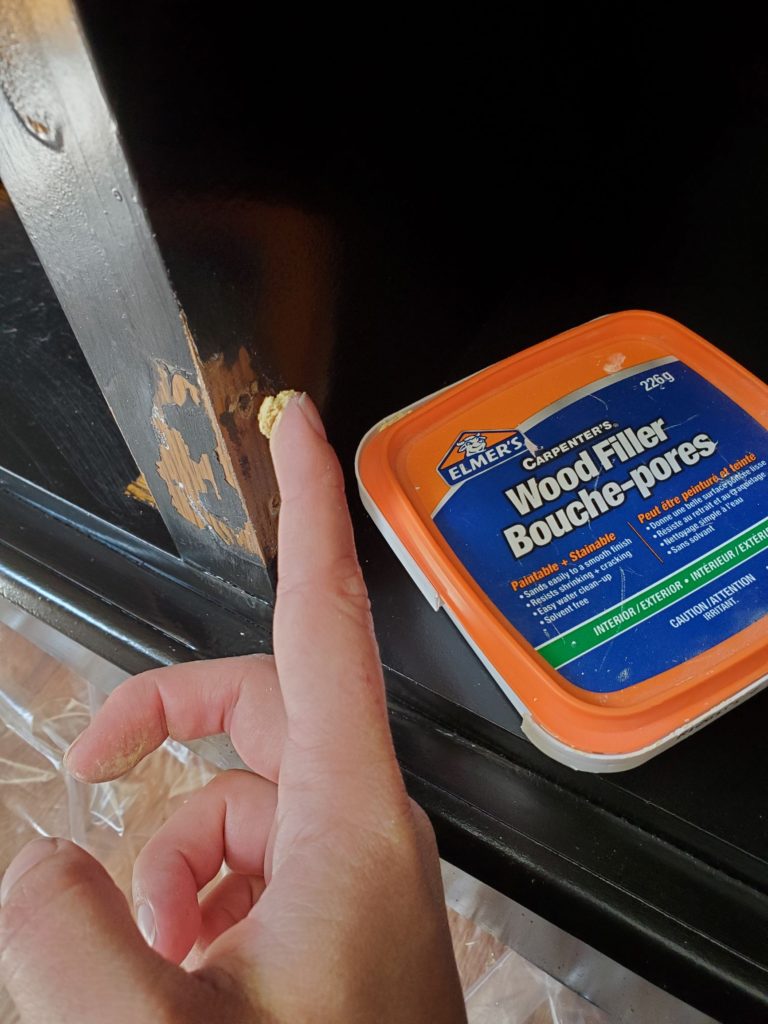
Once all of these were removed, I sanded down any rough spots the old hardware or drawer guides may have left.
I then filled any of the holes that the hardware and hinges had left with Elmer’s Wood Filler and then let dry (minimum 30 minutes). Once dry I gave the wood filler a light sanding.
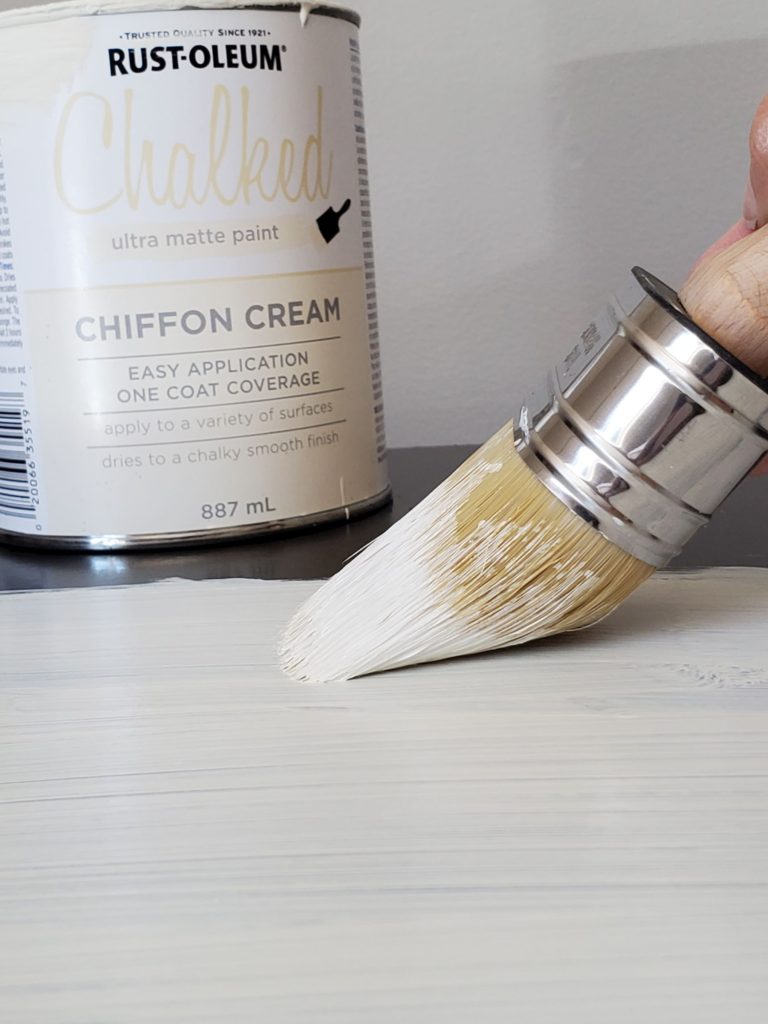
Knowing that I would eventually be distressing the piece I opted for chalk paint. I decided on Rust-Oleum Chalk Paint in Chiffon Cream and since I would be using chalk paint I didn’t need to use a base coat.
Next, I taped off the three drawers I would be keeping. I didn’t want any of the paint to get on the inside of the wooden drawers.
I painted on the first coat of chalk paint to the entire dresser inside and out and to each of the drawer fronts. Then I left it to dry for 24 hour.
The next day I lightly sanded the dresser with 280 grit sand paper. I also sanded the three drawer fronts and then wiped it clean with a lightly damp cloth.
Next I applied a second coat of chalk paint to the inside and outside of the dresser and drawer fronts. Again, I let it dry for 24 hours.
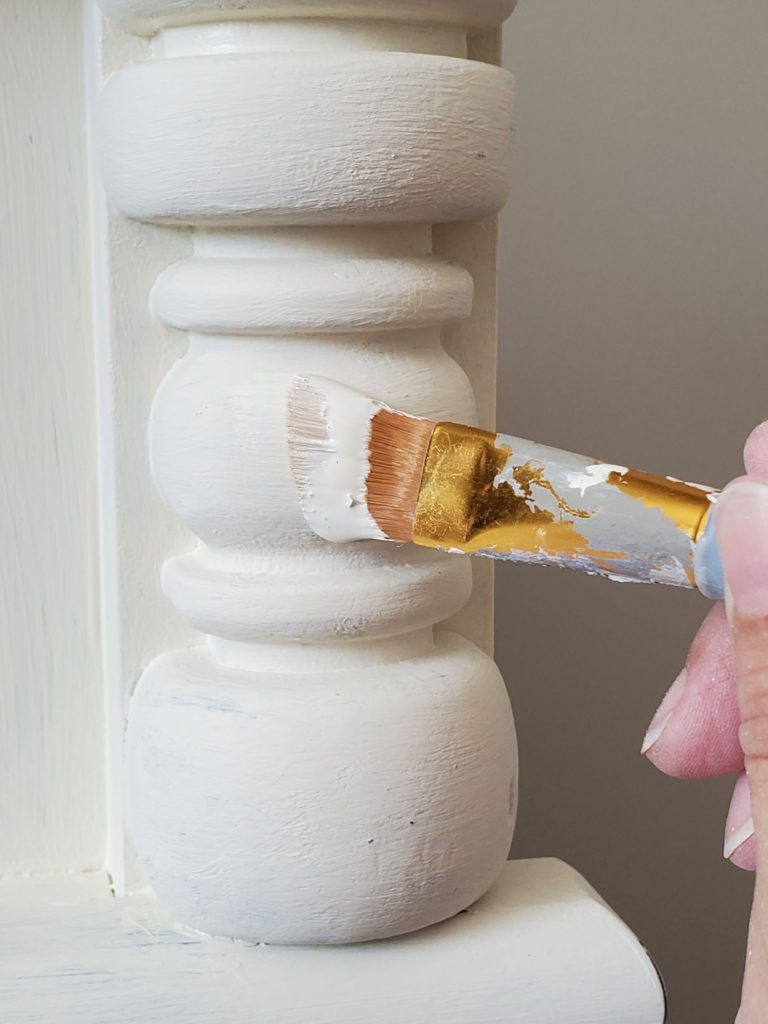
On the third day I repeated the sanding, wiping, and painting process. I choose to use a little paint brush to get into the finial details.
Looking in the wood pile I found a piece of bead board that fit perfectly to the back of the open, square shelf. This worked perfectly with the strip of bead board that was original to the dresser and really made this once small detail pop.
I attached the bead board to the back of the dresser using a nail gun and 9 nails – one in each corner and 3 down the middle. Although, I used short nails the back of the dresser was a bit thin so the the nail ends did go through a tiny bit. I simply used the hammer to bend each nail over so that they lay flat.

Free Printable Library
Welcome to AJP’s amazing free printable library! I’m thrilled to offer you a wide variety of printables for all your DIY needs. Whether you are looking for coloring pages, planners, decor images, or printable labels, I’ve got you covered. This collection is constantly updated, so you will always find fresh and exciting printables to enjoy. Best of all, everything in the library is completely free. No subscriptions or hidden costs – just pure printable goodness! So why wait? Start exploring AJP free printable library today and bring some creativity into your life. Happy printing!
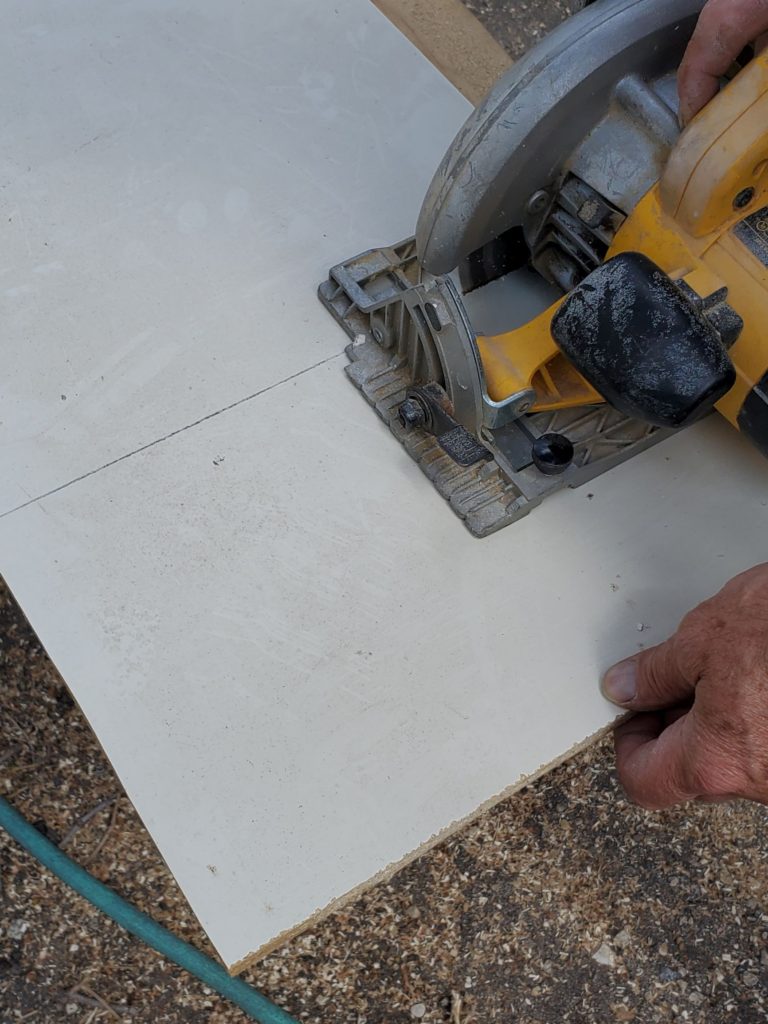
Using a piece of old melamine shelving, hubby cut out two shelves for each side.
Now, technically I could have taken the back off of the dresser in order to slide each shelf in in one piece but this dresser was pretty old and I was a bit hesitant to take it apart too much. So, instead hubby decided to cut each of the shelves down the middle so that we ended up with 4 pieces.
He did this by using a cardboard template that had been perfectly cut to fit the shelf spaces and then tracing each template onto the melamine pieces. He then cut the boards in half and then we slid them into each end of the dresser.
Lastly, I cut down two pieces of wood trim. Again, this was just spare trim found in the wood pile.
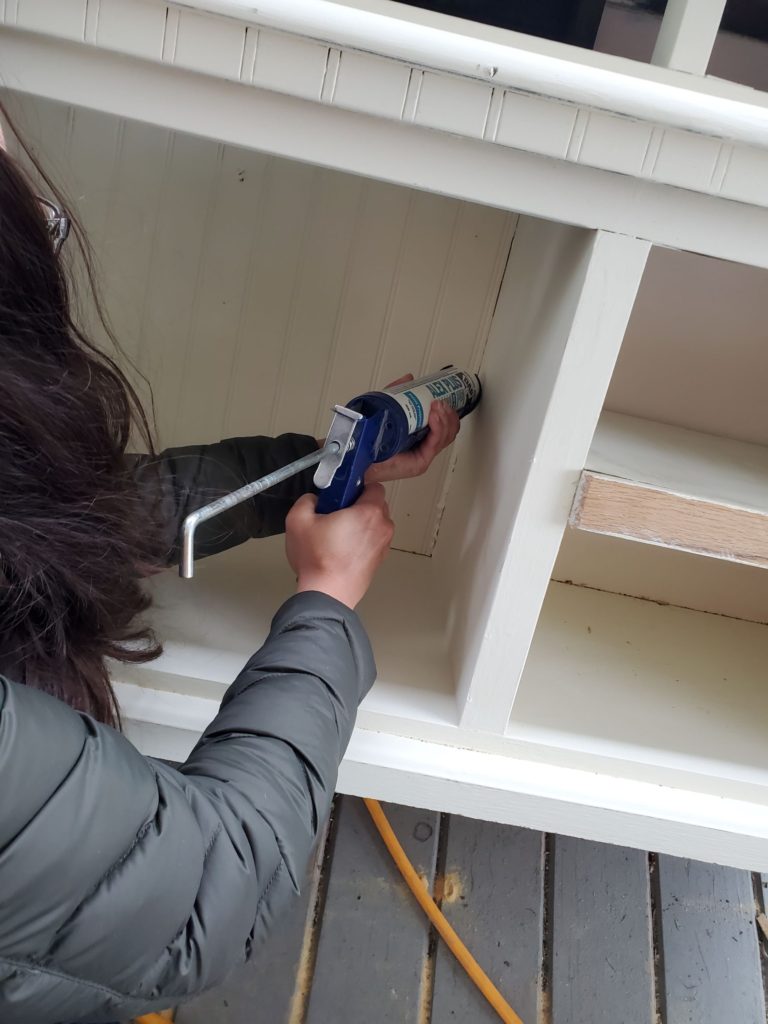
After wiping the saw dust off, I applied a thin line of caulking to the outer edges of the bead board.
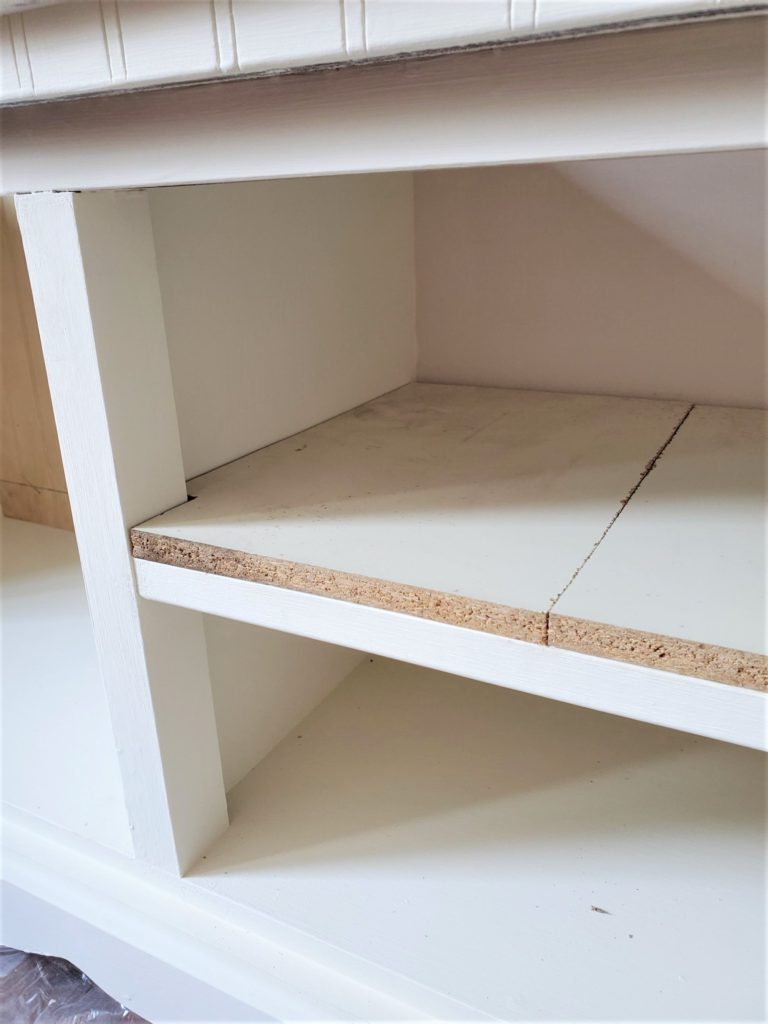
Using construction adhesive I attached the melamine shelving to the old drawer supports.
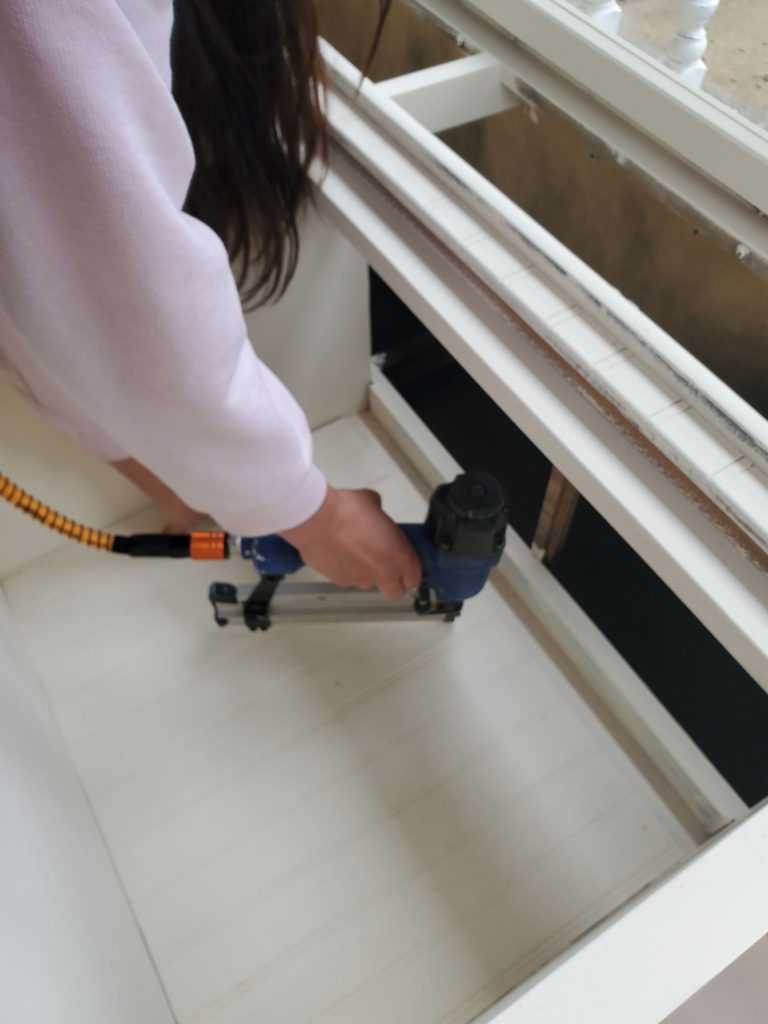
To each self, using the nail gun, I further attached the shelves with 3 nails in the front and 3 nails is the back.
Again, using construction adhesive I attached the two pieces of trim to the front of the shelving so that it left a clean look. Lastly, the trim was nailed in place with 3 nails – at each end and one in the middle.
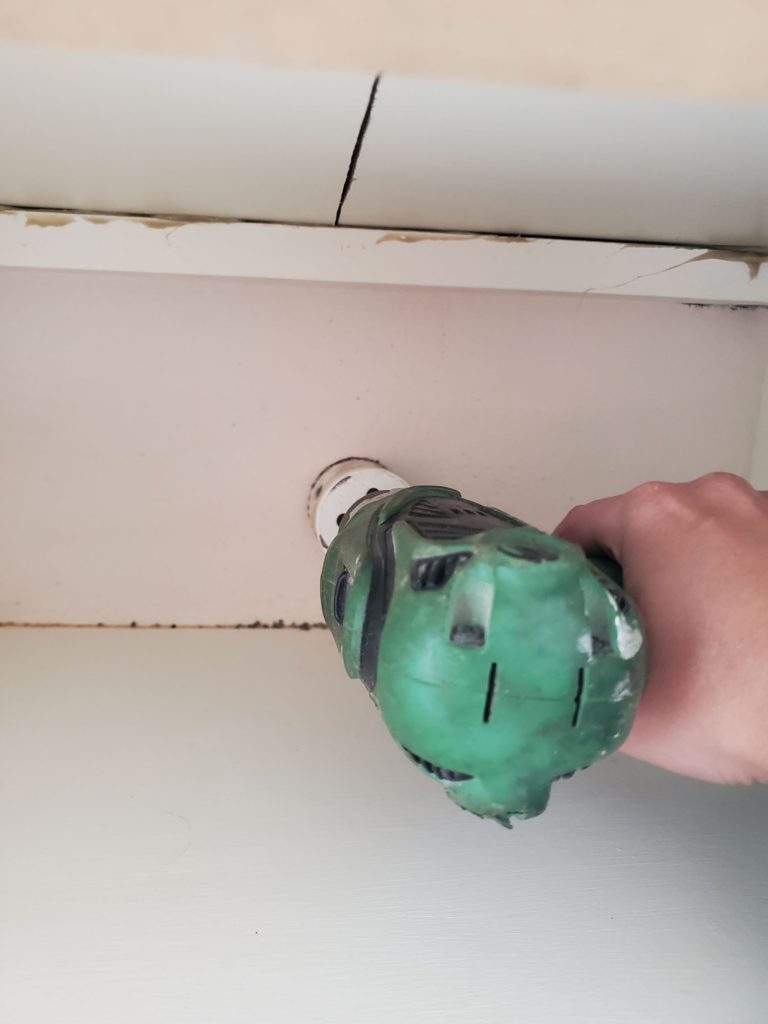
Using a 2″ hole saw I drilled a hole into the middle back of each shelf. This is so that the electronic cords can be plugged in through the back and the wire mess will be well hidden.
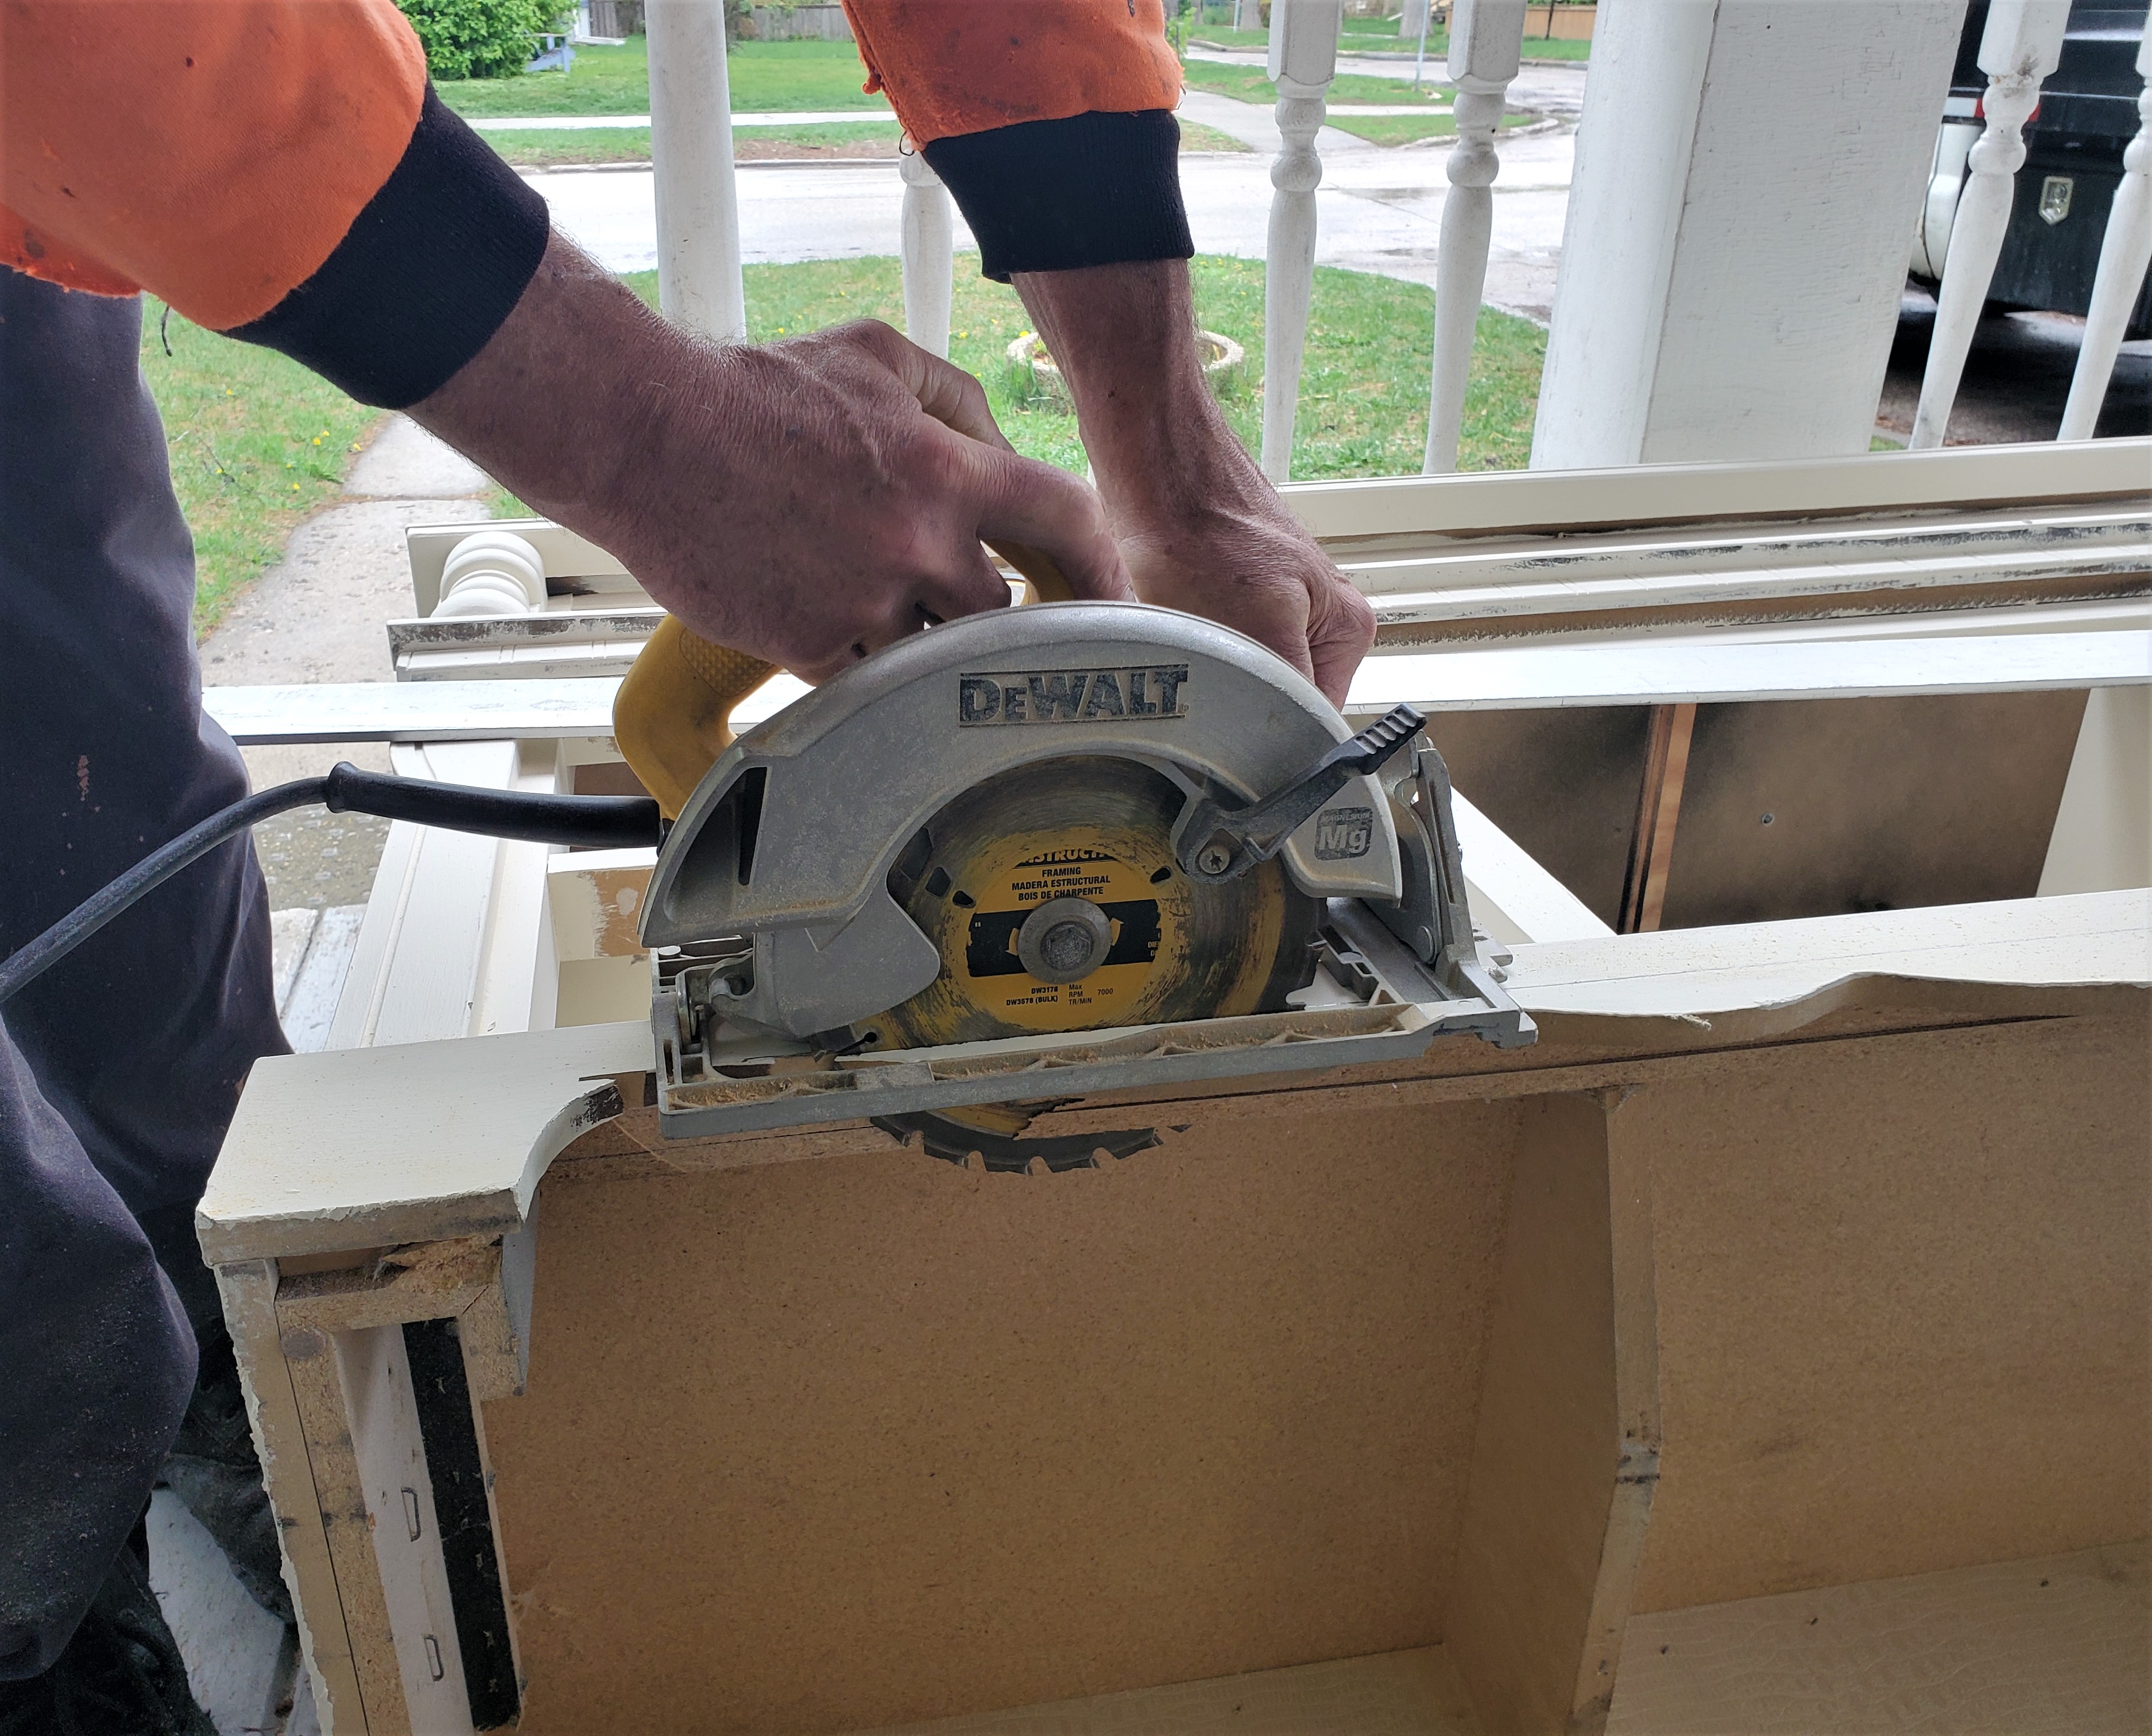
Now it was time to get rid of the scalloped edging on the bottom of the dresser. I personally felt that this fancy detailing made the piece still look like a dresser. It had to go.
Using a metal straight edge I traced a pencil line onto the trim and then hubby cut the scalloped edging off with circular saw.
I then added another coat of paint to the shelving, the bead board, and the trim so that caulking was covered and everything appeared cohesive.
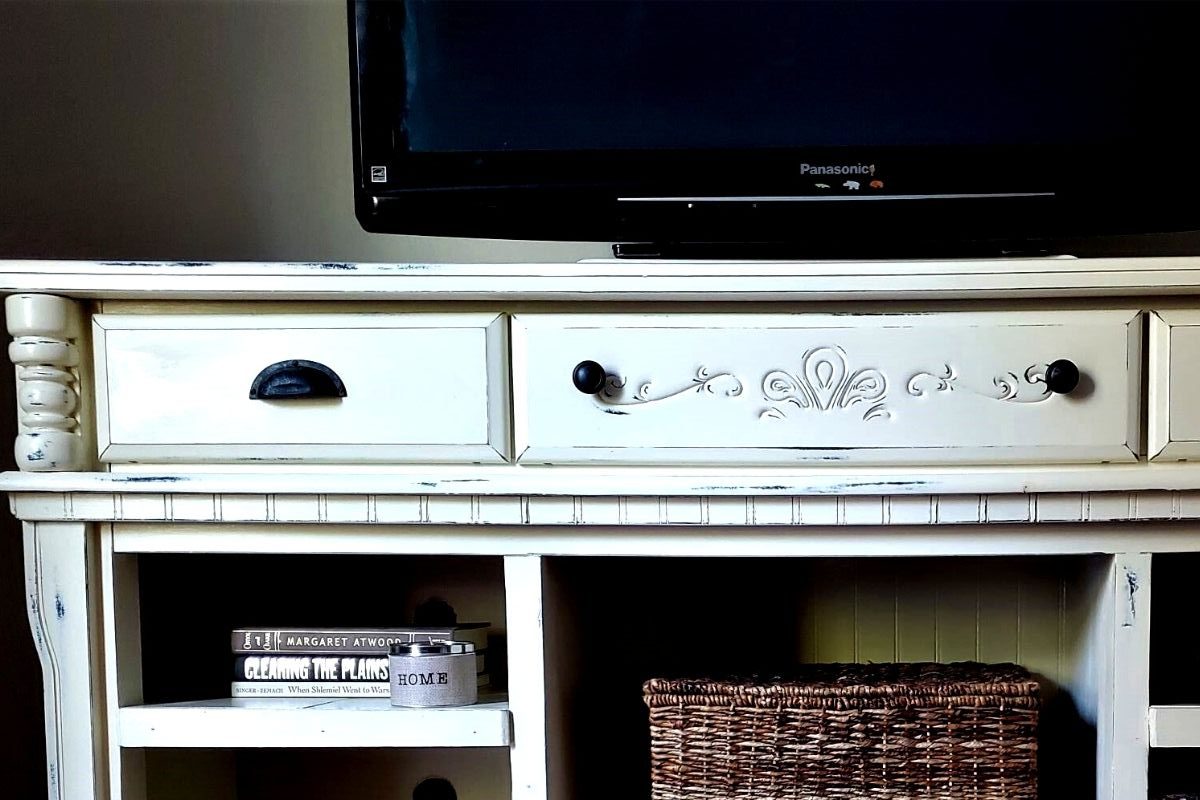
Now came the fun part! Using the 280 grit sand paper, I distressed the dresser focusing on the detailing and edges. The original black paint came through beautifully and it gave the TV stand dimension and interest.
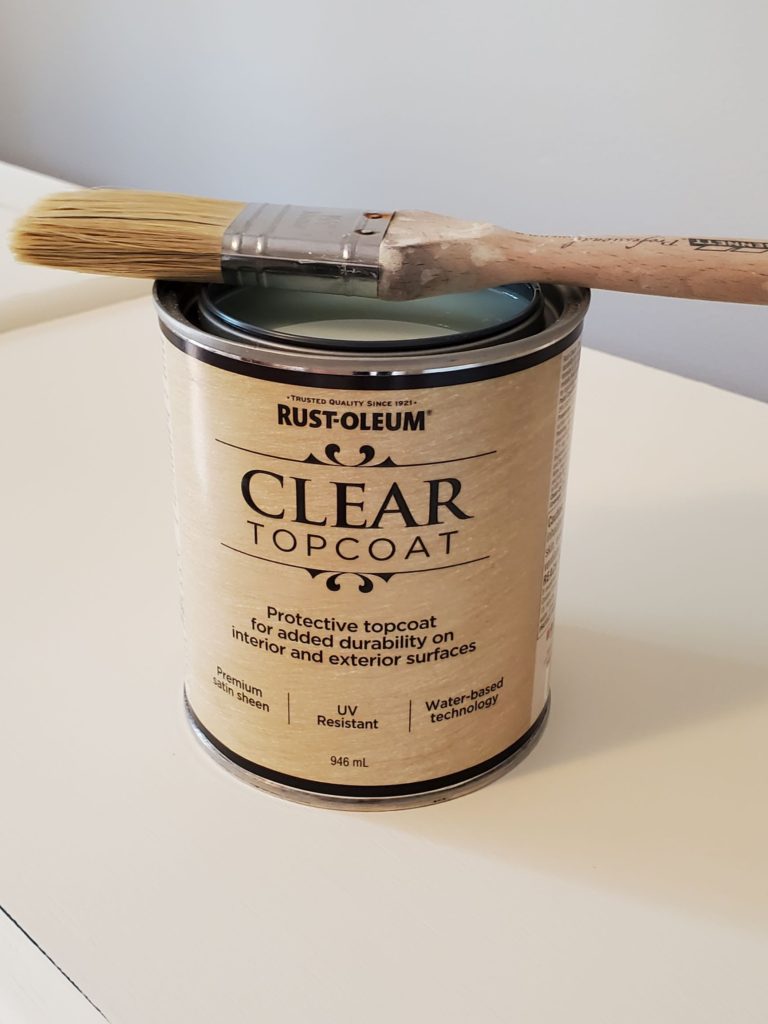
Then I gave the whole piece a protective top coat with Rustoleum’s Clear Top Coat.
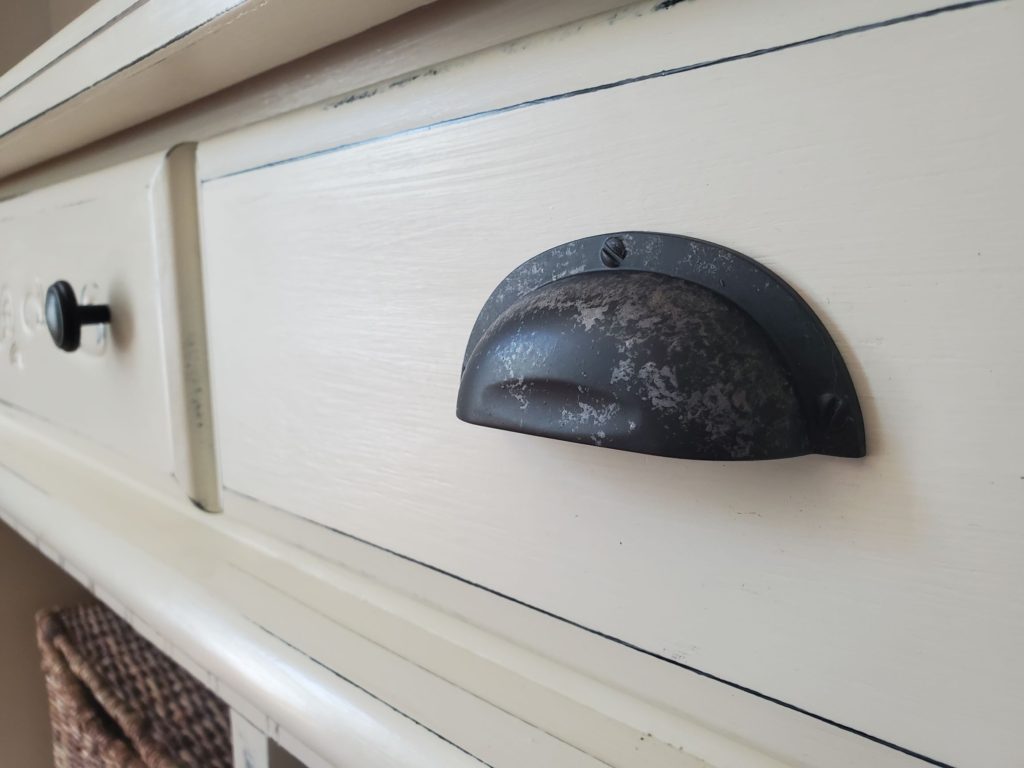
I decided to keep the piece’s original round drawer pulls for the long drawer. However, they were bright gold and I needed them a rustic black. So, I took them outside and gave them a quick spray of Rust-Oleum Painter’s Touch 2X in Black.
I found these drawer pulls at Home Depot for less than $7 each. I thought they would fit in perfectly with the farmhouse feel of the TV stand.
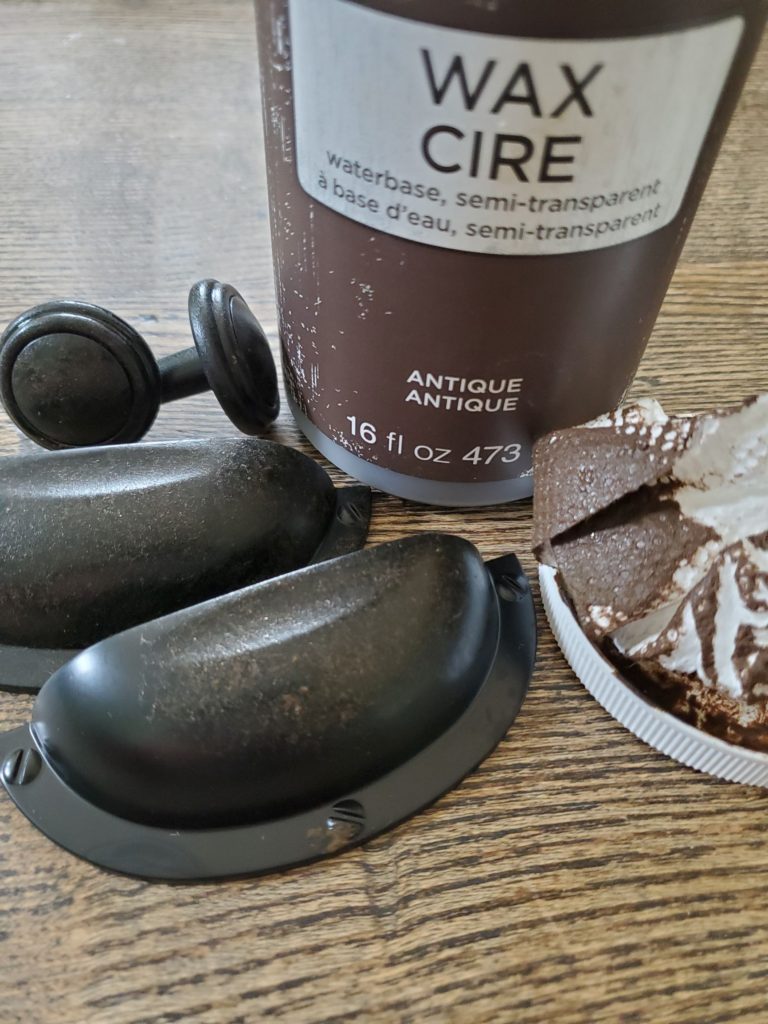
However, they were very shiny black and I wanted them to look a little less new. I dabbed a bit of FolkArt Home Decor Wax Antiquing to each of the 4 drawer pulls. I just used a crumbled up piece of paper towel and this worked wonderfully.
Each were then sprayed with a coat of Rust-Oleum Chalked Protective Top Coat in Matte Clear. This gave n even a more worn, rustic look.
I attached the hardware to the unit, added baskets, and the electronics. The TV was added last and the project was finally complete.
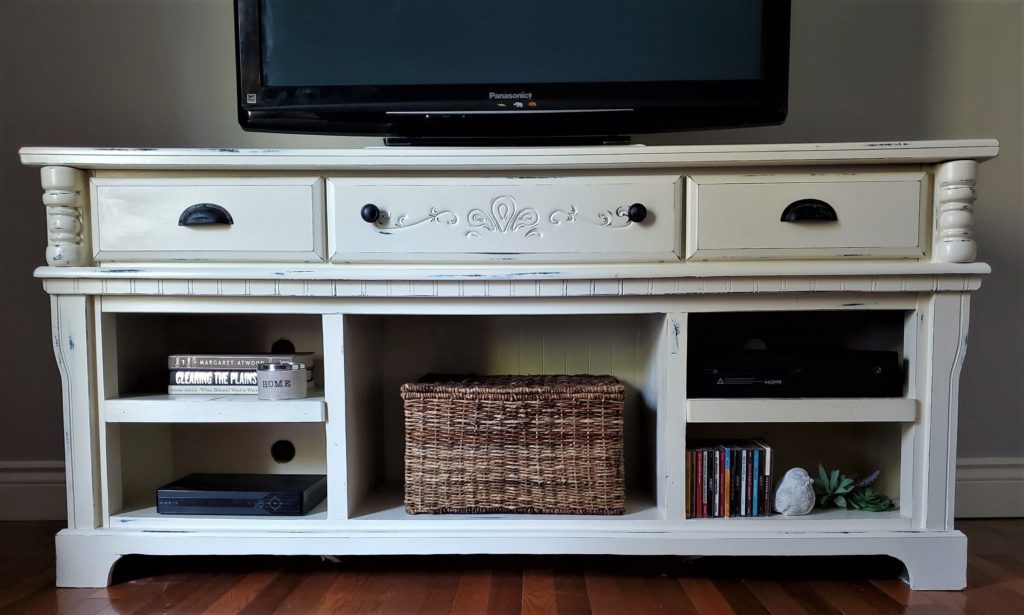
And Voila! A beautiful, high end DIY TV stand that is as unique as it is practical. This project turned out exactly right and I couldn’t be happier.
Jenny’s Finishing Thoughts on This Makeover Dresser Project
I am just crazy about how this makeover dresser project turned out. . There is no way I could have afforded to buy a similar TV stand from a furniture store. It is the perfect combination of rustic farmhouse and modern luxury. I love that it holds all of our electronics without appearing cluttered. There is plenty of room to house all of my candles and a few more odds and ends.
Overall, I couldn’t be happier and I think this makeover dresser is pretty impressive but you tell me what you think. Have you ever used an old dresser as a DIY TV stand? If not, would you ever consider making a DIY TV stand out of an old dresser?
Did you find this post helpful or inspirational? Save This Pin to your Furniture Makeover board on Pinterest


Wow! This a handsome piece of furniture – much more appealing than run of the mill particle board or a pricier piece with a veneer finish. Love your attention to detail and clear instructions. Perfect.
Thank you! So glad you like the piece. It was a lot of fun to makeover.