Stunning DIY Decor Gifts Mother’s Day
With Mother’s Day just around the corner let’s make some gorgeous DIY decor gifts that are simple to make and are guaranteed to please mom.
Mother’s Day Why DIY Is Best
There is just something so incredibly special about giving and receiving DIY gifts. I used to love the little hand made cards, paper crafts and pottery my kids would make me for Mother’s Day. For some reason these homemade, simplistic gifts made from their own tiny hands meant so much more to me than anything money could buy.
The “kids” aren’t so little anymore. And gone are the days of school DIY gifts. Oh, they haven’t forgotten me. Over the past few years they have bought me some nice things and on the rare occasion they have even made me a little something. I love anything and everything they give me because I am always just so thrilled that I am on their thoughts and hearts
However, I would never tell them this but secretly… I still love the homemade gifts. I especially love DIY decor gifts. Because of this I thought it would be fun to ramp up the Mother’s Day DIYing and create beautiful decor gifts that are simple and inexpensive to make, look high end, and are things that I know any mom would be proud to display all year round.
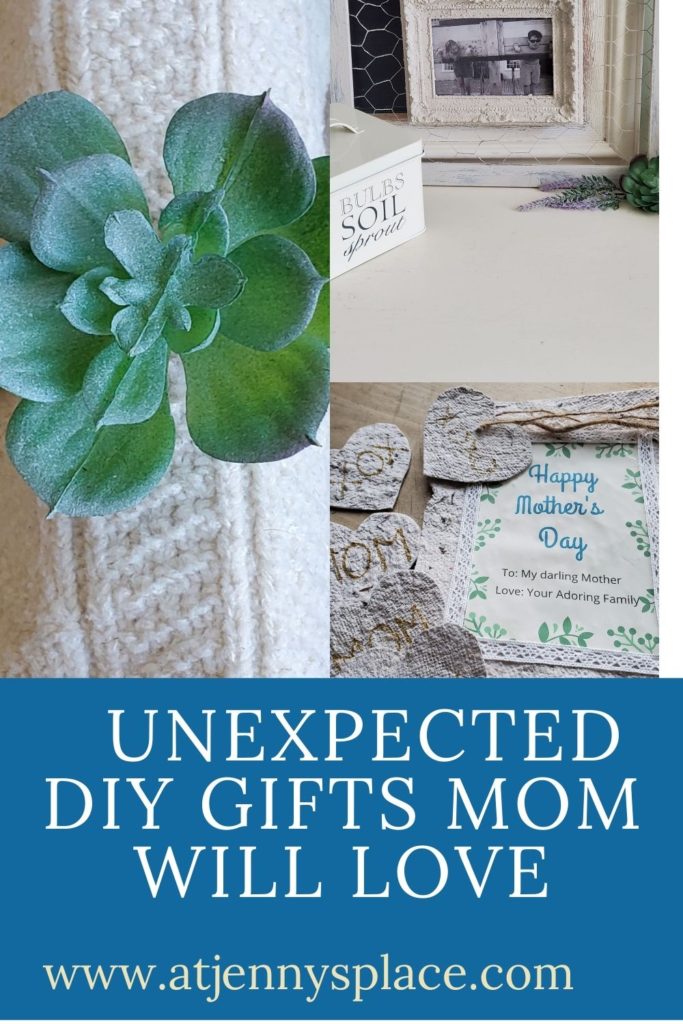
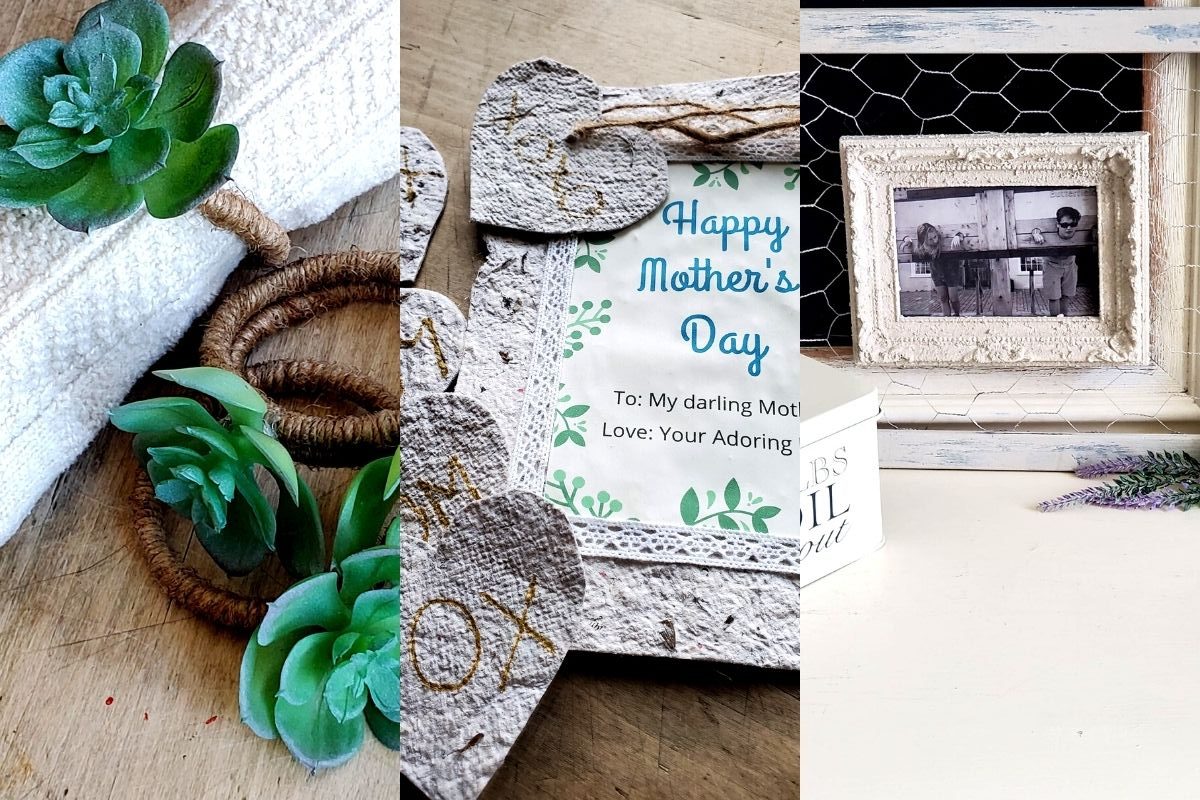
DIY Seed Paper Place Cards and Gift Cards
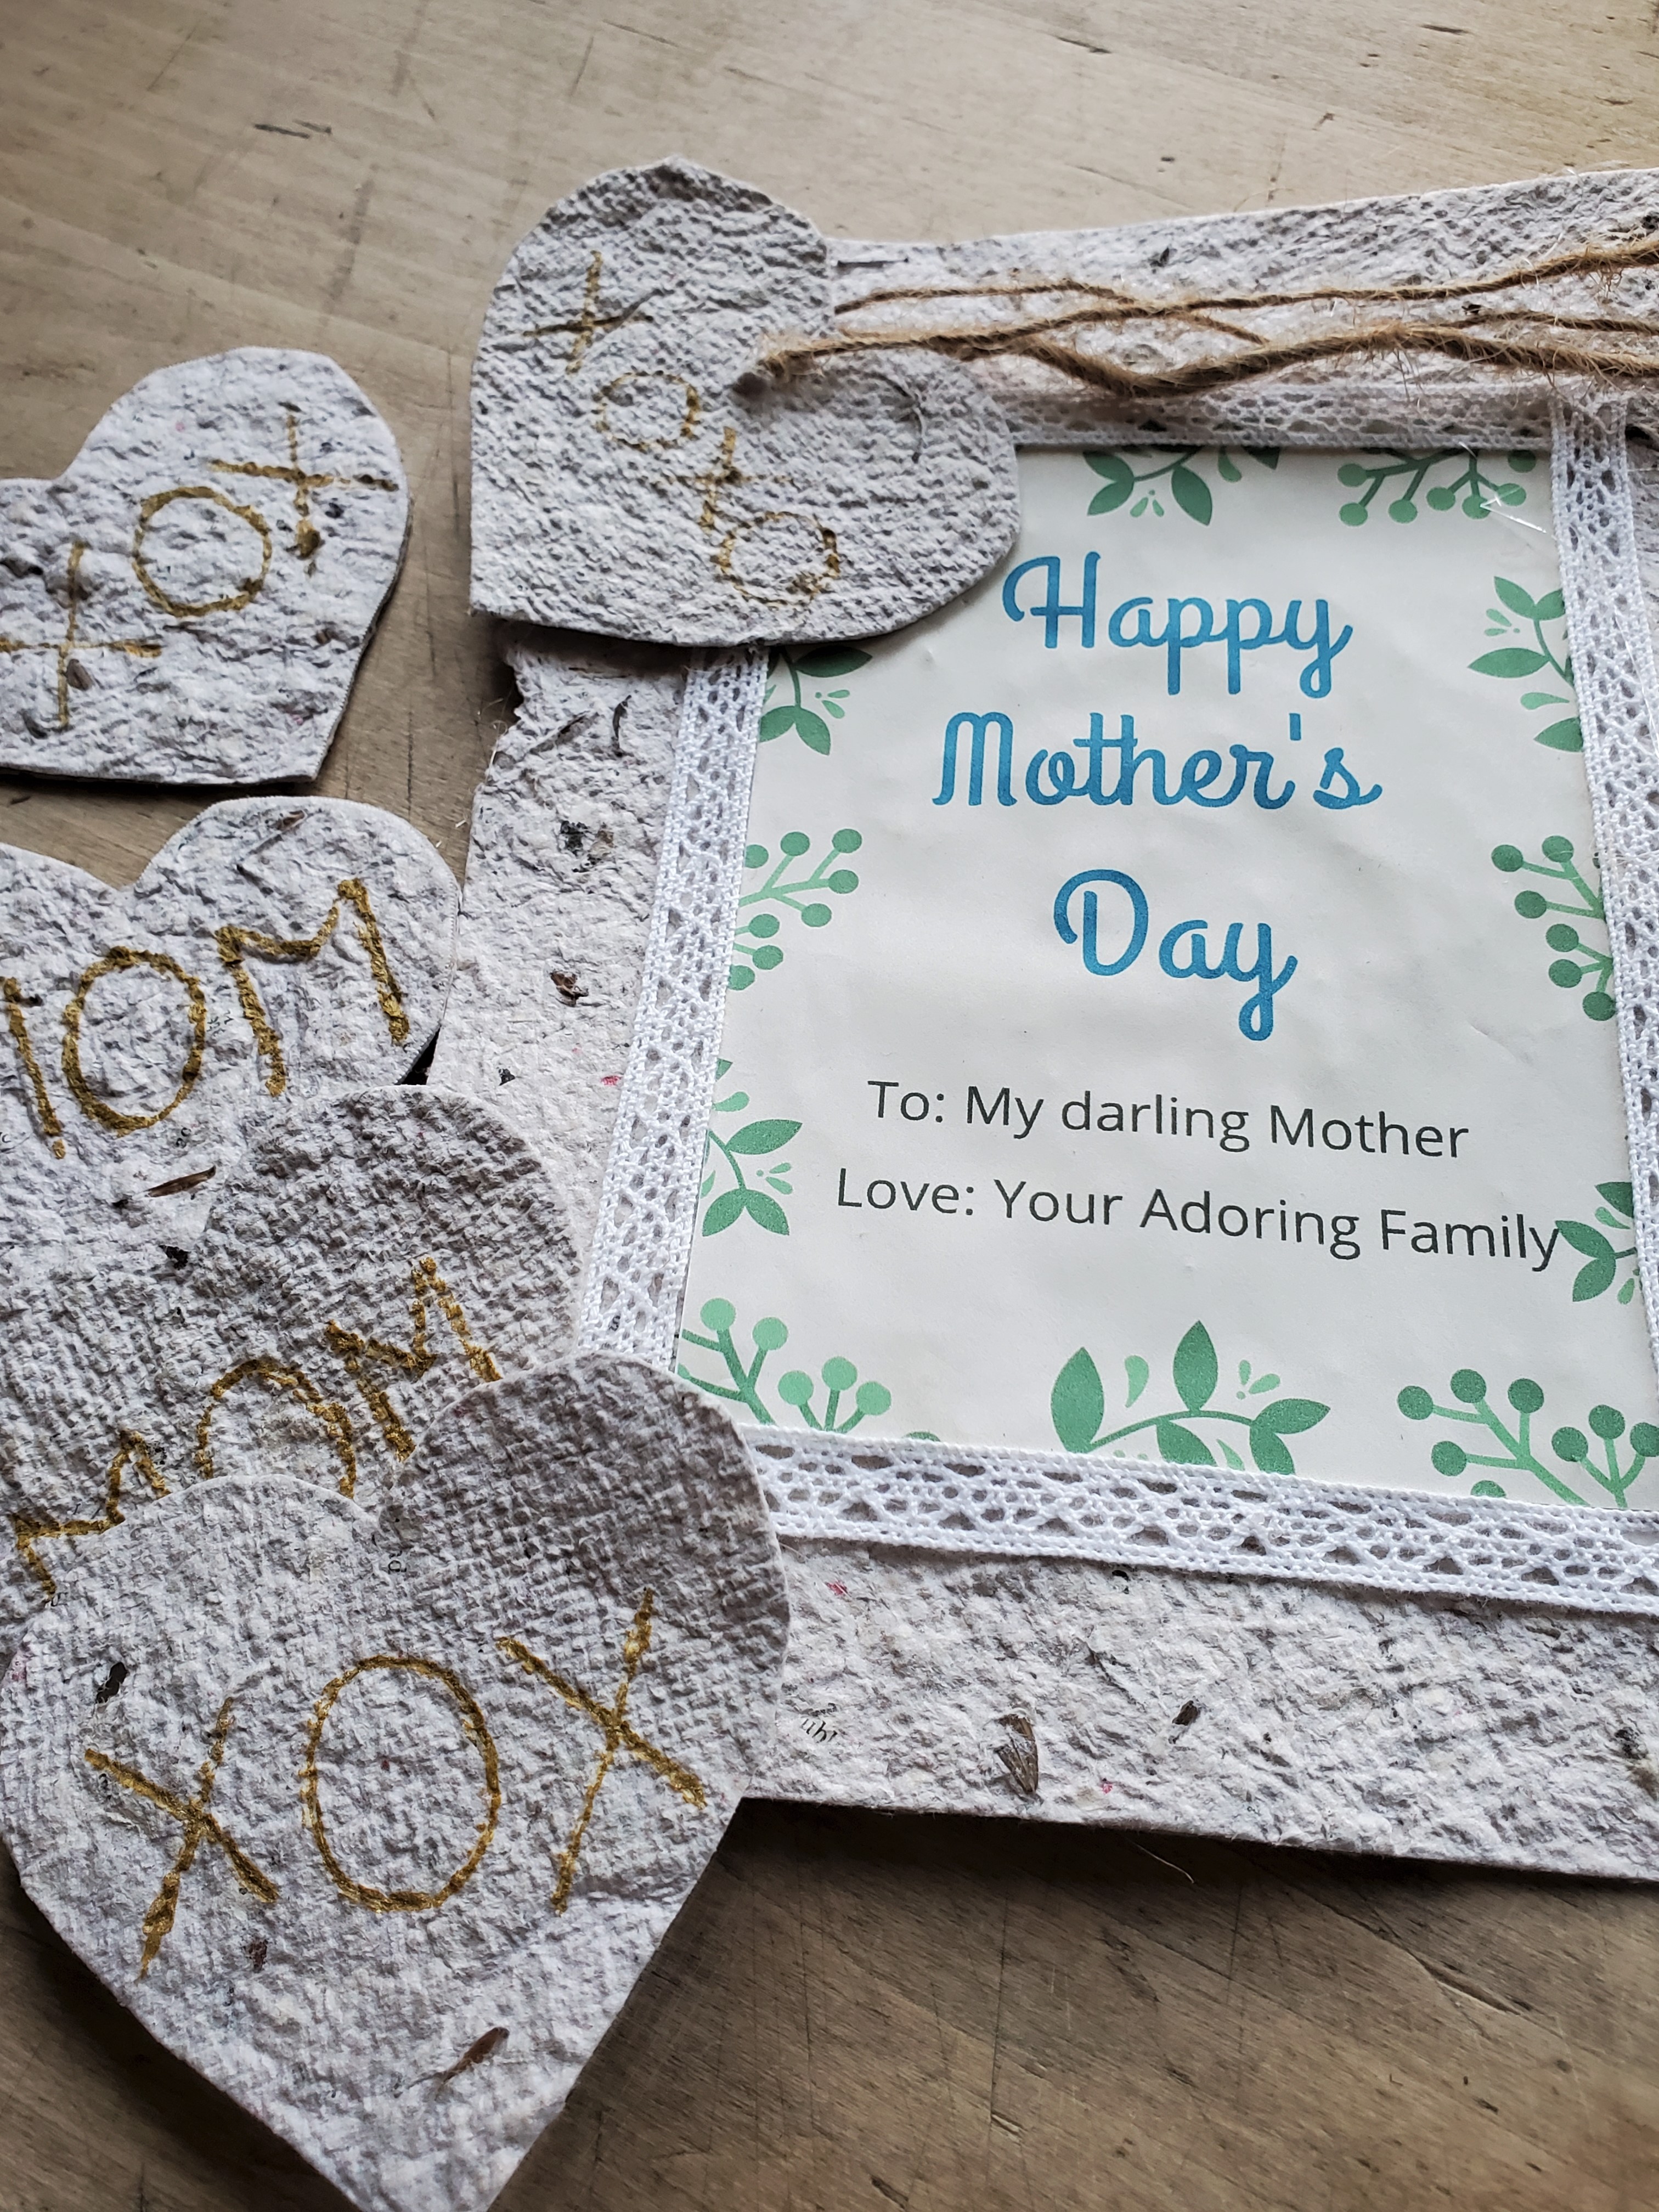
I love the idea of these decor gifts. These seed cut outs look perfect on the Mother’s Day brunch table as scattered decor or as place cards. The gift card is gorgeous and the best part is that both can later be planted in the ground and then Voila! Beautiful blooms.
Supplies You Will Need to Make Seed Paper Place Cards
- Paper Scraps
- Water
- Measuring Cup
- Blender
- Wild Flower Seeds
- Wooden Spoon
- Screened Frame
- Cookie Tray
- Old Tea Towel
- Paper Towels
- Sponge
- Scissors
- Twine, Fabric Ribbons, and Lace
- Hot Glue Gun and Glue Sticks
How To Make Seed Paper Place Cards
Start by spreading a towel over your table or counter. Place a large cookie tray on top of the towel and then your framed screen paper mold over the cookie tray.
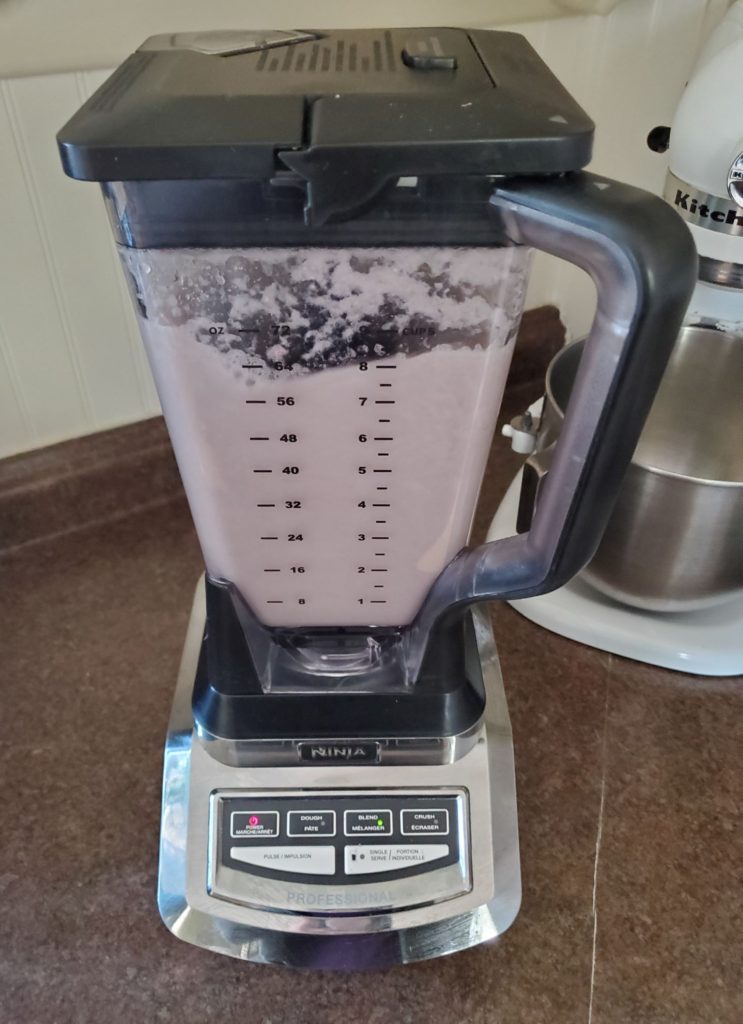
Tear paper into tiny bits. I went with a mix of several different papers in several different colours because it was what I had on hand from my Easter Egg paper projects. Place paper in blender until it’s 3/4 full. Add water until the paper is covered.
TIP: My paper screen is made out of an old door frame and a used screen window from Habitat for Humanity but you could also make a really simple screen out an old screen window, a picture frame, and some staples. I recommend not using a frame that is less than 8″x10″ unless you are purposely going for small pieces of papers.
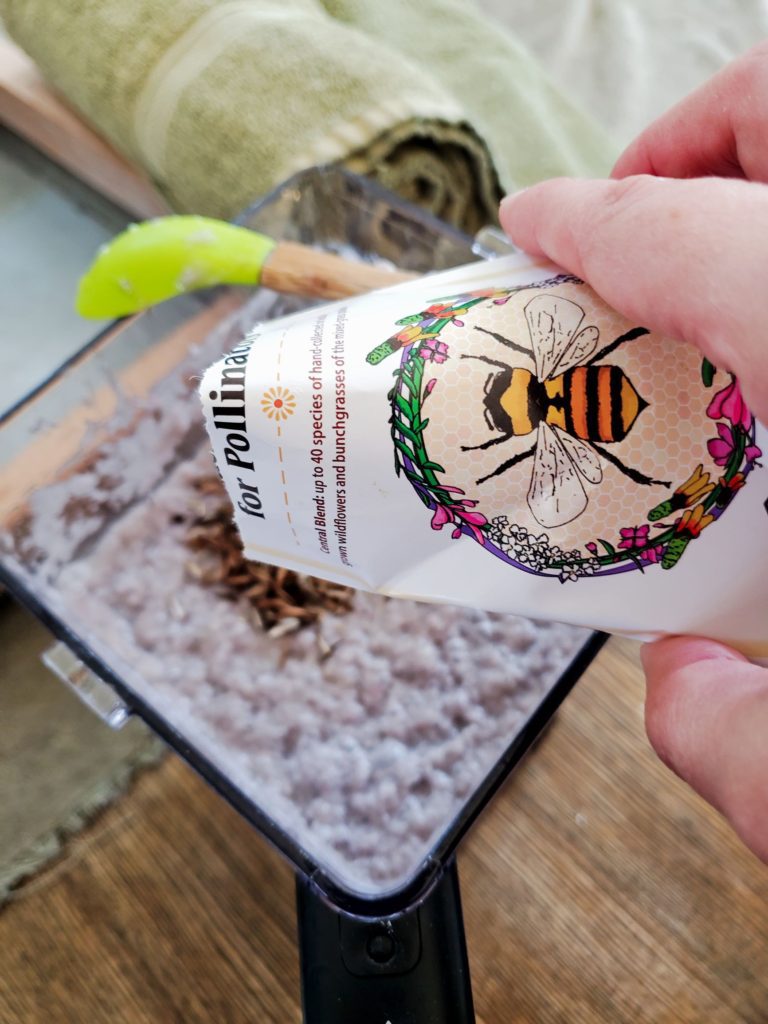
Blend paper with water until it’s fully pulverized and the shredded papers is turned into pulp. It will look like paper soup. Add the packet of flower seeds.
Carefully pour the pulp so that it covers the entire screen.
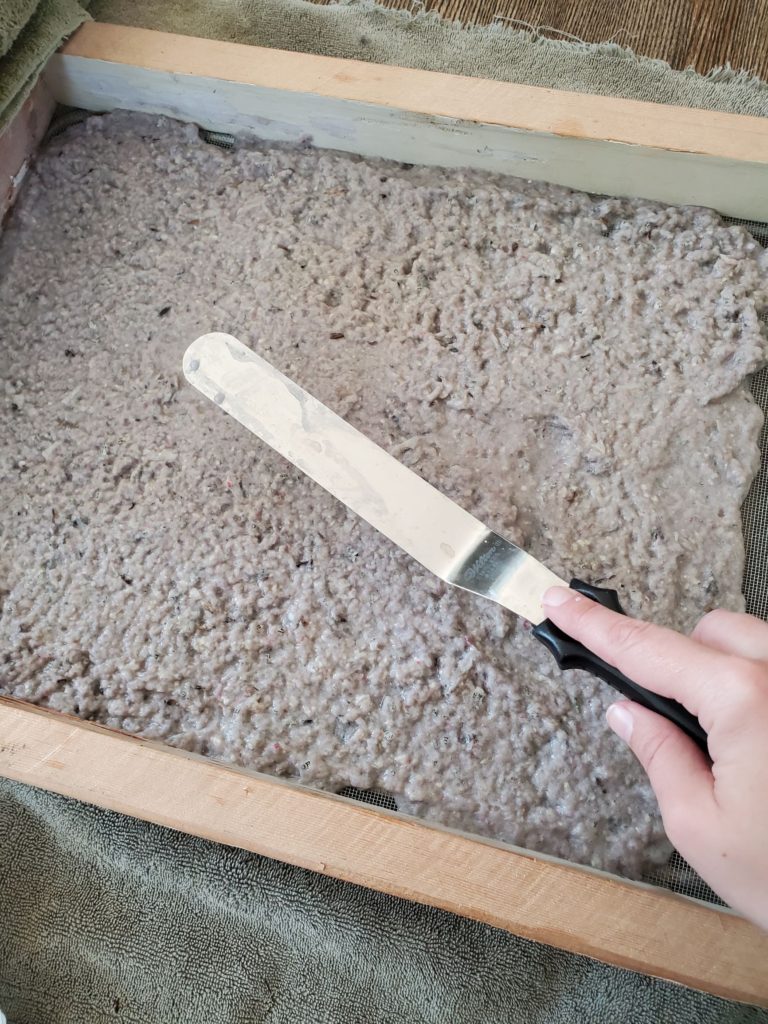
I decided to use my cake decorating spatula to smooth out the top of the pulp. This step is optional. If you don’t have a spatula don’t worry it will still work just fine later on.
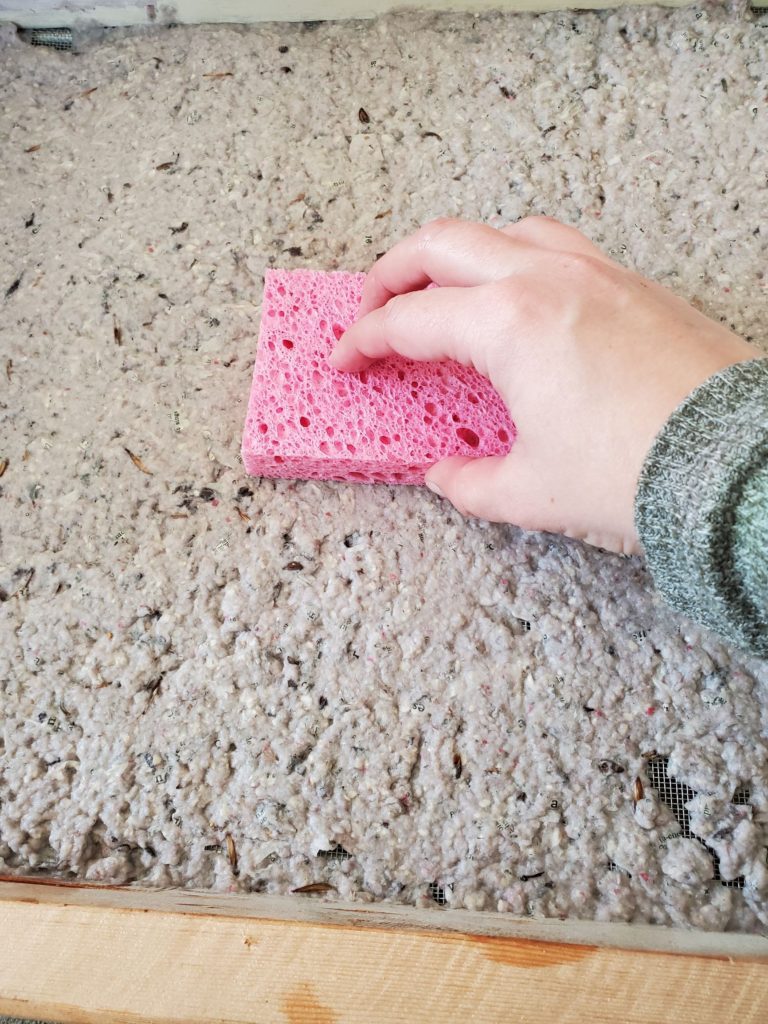
Using a dry sponge gently press down all over the wet pulp, drawing up as much moisture as possible. Squeeze the water out of the sponge as you go. Once satisfied that enough moisture has been removed cover the pulp with paper towel.
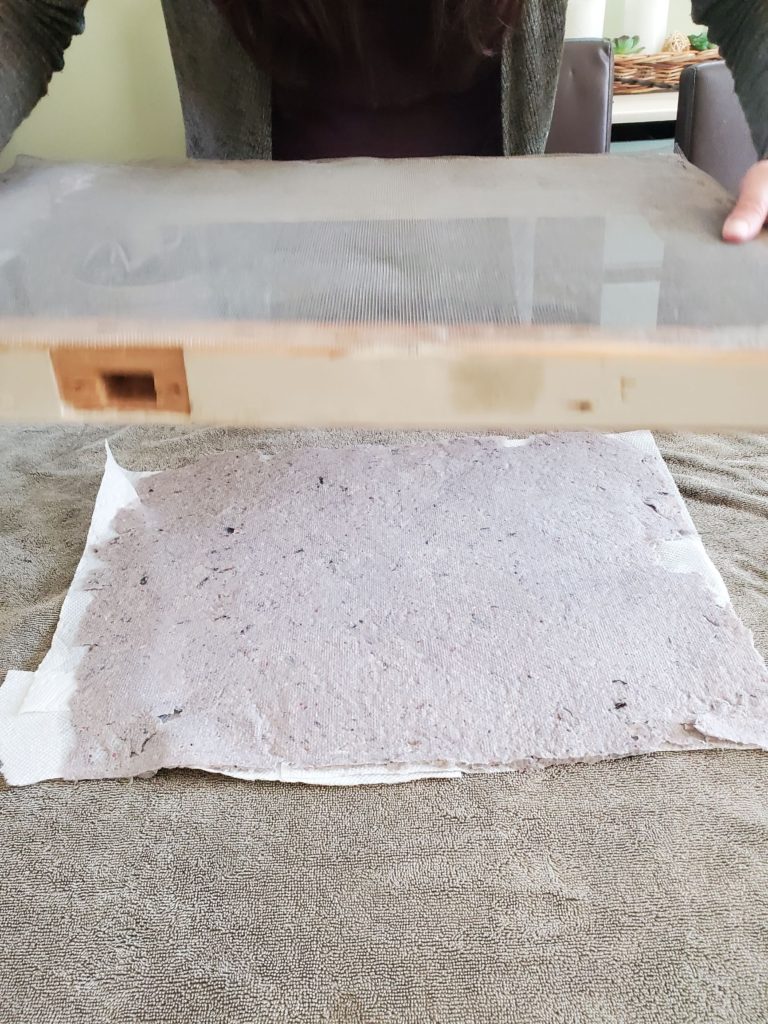
Once the pulp has had time to dry a bit flip the screen over onto the towel. Cover the top of the pulp with another layer of paper towel.
Using a rolling pin, gently but firmly roll the pin over the paper towel covered pulp so that the paper will come out nice and flat. Remove top layer of paper towel an let pulp dry overnight.
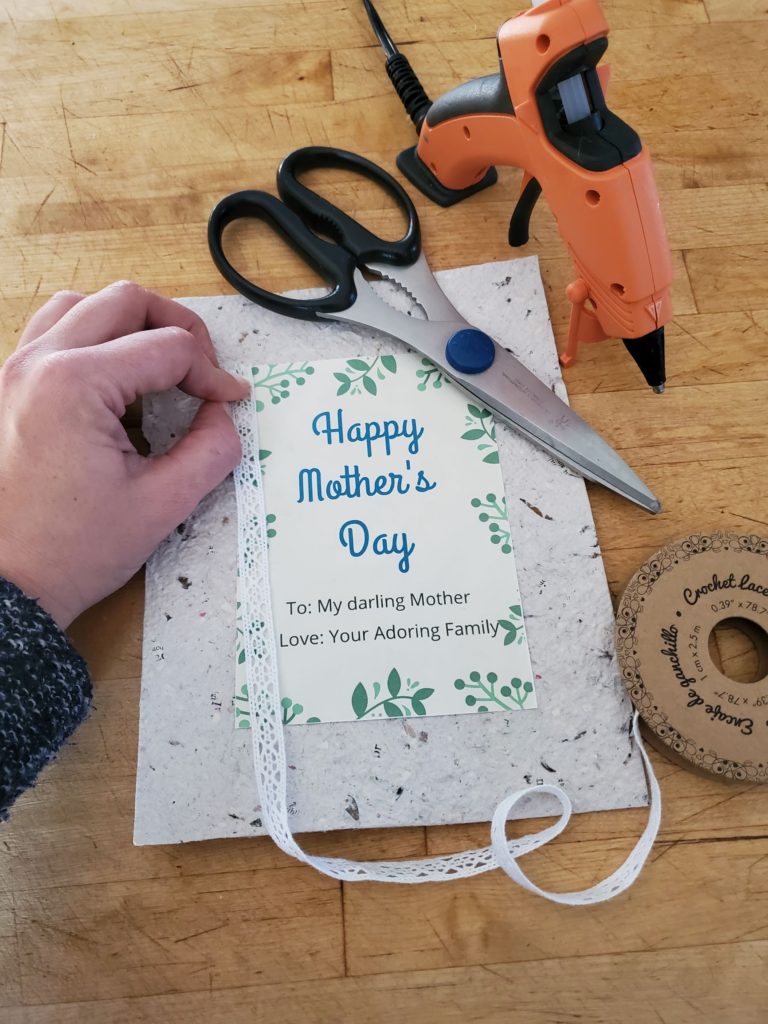
Have fun decorating the seed card. Print out a loving message on printer paper. Use ribbon, twine, fabric bows to embellish the seed card. I used the twine at the top of the card to attach a seed paper heart to it. I just love how homemade and natural this card looks and I am a huge fan of the idea that Mom will think of us when she sees her summer blooms!
DIY Succulent Napkin Rings
These succulent napkin rings are a Crate & Barrel dupe and I am just in love with them. Crate and Barrel was asking $9 for each napkin ring ($54 for a set of 6) and I was able to make all 6 for just $7.25. I managed to find all the supplies I needed for this project at the DollarTree. So super cheap and super cute
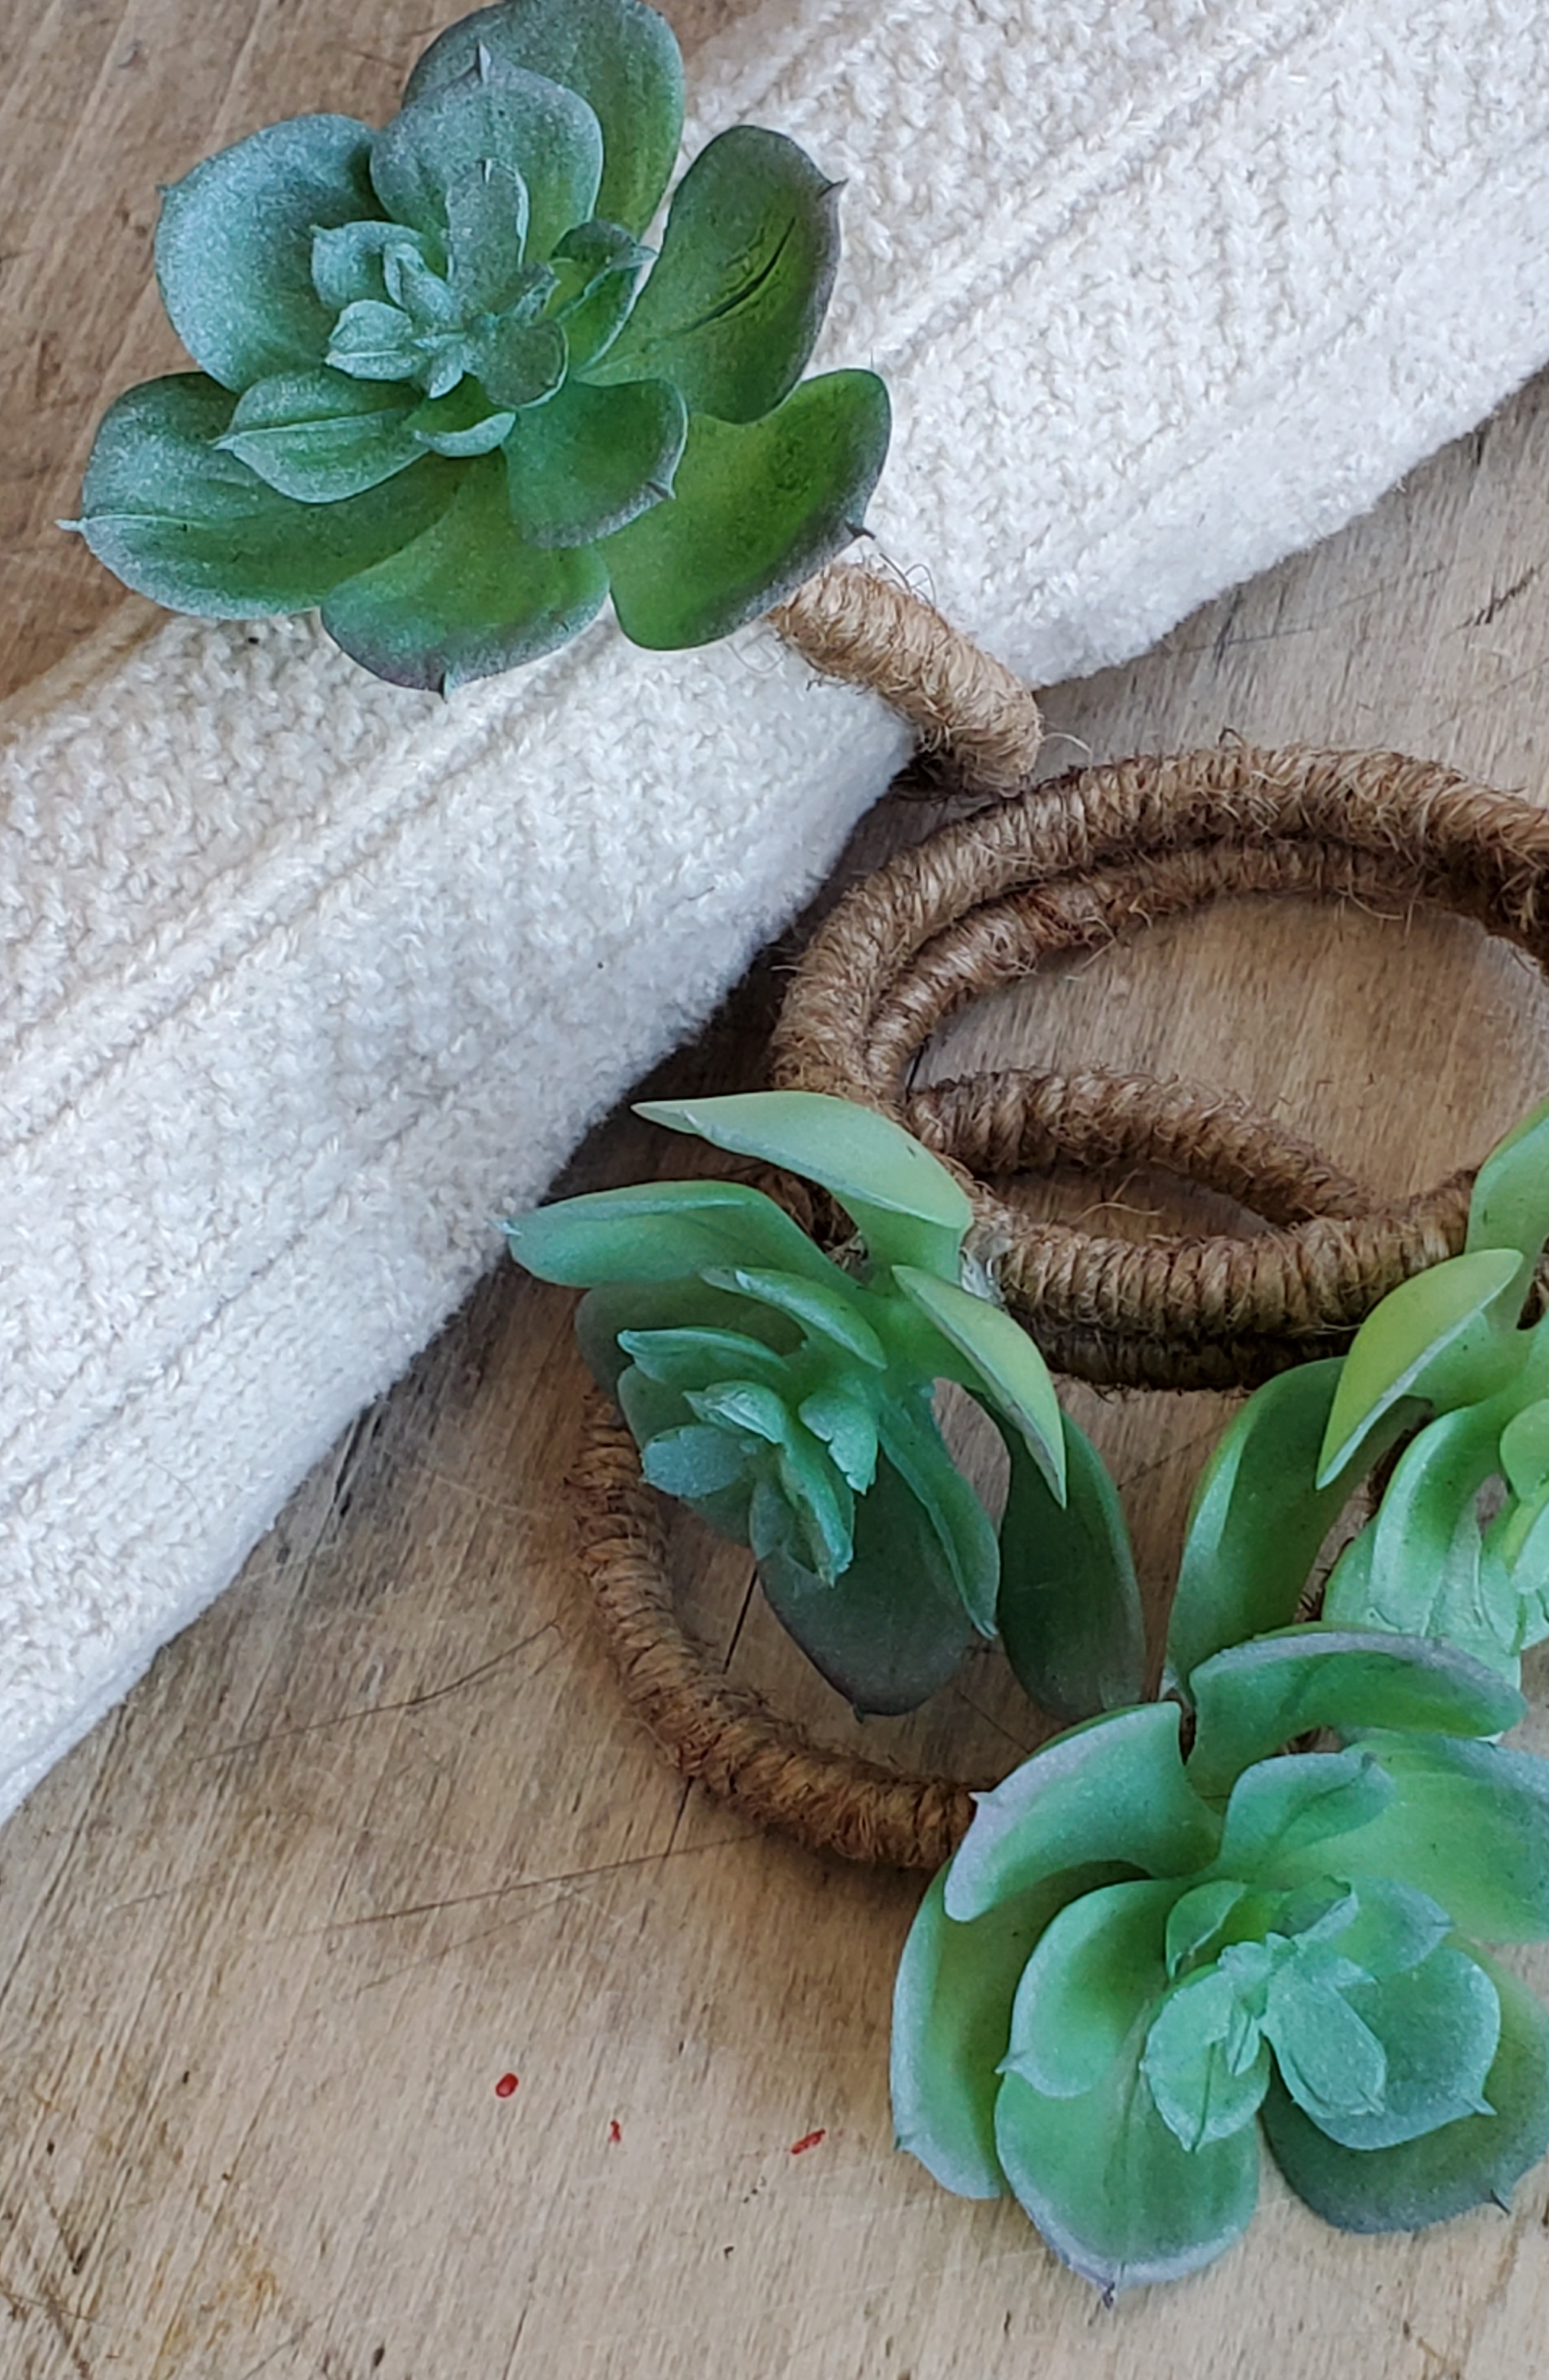
These napkin rings are fabulous. I plan to use these all spring and summer long. They are full of natural charm and I just love the way the soft succulent petals are juxtaposed by the rough twine.
I don’t know about you but I think these succulent napkin rings are the creme of the crop when it comes to DIY decor gifts.
Supplies You Will Need to Make Succulent Napkin Ring
- 6 Metal Paper Fastener Rings
- Twine
- Scissors
- 6 Faux Succulents from Dollar Tree
- Hot glue and Hot Glue Sticks
How to Make Succulent Napkin Rings
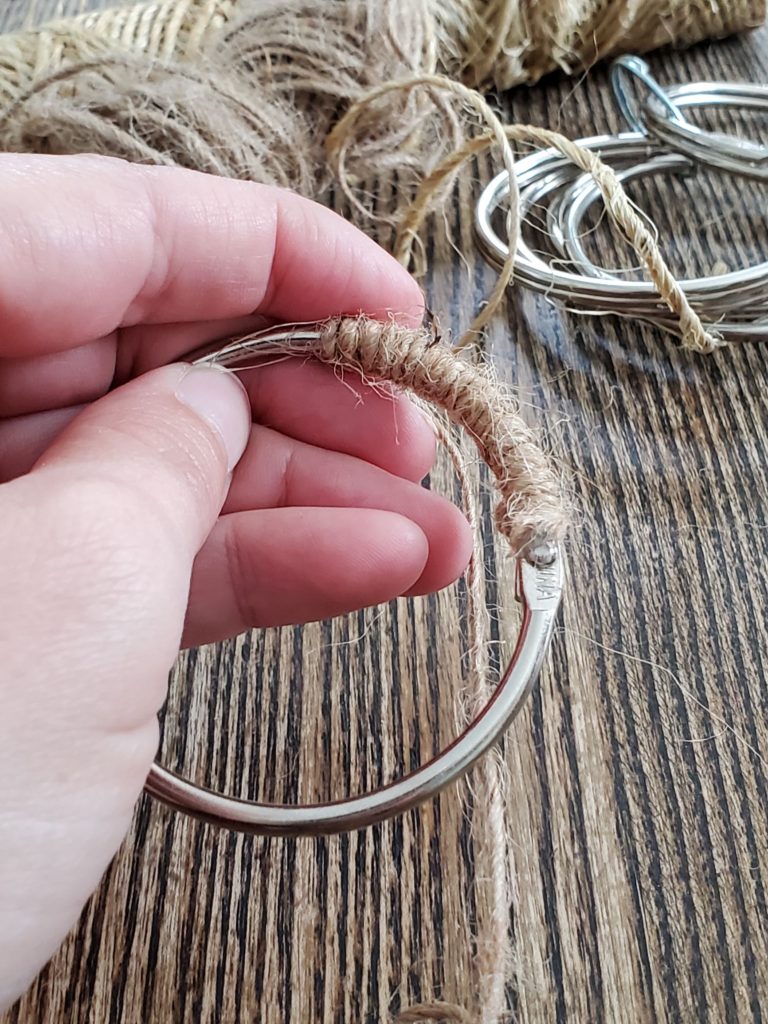
Snap paper fasteners shut. Attach the twine to the top of the metal fastener with a dot of hot glue. Wrap the twine around and around the fastener until you reach where you started. Fasten the twine end down with another dollop of hot glue.
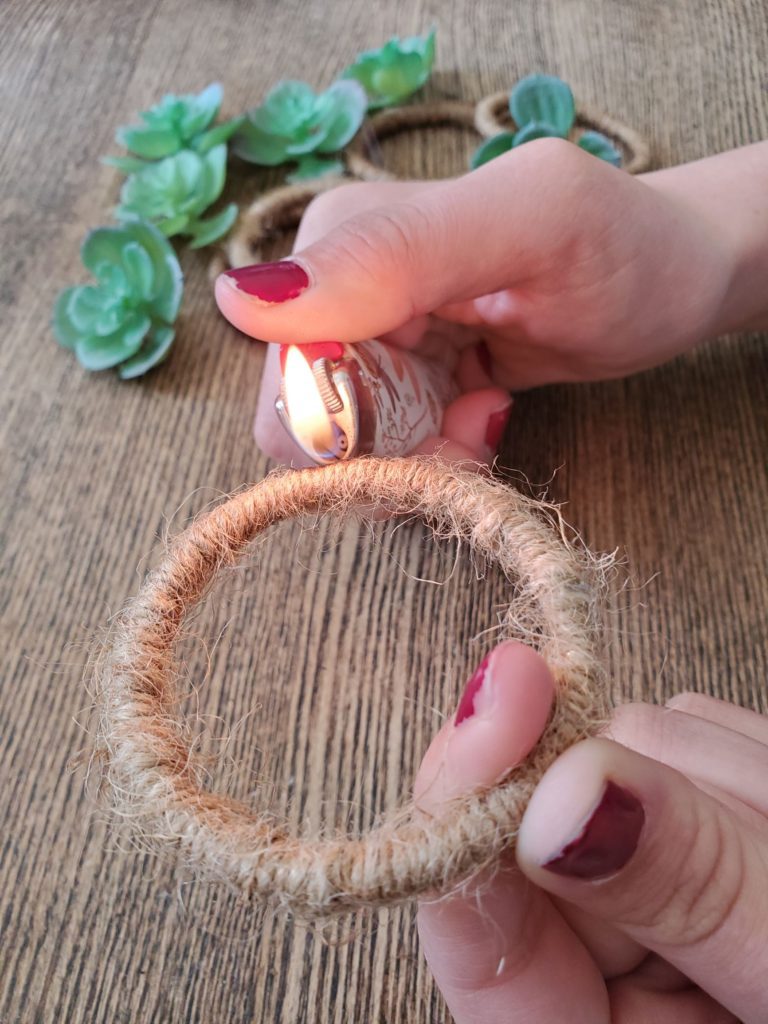
I found the twine to be a bit too fuzzy for my liking. This is a completely optional step. Using a lighter sear the fuzz off the twine rings. Trust me – fun! (My teenage daughter helped me with this step. Crazy kid!)
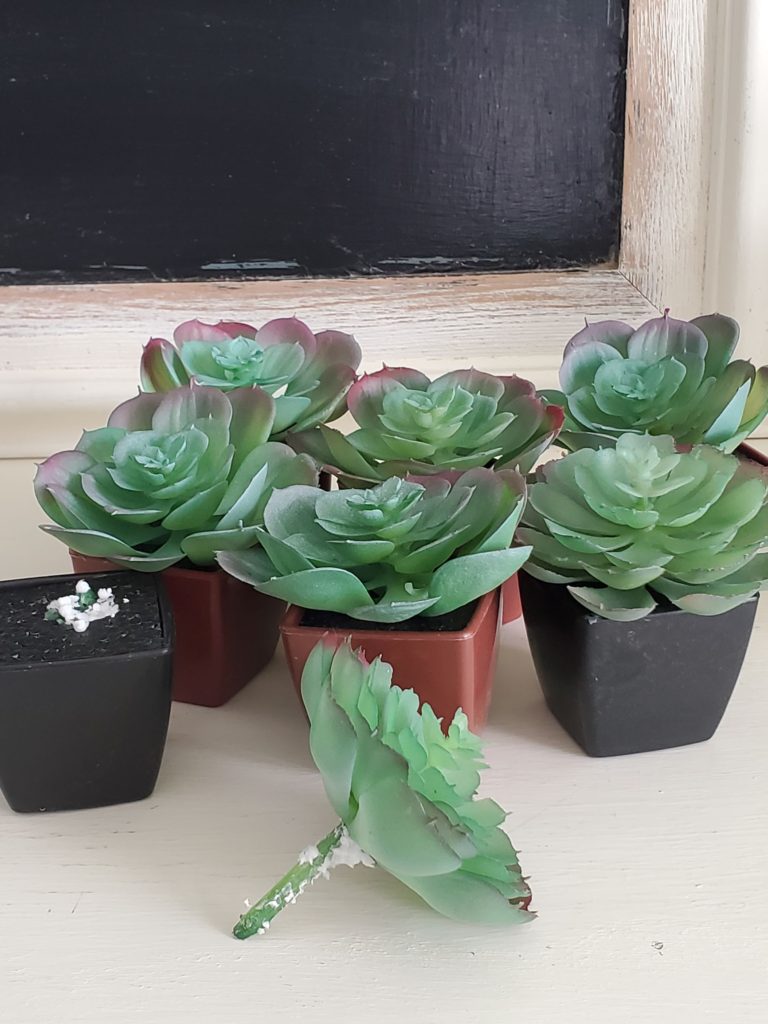
The succulents I decided to use were the ones from Dollar tree that that came in the individual pots and had light pink tips. (The pink shows up darker in these pictures.)
If you can find these great but if not no biggie. DollarTree has a ton of other succulent options. And if you are unsuccessful finding them at Dollar Tree try Michael’s. They also have a ton of beautiful succulent options or Ikea has a trio of succulents that would work.
Cut the succulents down a bit so that their size works well with the clip. I found that cutting 2 layers away worked the best.
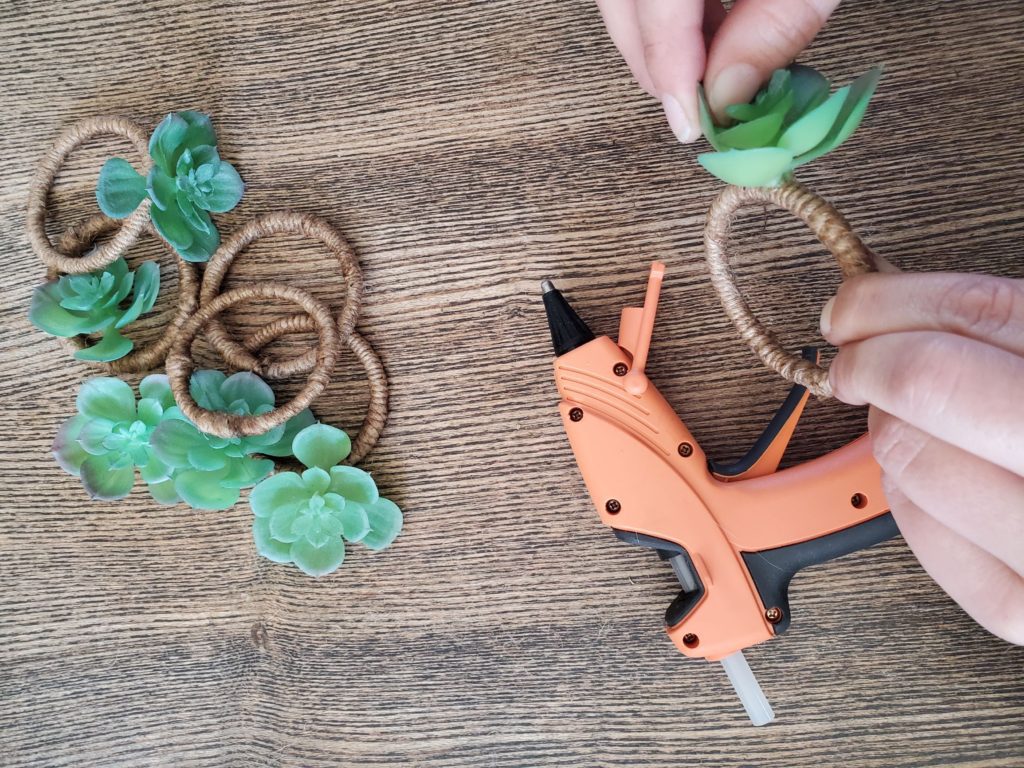
Hot glue the succulent to the top of the twine wrapped ring and press down in place so that the succulent stays in place.
Slide the cloth napkin through the succulent napkin ring. And Voila! A stunning piece of DIY decor that will look amazing at any table setting.
DIY Rustic Stone Picture Frame
This project was the outcome of unlimited curiosity and too much paint. While working on another project whee I was experimenting with paint textures I again made the mistake of mixing too much paint. Not wanting to waste my textured paint I decided to try it out on other things.
One of the things I tried it out on was this ornate dollar store picture frame. Combining it with the metal hard texture of chicken wire and the soft and worn appearance of the outer frame made for the perfect rustic look. Not sure if this picture frame or the succulent napkin rings rank the highest as my favourite DIY decor gifts.
Supplies You Will Need to Make Stone Picture Frames
- 4″x 6″ Ornate Picture Frame with Backing
- 8″ x 10″ Picture Frame with No Backing
- Acrylic or Chalk Paint
- Epsom Salt
- Plastic Spoon
- Chalk Paint in colour of your choice
- Chicken Wire
- Chip or Stenciling Brush
- Scissors
- Hot Glue Gun and Glue Sticks
- Photo of Your Choice
How to Make Rustic Stone Picture Frame
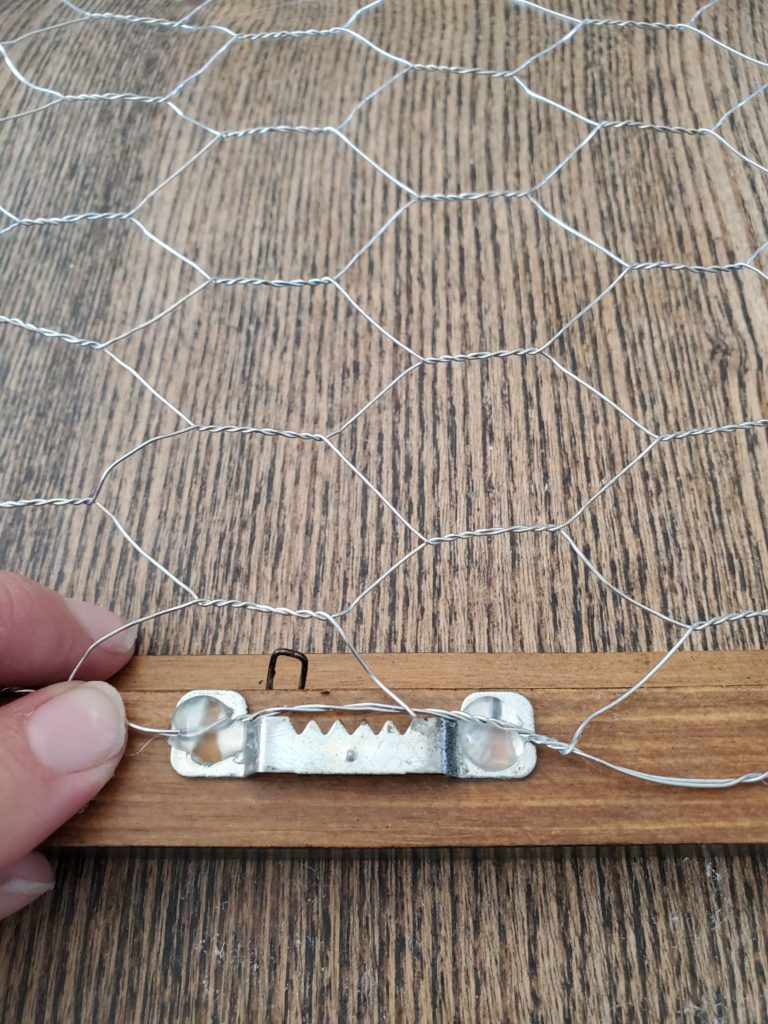
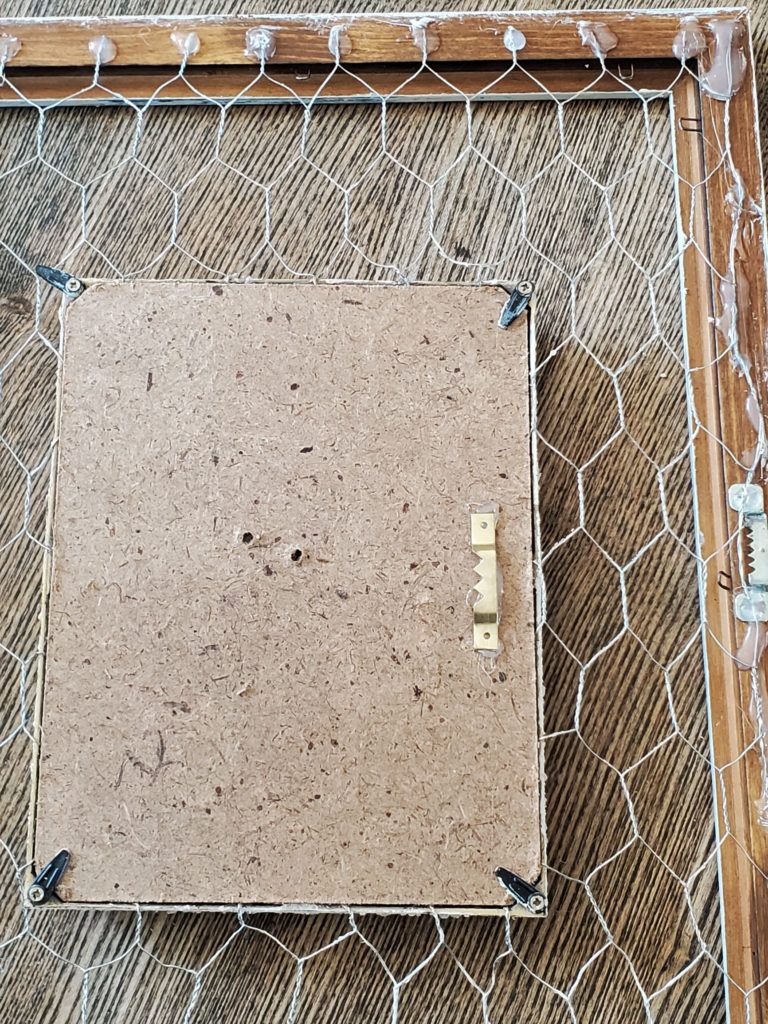
Cut chicken wire so that it covers the whole back of the larger 8″x10″ picture frame. Hot glue the cut chicken wire ends to the back of the frame. This steps takes a bit of patience but isn’t difficult.
I wanted the option of being able to hang this picture frame so I made sure to hot glue the chicken wire around and underneath the saw tooth picture hanger.
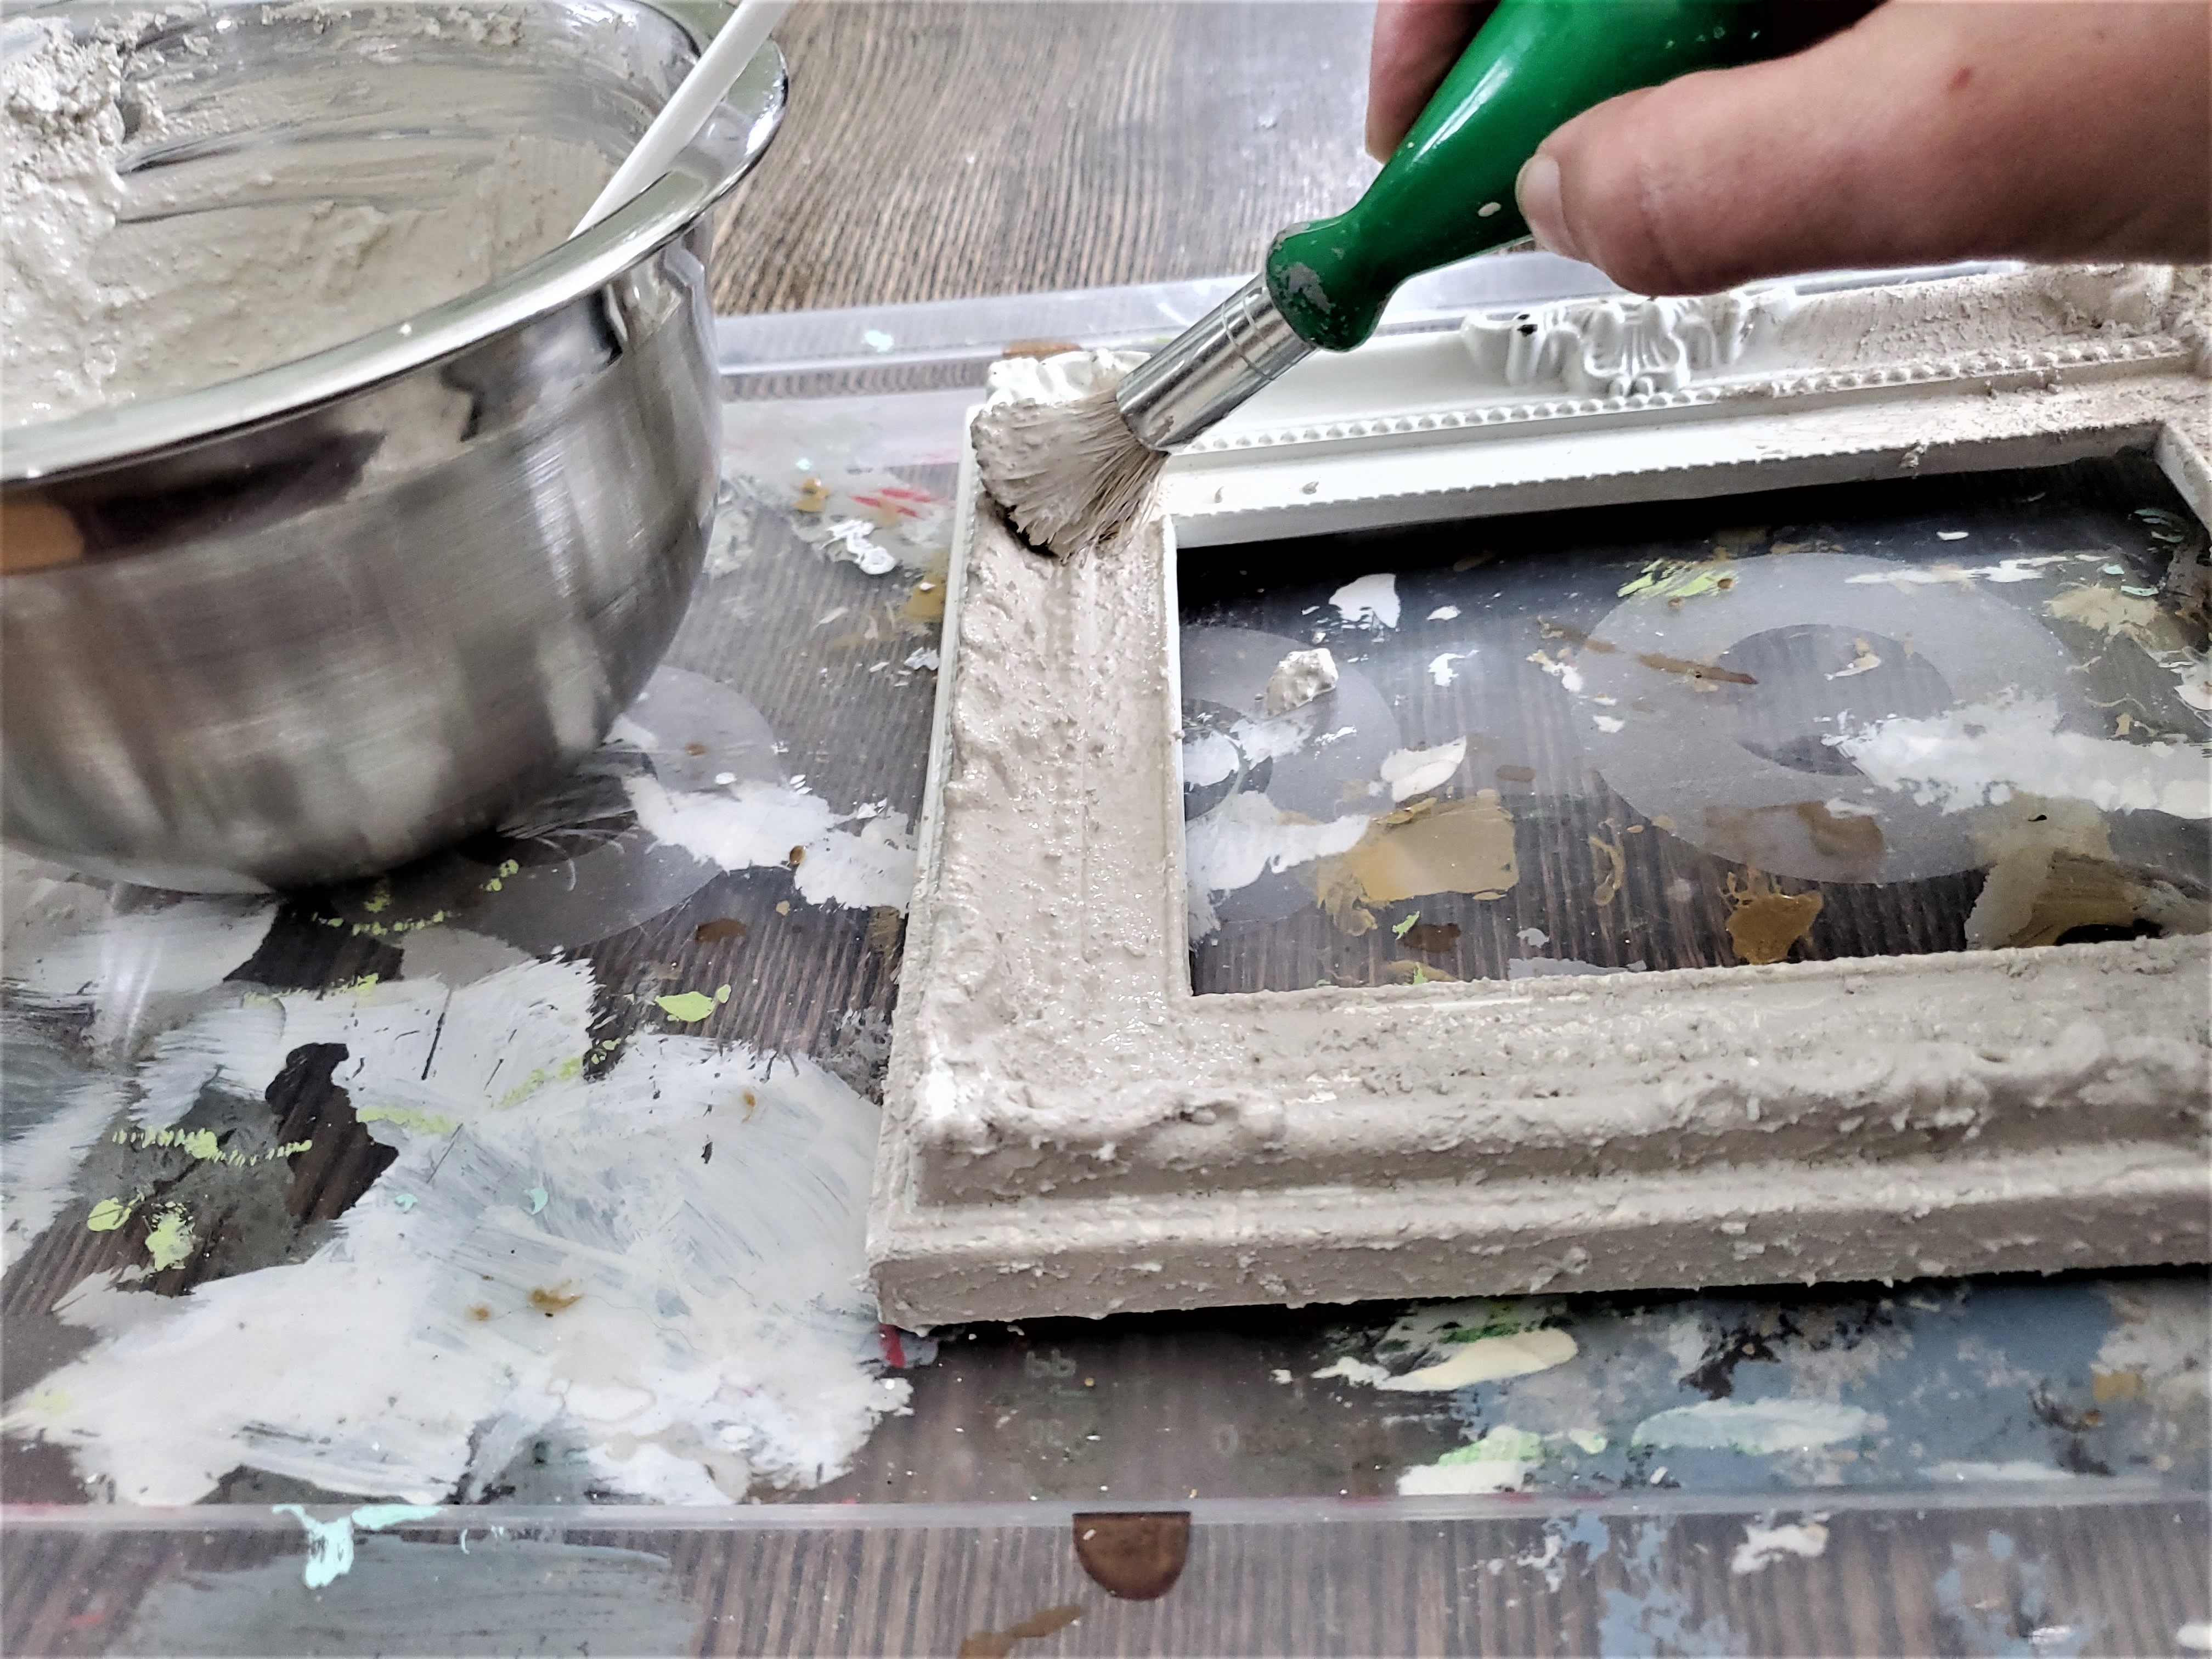
Mix 1 part paint to 2 parts Epsom salt. You want the consistency to look like it’s chunky peanut butter.
Use this to paint the 4″ x 6″ ornate frame. I found one coat was enough but then I did start with a cream coloured frame. If your frame is a darker colour you may want to paint it white or cream first or alternatively you could apply 2+ coats of the Epson salt paint. Let dry.
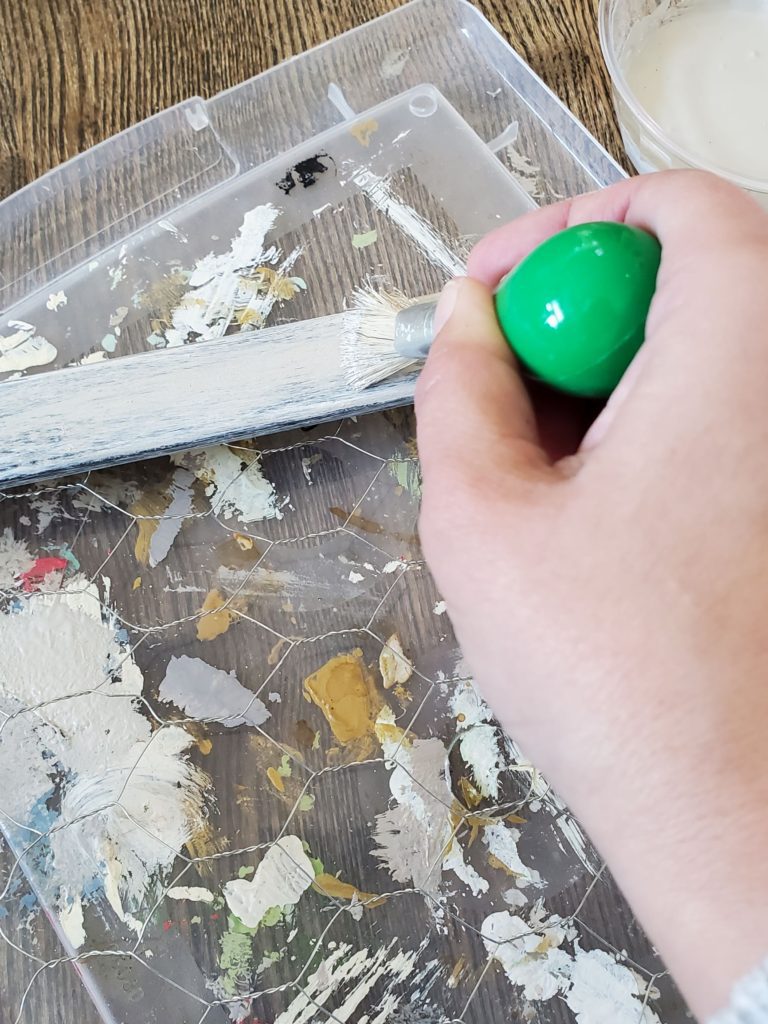
Use the chip brush (I used a stenciling brush because I was being lazy and I didn’t want to go search for another brush.) and distress the 8″ x 10″ picture frame by applying light and random stokes with the dry brush.
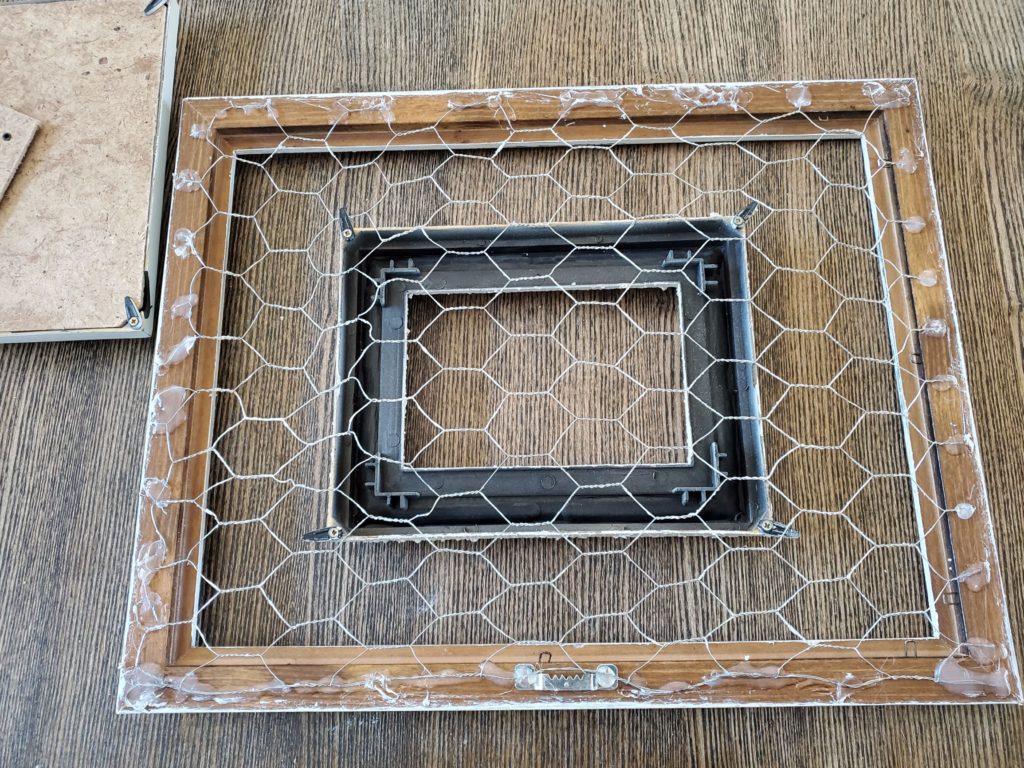
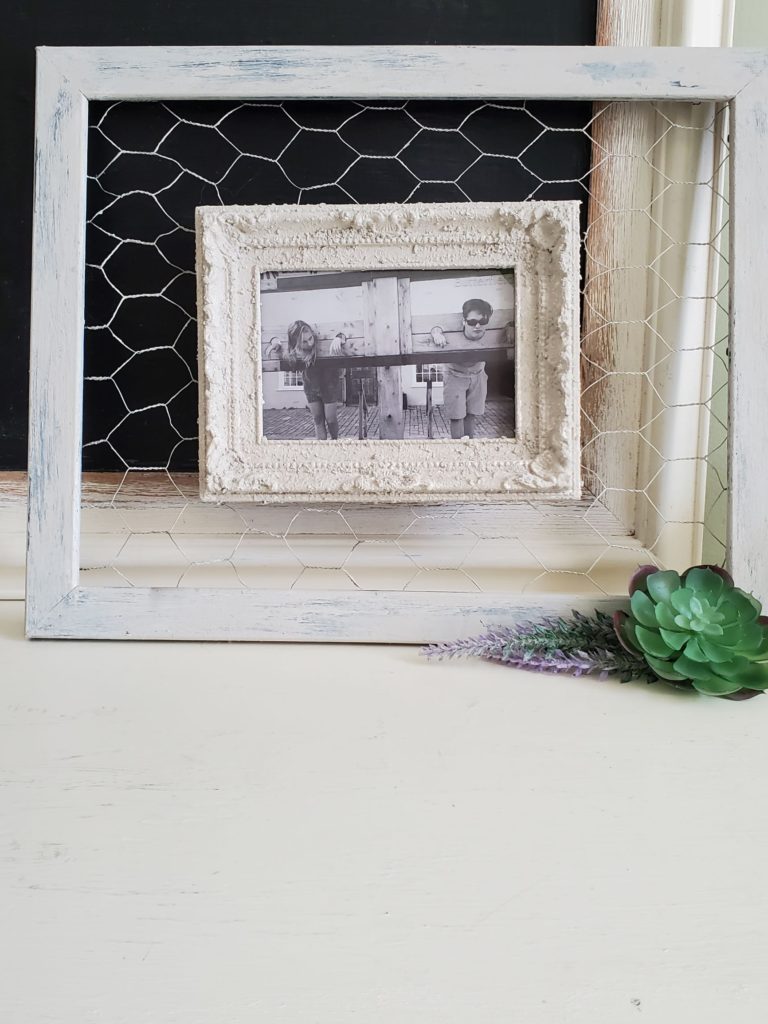
Lay the ornate frame on a flat surface, and then making sure that the ornate frame is at the center of the 8″ x 10″ frame, lay the 8″x10″ frame over top.
Carefully cut the chicken wire down so that the middle part behind the ornate frame is gone. This is so that you can change the picture in the ornate faux stone frame when you want to.
When cutting the chicken wire leave a small amount of overhang so that it can be attached to the inside of the ornate frame. *See pictures below
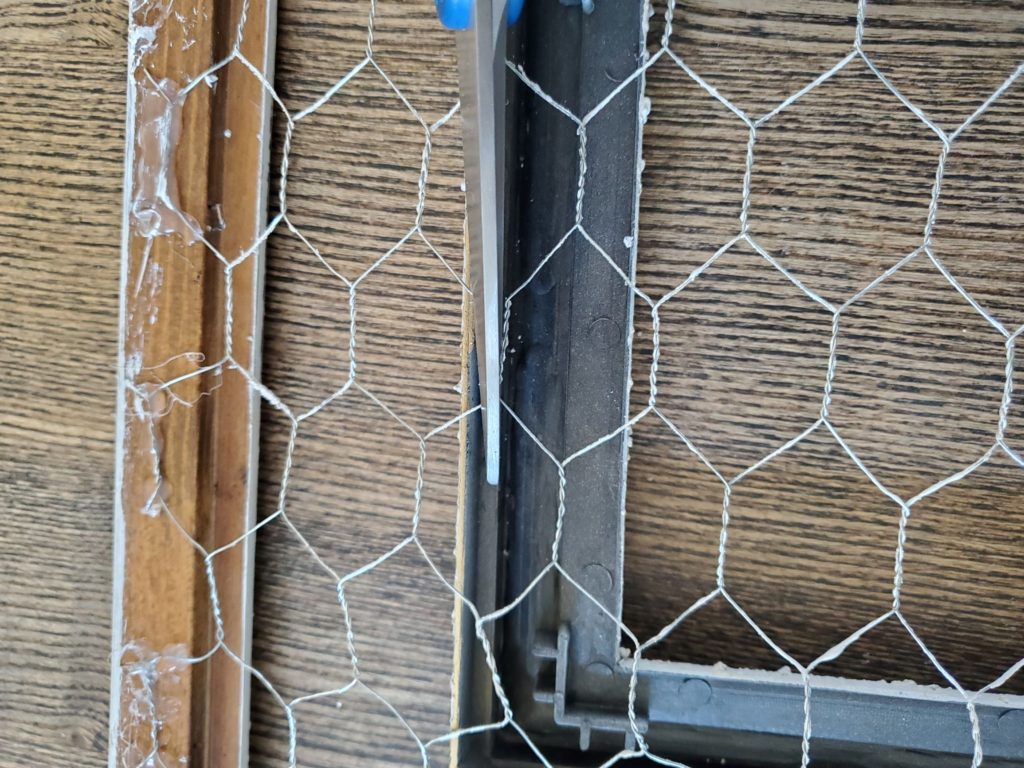
Using the overhang of the cut wire tips hot glue the chicken wire to the inside edge of the frame. Hold the wire down so that it is making contact with the frame and keep in place until the hot glue is dry.
PRO TIP: Hot gluing the chicken wire tips to the frame can be a bit … hot. Personally, I no longer have any feeling in my finger tips but if you still have sensation in your finger tips you may want to invest in a set of hot glue finger protectors from the dollar store.
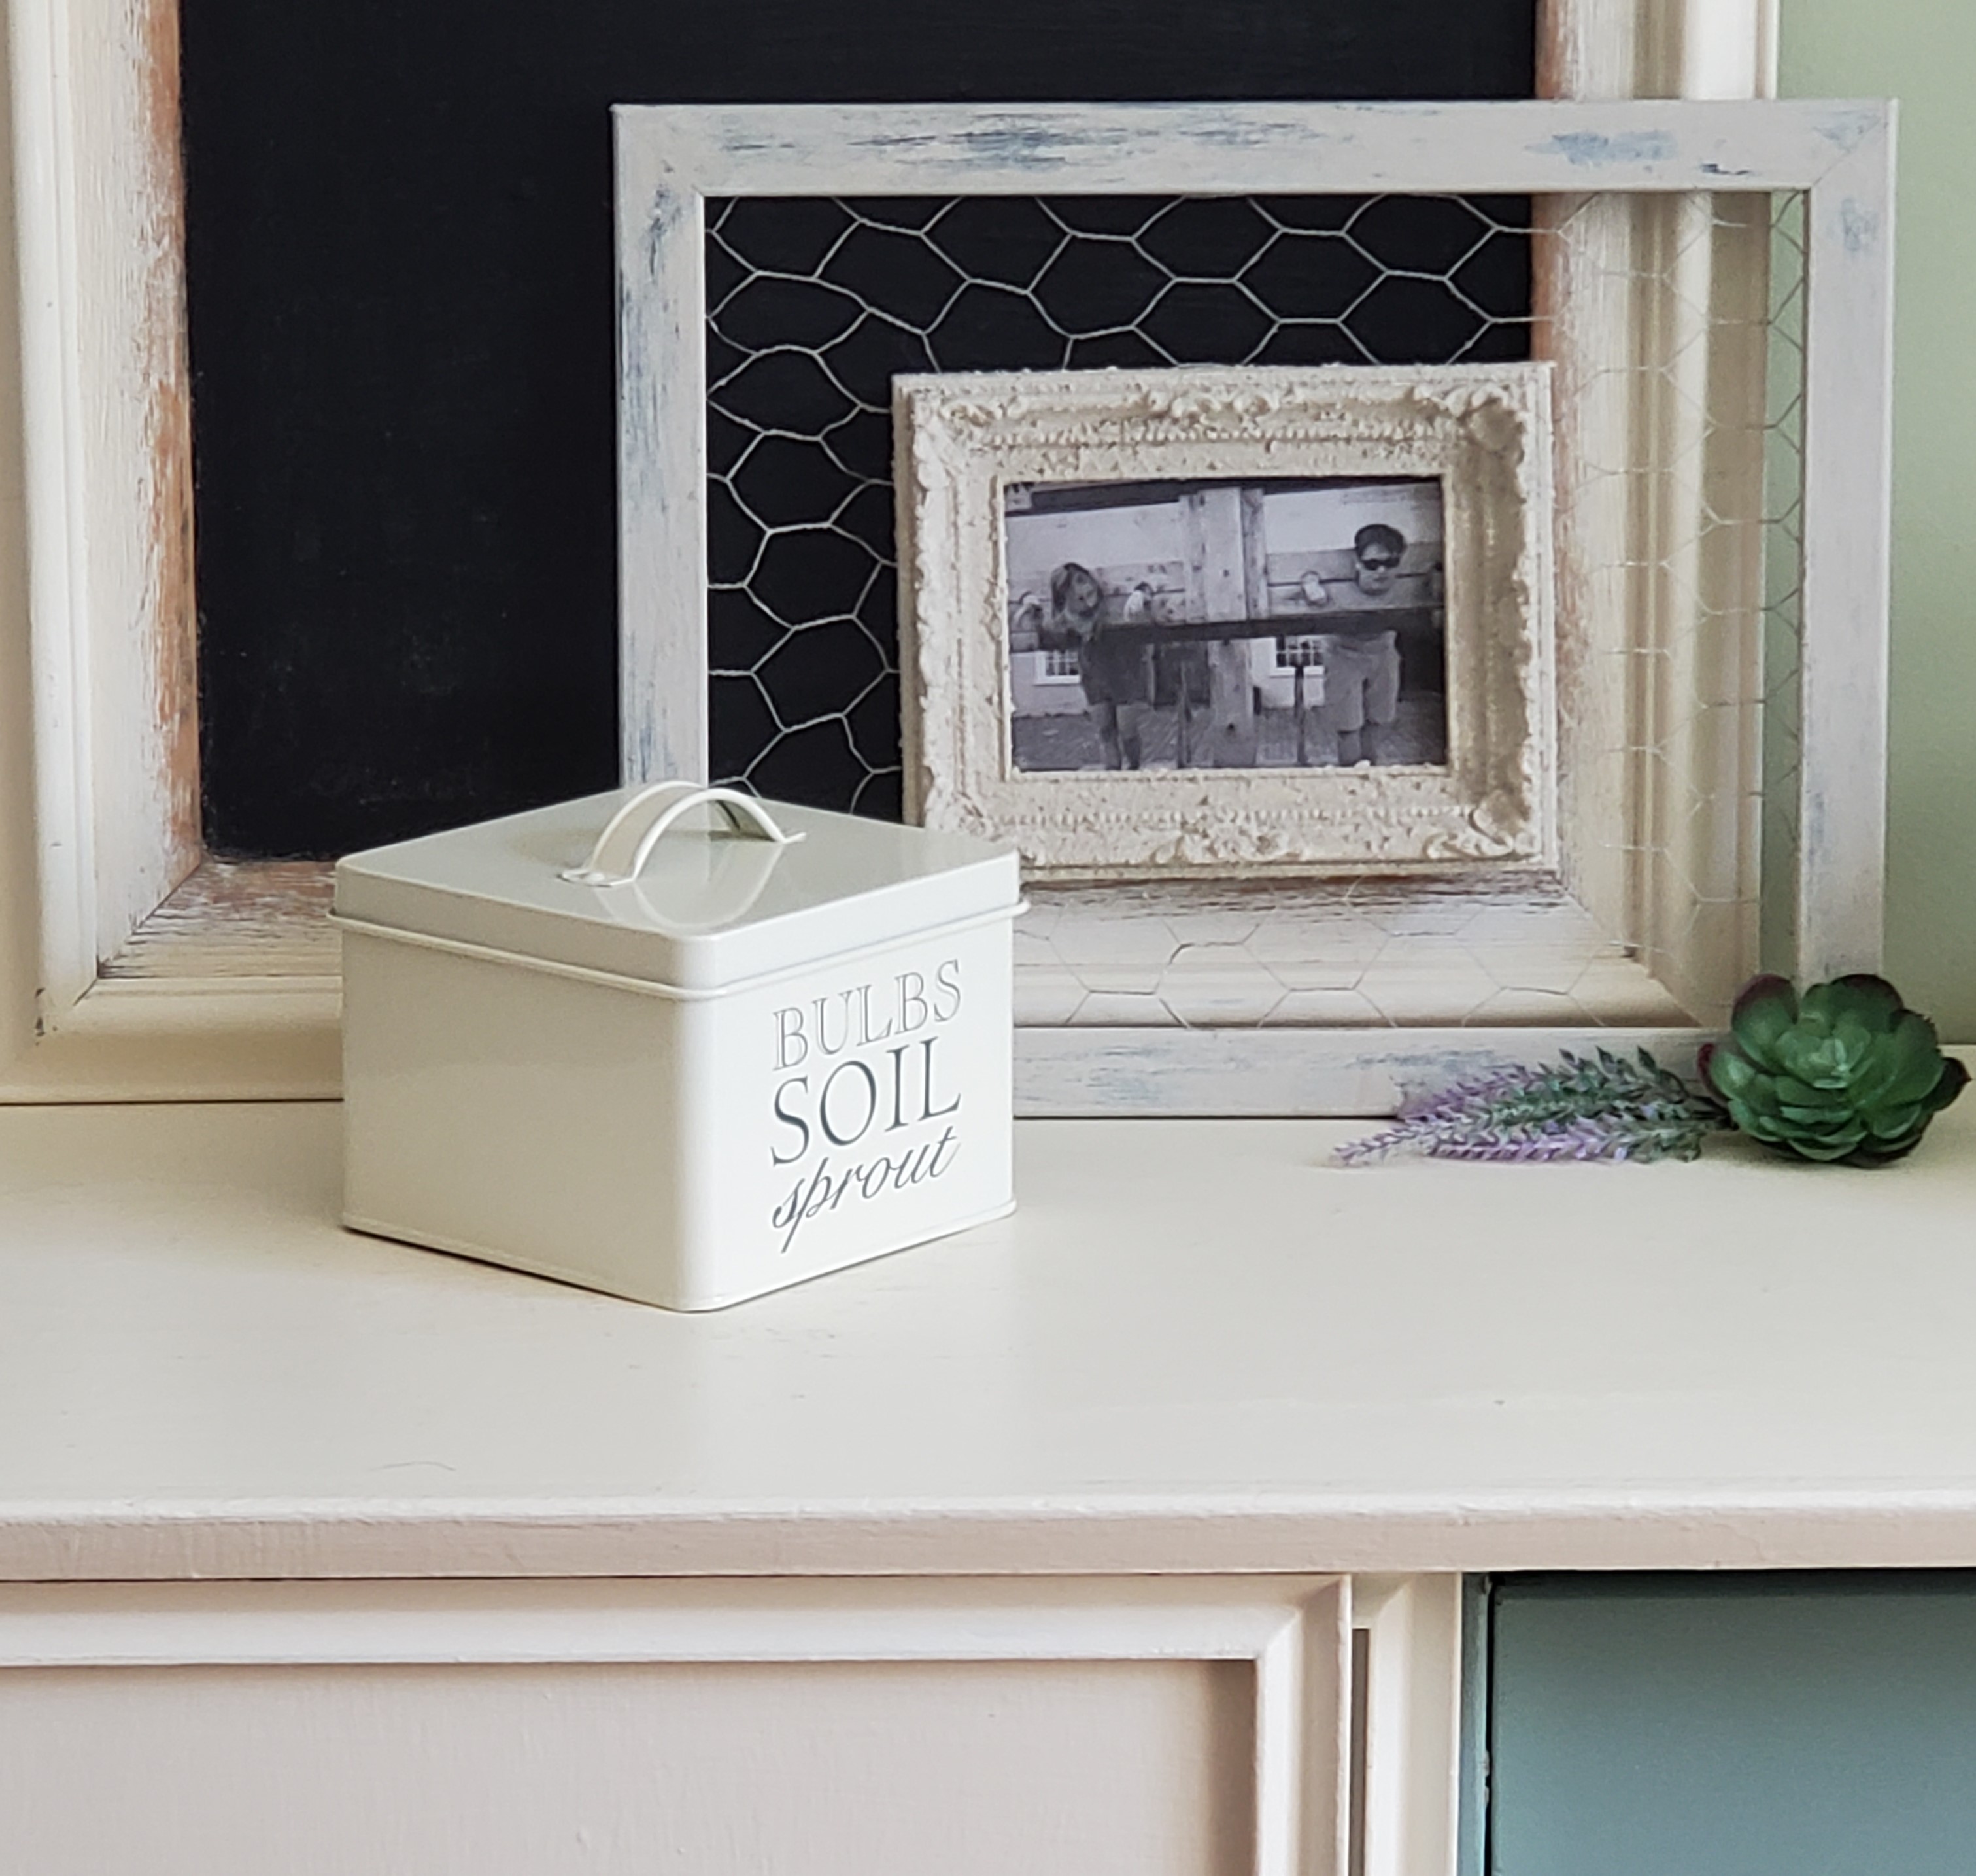
I am head over heals for this picture frame. Not sure the picture does it justice. I know that any mother or grandmother would love to get this gorgeous frame where they can proudly display pictures of the kids all year long.
And Voila! 3 Beautiful decor gifts that you will be proud to give and your mom will be thrilled to display.
Jenny’s Finishing Thoughts On DIY Decor Gifts For Mother’s Day
There is something extra wonderful about homemade decor gifts. They show the person that you took the time to think of them and create something unique just for them. The DIY decor gifts shared today are perfect for Mother’s Day because they are practical, simple, inexpensive to make, and absolutely stunning. Cheers!
Did you find this post helpful or inspirational? Save This Pin to your Mother’s Day Board or DIY Gifts on Pinterest