How to Make a Simple and Pleasing DIY Wind Chime
Let’s make a beautiful, simple, and inexpensive DIY wind chime that you can proudly display on your front porch.
The Beauty of DIY Wind Chimes
Wind chimes have been around since 1800 BC and it’s easy to understand why their popularity has stood the test of time.
There are a ton of superstitious reasons why one should have wind chimes adorning their front entrance but I think that it is their beauty and the delightful sounds they make that make them a porch stable.
Now, you can find wind chimes at a ton of different stores but since they are so simple to make why not make your own DIY wind chime? This way you can personalize your wind chime any way you want to.
Dollar Store Gardener’s DIY Wind Chime
I love gardening… this is actually an understatement. I live for gardening. Full time plant addict. So when I saw this mini gardening tool set at my local dollar store I knew I needed to make them into something special.
I ended up deciding that they would be perfect in a DIY wind chime. I decided to add a metal bird figurine that was also found at the dollar store and some wooden beads. The end result was beautiful in its simplicity.
I think that this is just the sweetest wind chime. Every time I look out my front window and see it hanging there it makes me smile. I love it’s charming whimsy. The wooden handles and metal shapes do clink together nicely. They makes this delightful clinking-clatter that sounds a lot like ice clinking in a glass.
Supplies You Will Need to Make Gardener’s DIY Wind Chime
If you opt to not spray paint the items then all of the supplies needed for this project can be found at your local dollar store.

- Terracotta half pot
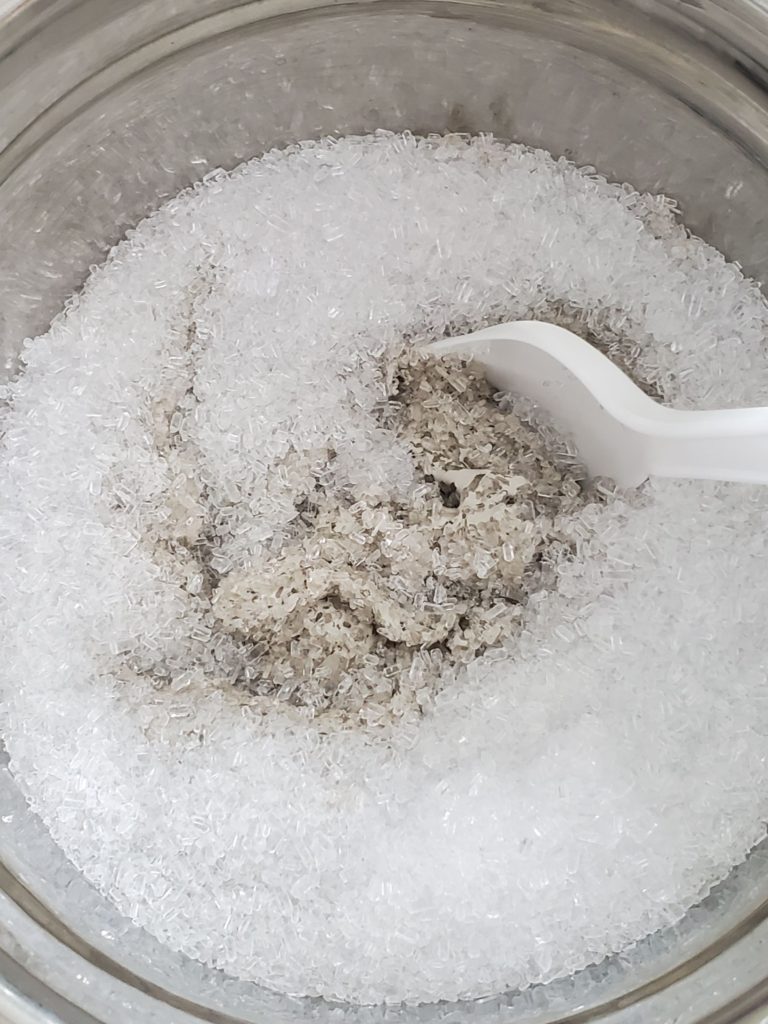
- 10 wooden beads in 20mm size
- 9 wooden beads in 16mm size
- Tray of dollar store wooden beads
- Heavy jute twine
- Wooden stakes
- Miniature gardening set
- 3 – 4 Eye hooks
- Metal bird
- Mitre box and saw
- Hot glue gun and hot glue
- Rustoleum spray paint in Hammered Copper *(optional)
- Chalk paint in FolkArt Milk Jug *(optional)
- ArtMinds Antique Wax *(optional)
- 2 Paint brushes
How to Make Gardener’s DIY Wind Chime

Using masking tape or painters tape, tape off the handles of each mini gardening tool.
Then using Rustoleum Hammered Copper (or any other spray paint colour of your choosing) I spray painted the metal portions of the mini gardening tools. At this time I also spray painted the green, metal bird with the hammered copper spray paint.
*PRO TIP: To ensure a smooth finish spay a light coat on and let dry. Keep applying a light coats of the spray paint until the entire surface is covered.

Using wooden beads that I found on Amazon, I choose 10 20mm beads and 9 16mm beads and painted them off white with the FolkArt Milk Jug chalk paint. I let them dry.
I also painted 1of the 16mm beads in the ArtMinds Antique Wax and let this dry as well.

Next, using a dry chalk brush, I painted some of the FolkArt Milk Jug chalk paint onto the terracotta pot so that it gave the pot a distressed appearance. I also let that dry.

I then grabbed one of the wooden plant stakes, measured out 6″ and marked it with my pencil. I repeated this process so that I ended up with two 6″ portions.
Using a miter saw, I cut along my markings so that I ended up with 2 wooden pieces.

I then affixed the 2 wooden pieces together with a combination of wood glue and Gorilla hot glue. Not to sound like a parrot, but I let this dry overnight.

Once the wood glue had dried I then tied the twine around the middle where the two wooden pieces meet.
Next, I wrapped the rope around the wooden pieces several times finishing off with the long end of the jute twine being pulled upward. (*See picture)

I pulled the twine end through the hole in the bottom of the terracotta pot.

I pulled at the end of the jute twine until the wooden X was inside the terracotta pot. The wooden X was positioned that that it rested at least 1/2″ from the pot. This was so that later I could tie the garden tools on to it using more jute twine.

I slid the first painted 20mm wooden bead on to the twine and the hot glued it to the top of the pot. This helped to cover the hole and ensured that the when hung the terracotta pot would stay balanced.
I then slid on the 16mm wooden bead that I had painted in the antiquing wax.

I looped the twine around and threaded it back through the top wooden bead. The end of the twine coming out between the two beads.
This was done so that the twine created a large loop that would later be used to hang the actual DIY wind chime.

I tied the jute twine into a double knot and trimmed off the end.

To reinforce the double knot I used a good dollop of hot glue in between the twine knot and each of the beads and then let this dry.


At the dollar store they sell these little picture hanging kits. You will need 3 of the eye hooks found in this kit.
Again, using the Rustoleum Hammered Copper spray paint, I spray painted the three eye hooks so that they would blend in with the rest of the look.

Next I screwed the spray painted eye hooks into the top of each of the wooden handle on each of the mini garden tools. This is easy to do with just your fingers. No special tool required.

Now it was time to tie the twine to each end of the wooden X. Again I secured each of the knots to each of the wood ends with a nice dab of hot glue.

I found it best to start with finishing off one of the twine strings from start to finish and then using the length of twine needed to measure the remaining 4 strings of twine. This way all the tools ended up at the same height.

You can do whatever pattern you like with whatever sized beads you like.
I chose to go with a pattern that mixed the larger beads from Amazon with smaller, glazed beads that I found at the dollar store. I liked the way that the different colours, patinas, and textures added interest to an otherwise monochromatic look.

I started with the chalk painted 20mm wooden bead, followed by a dollar store dark brown bead, a cream coloured ribbed bead, and then another brown bead. I followed this with a 16mm chalk painted bead, a smooth cream coloured bead, a medium dark ribbed bead and then again a chalk painted 16mm bead. The whole string was finished off with a repeat of the darker bead, a ribbed cream coloured bead, another dark brown bead and then finished with another chalk painted 20mm bead.
Again though, the pattern you decide to go with is completely up to you. Paint the beads different colours, change up the sizes, or mix with other bead styles such as glass. Have fun!

I then tied each of the mini gardening tools and the metal bird to the ends of the twine and trimmed off the excess.
*NOTE: The picture I took of me doing this came out a bit blurry so I decided instead to show you the end result of this step. Oops!
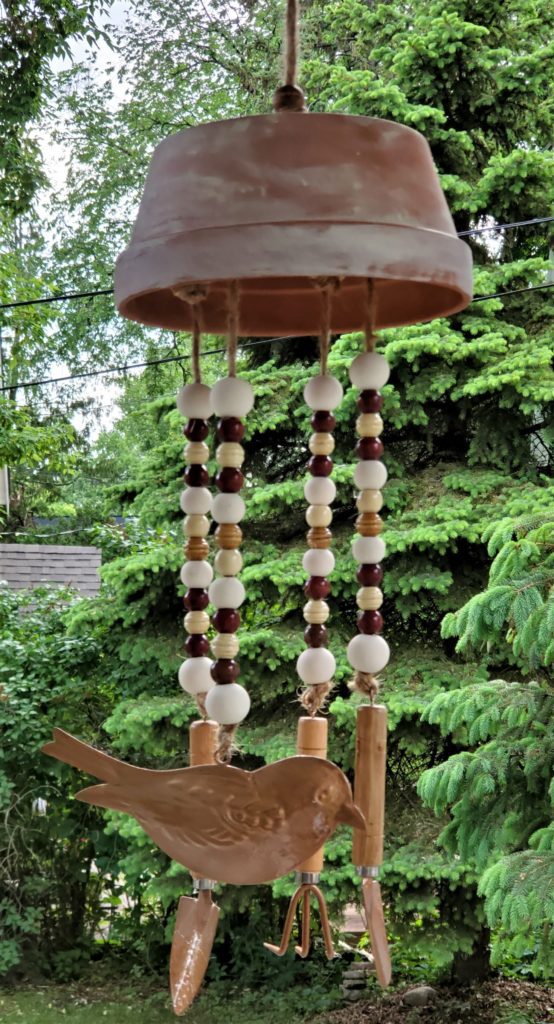
And Voila! A simple but visually appealing DIY wind chime that creates a gentle sound and looks fabulous hanging on our front porch. I couldn’t be more pleased with the end result.
Jenny’s Finishing Thoughts on Gardener’s DIY Wind Chime
I love wind chimes. There is something incredibly relaxing and whimsical about them. I do find that some of them are a bit louder than I like and this is why I just love this one. It looks lovely, was so simple to make, cost next to nothing in supplies, and it doesn’t create a ton of noise. And being a garden lover, this DIY wind chime perfectly represents me and what I love to do in the summer months.
Are you a fan of wind chimes? If so, do you like the ones that make a lot of noise or are you more about the looks and less about the sound? Let me know in the comments below.
Did you find this post helpful or inspirational? Save This Pin to your DIY Wind Chimes board on Pinterest

Don’t Miss Out on At Jenny’s Place Latest Free Printable!
Get the Master Decor Planner from At Jenny’s Place. This decor planner will help you be successful with all of your DIY home decor projects. This AJP planner will keep your ideas in one place, will aid in breaking down projects into manageable bites, keep you on budget, and it is full of tips that you need to make things happen.