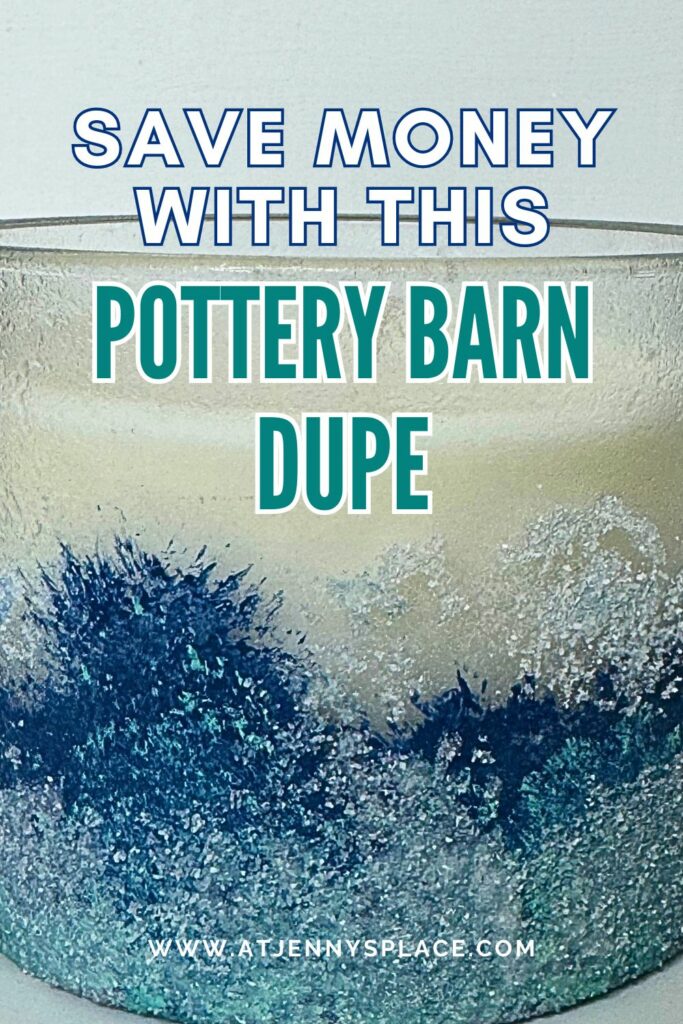
Pottery Barn Dupe – Save A Ton Of Money
Get the look but at a fraction of the cost. Welcome this summer with a Pottery Barn dupe, a great alternative to the costly original.
Pottery Barn Dupes – Getting The Look For Less
Hey, savvy DIYers! Summer is right around the corner and Pottery Barn has the perfect wave inspired candles to help you greet it. Their beach inspired allure can transport you straight to your favourite beachside escape. Ah, pure bliss!
But hey, let’s be real. Love them as we do, Pottery Barn price tags can be a little bit on the high side. Take these Pottery Barn frosted seaside candles, for example. With a price tag of $28 for the petite version and $98 for a large one (even when on sale!), these are too rich for my blood. That’s why today, we’re diving into a fun, budget friendly adventure! That’s right, we’re recreating this stunning Pottery Barn summer candle but for way less!
So, if your frugal soul is squealing with delight, stick around. ‘Cause we’re about to easily DIY this dupe, to capture that coveted Pottery-Barn-esque ambiance without shelling out the mega bucks.
Supplies You Will Need
To make this super simple, yet totally stunning Pottery Barn candle dupe all you are going to need are these basic, inexpensive supplies:
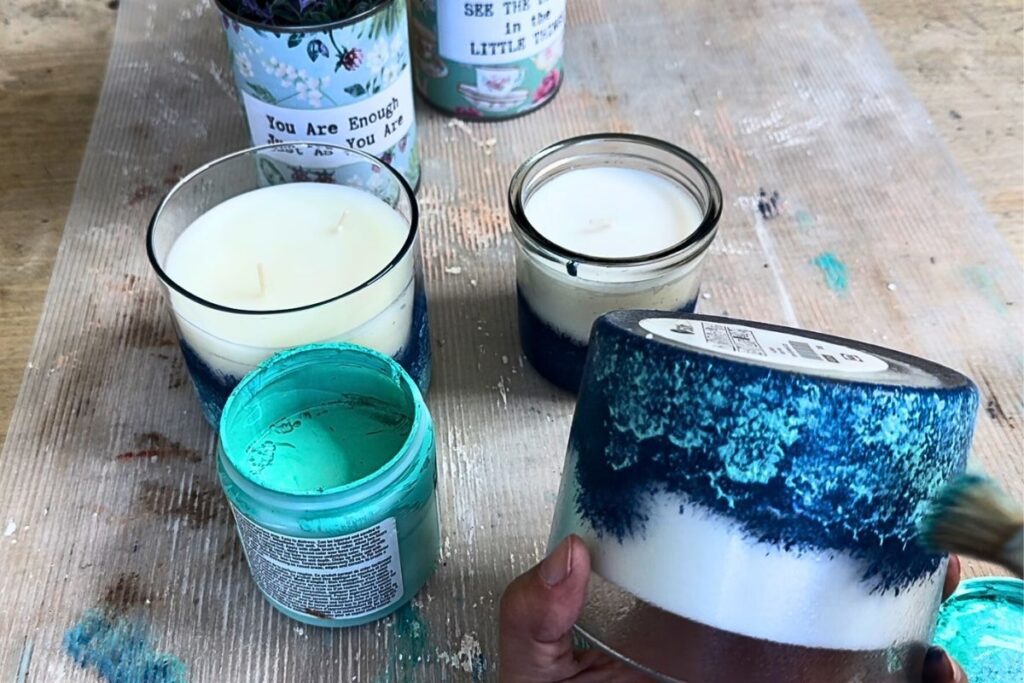
- Candle in a glass jar. (Size is up to you.)
- Navy blue chalk paint
- Teal chalk paint
- Mod Podge
- 3 stencilling brushes
- Fine white sand vase filler
- *Optional: FolkArt Finishing Spray
Watch this DIY come to life PLUS a few more!
Want to see this DIY come to life PLUS 4 more Pottery Barn dupes? Witness some DIY magic with these bonus Pottery Barn look-a-likes. Be sure to catch this accompanying video that’ll make your duping dreams come true!
Pottery Barn Dupe Summer Candle DIY
Embrace the summer season with stylish decor inspired by Pottery Barn – without the steep prices! You can easily recreate this sophisticated, summer inspired decor without spending a whole ton o’ cash.
Let’s get started DIYing…
First steps
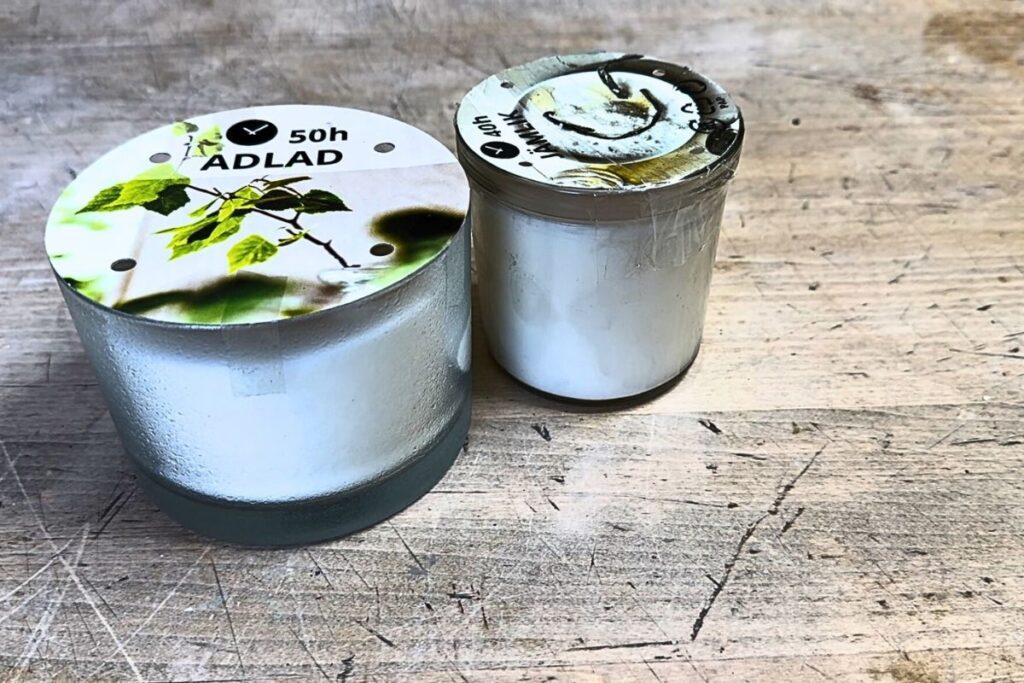
To start this DIY you are going to need a white candle in a clear glass container. This can be any size, and any scent. Ikea has this one for under $10 and it is ideal for this DIY because it is frosted which just adds to the overall look.
Laying down the foundation
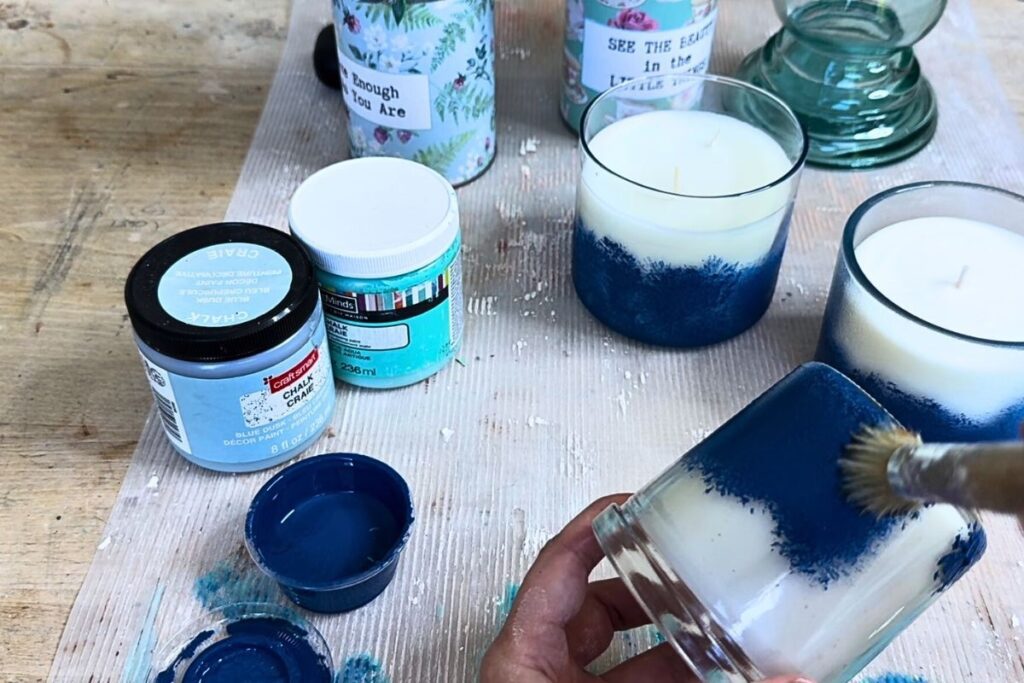
Begin by selecting a rich navy blue chalk paint and a soft, fluffy stencil brush. Then carefully apply the chalk paint to the lower section of your candle holder, creating an effect much like that of gently lapping waves.
Your aim? To evoke the calming essence of the ocean right in your own home.
Add some dimension
Next, seize a novel stencilling brush, and bring to play some enticing teal chalk paint – I used the Antique Aqua from ArtMinds. Use the stencilling brush to dab some of that tranquil teal hue over the navy blue base.
Concentrate more on the centre and lower areas, but remember, there’s no fixed rule, your creativity knows no bounds. You are aiming to create a picturesque wave-like visual that conjures up your sense of being by the ocean.
Interweave the two hues, lightly layering on a bit more of that navy blue to mellow the vibrant teal. Allow this to dry completely before going on to the next step.
Blending it all together
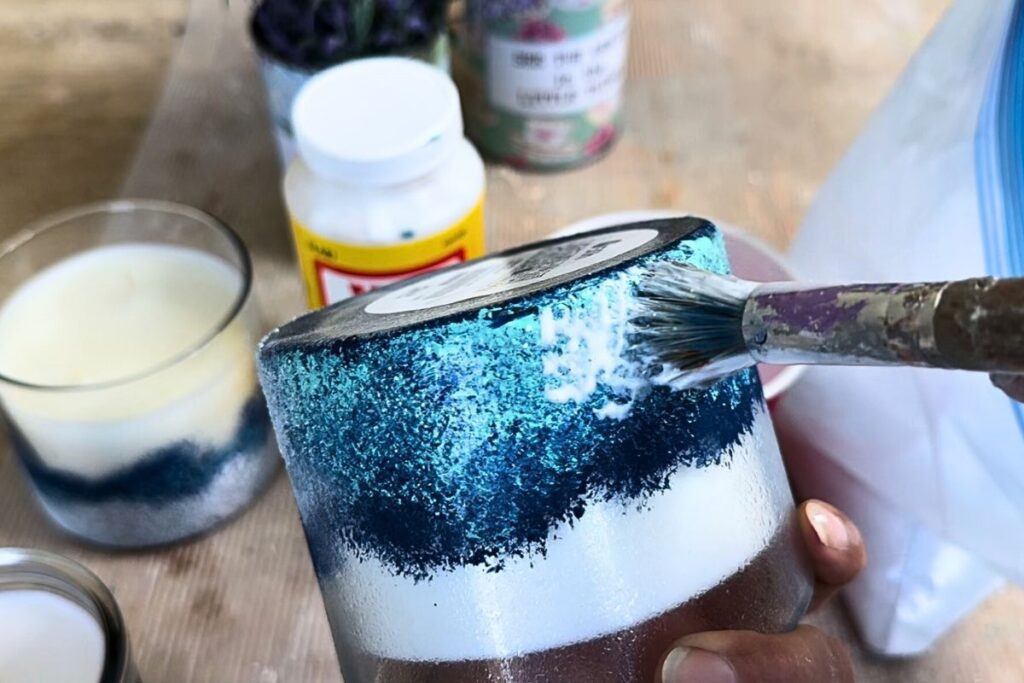
Grab your Mod Podge and the third stencil brush. Now, thoughtfully apply the Mod Podge to the base of your candle holder, creating a spontaneous design. This process will partially cover the teal, but will still allow the teal and midnight blue to stand out.
Join At Jenny’s Place Library
Join At Jenny’s Place Free Printable Library and get unlimited access to all of my past, present, and future free printables. PLUS so much more!
Adding a touch of texture
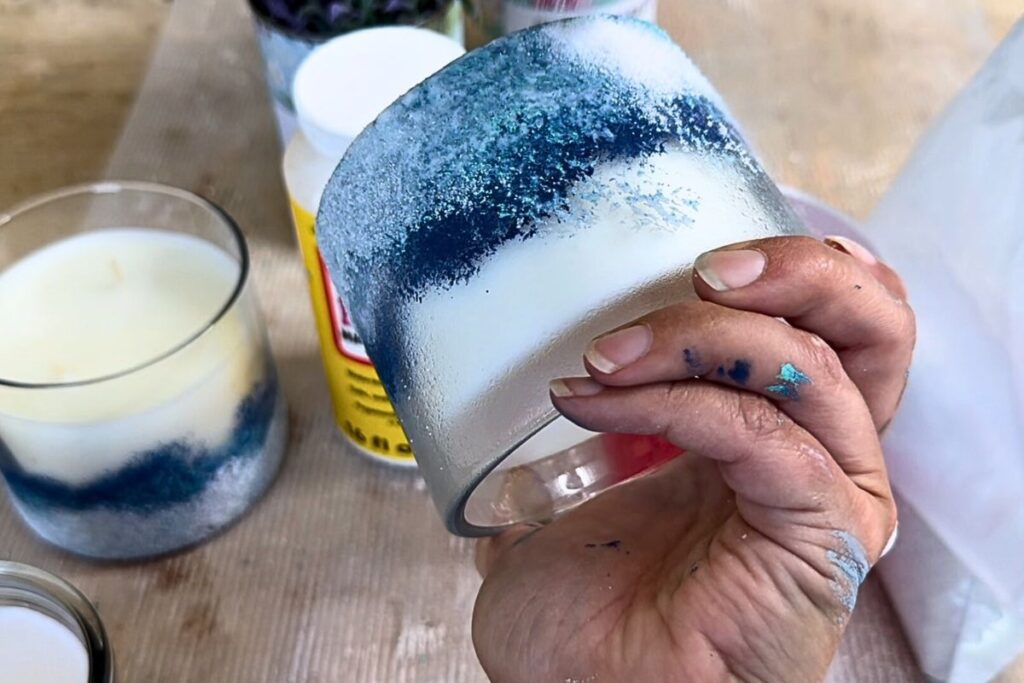
You’ll need that white vase filler sand now. Sprinkle it to coat the Mod Podge, shaking off the excess.
Add the Mod Podge to the base, and extend it a bit to the top of the blue “waves”. You’re using the white sand to create a look that echos the frothy white caps of a wave.
The finishing touch
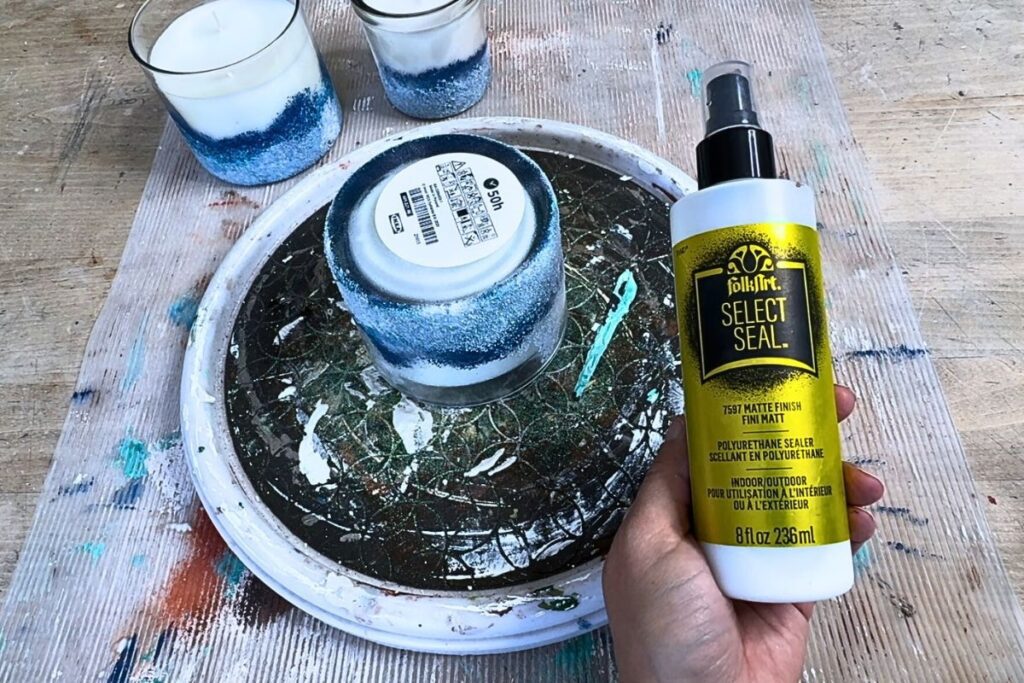
For the finishing touch, I opted for FolkArt’s Select Seal.
NOTE: Despite my thorough search, I couldn’t find any explicit warning about its flammability, so proceed with caution.
Apply the spray to the candles entirety, ensuring that the seal coated the candle evenly and will hold the sand in place.
To prevent any residual seal spray on the bottom, gently wipe away any excess using a damp rag. Then lifting the candle, clean any possible seal drop on the glass with the same cloth.
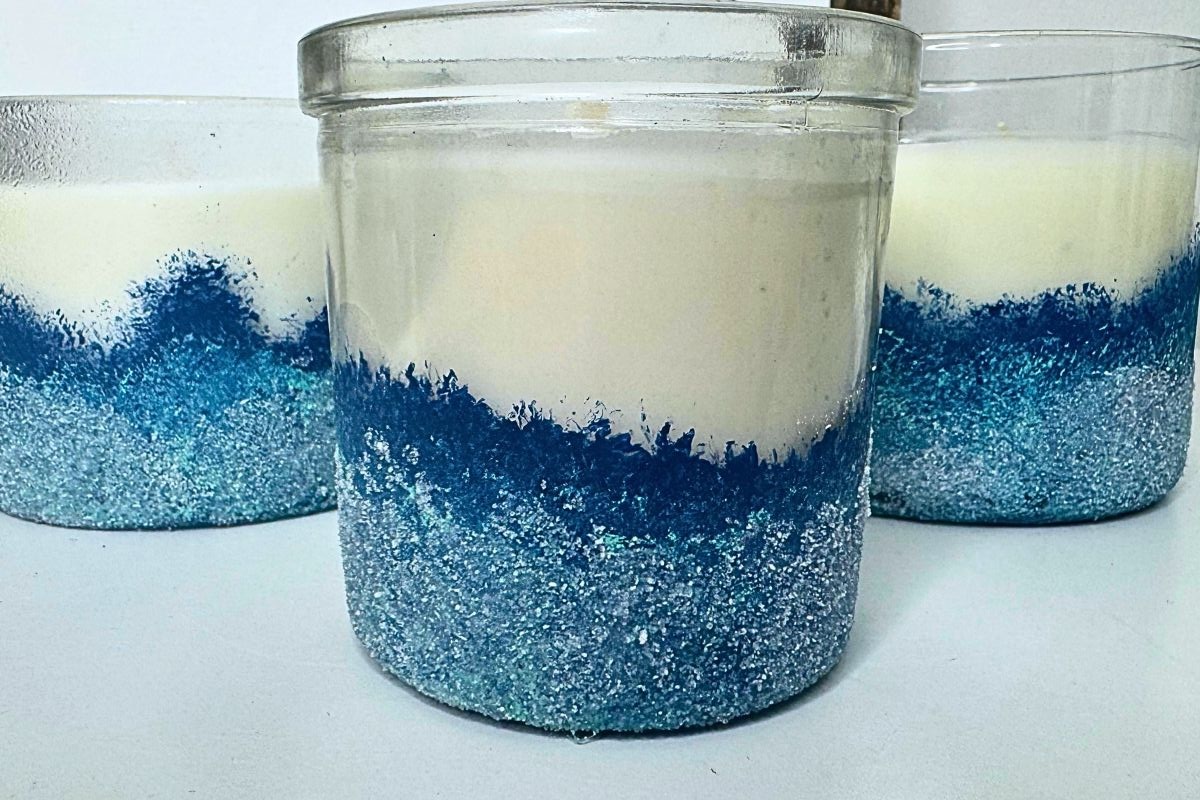
The final looks
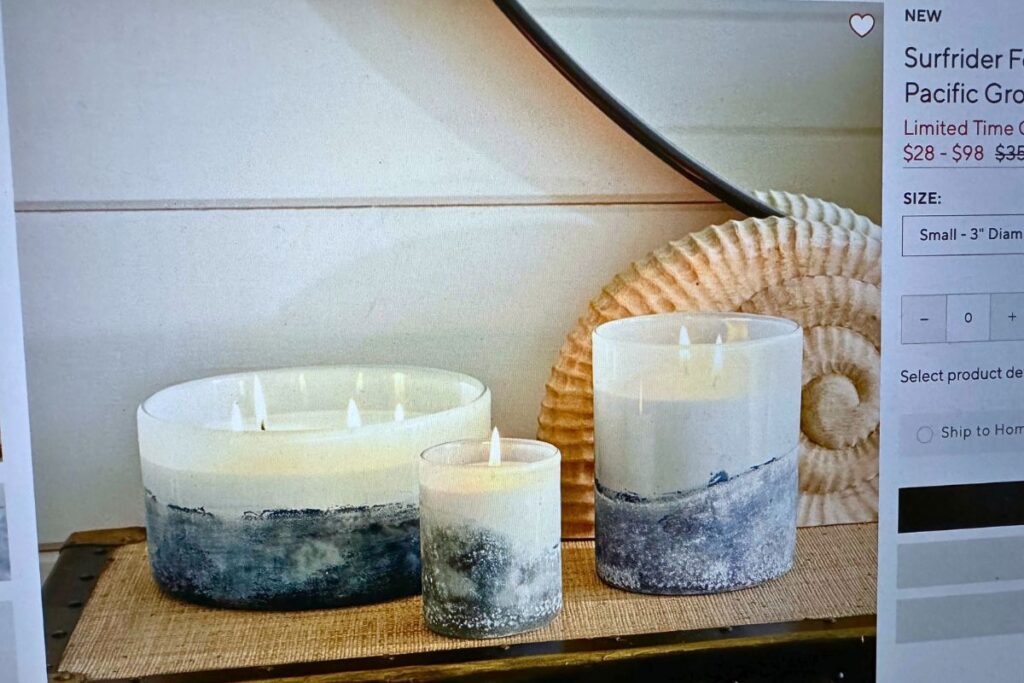
Their Version
Pottery Barn may ask you to shell out anywhere from $30 to $100 for these items.
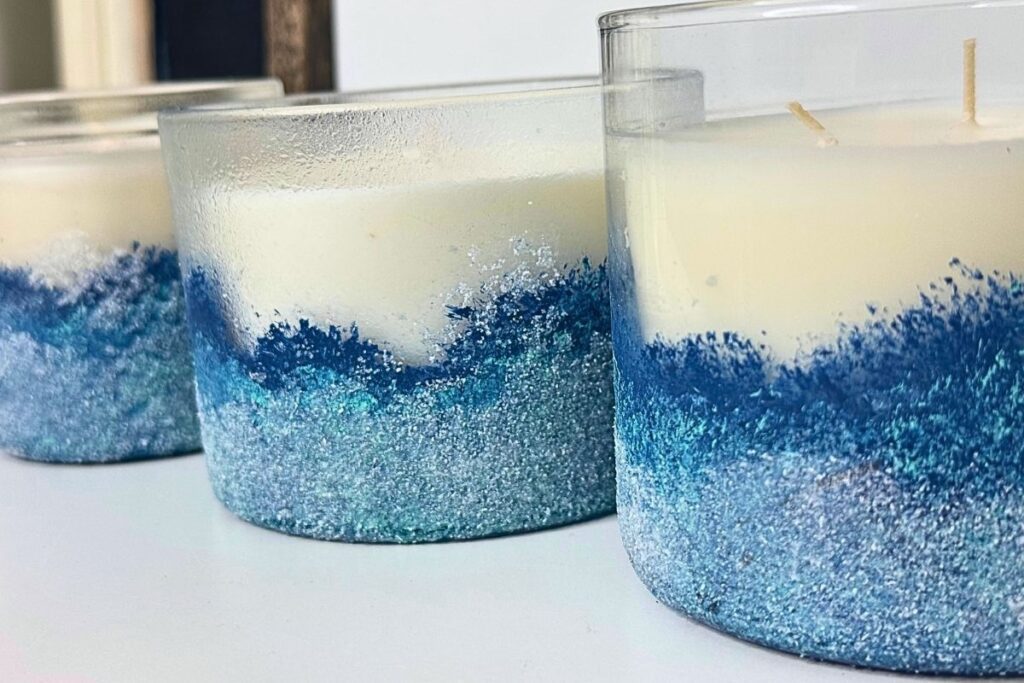
Pottery Barn Dupe – Our Final Look
But feast your eyes on the end result we’ve come up with. Each piece boasts an impressive price tag of less than $4 -$10. But their beauty – priceless!
Quite a steal, don’t you think?
Jenny’s Finishing Thoughts On Pottery Barn Dupe Summer Candle
So, there you have it, my style savvy friends, the perfect solution to keep your home looking like a page torn right out of a Pottery Barn catalogue without having to blow your budget. These Pottery Barn dupes are not just cost effective but they are chic, trendy, and oh-so-summer-ready!
Keep your eyes on my blog for more budget friendly brilliance and remember, style doesn’t have to cost a lot. After all, we are all about scoring high on style, but low on spending here At Jenny’s Place. Until next time, happy decorating!
Do you do the dupe? Let us all know in the comments below!
Did you find this post helpful or inspirational? Save This Pin to your HOME DECOR DUPES board on Pinterest!
If you liked this post you may also enjoy:
Fake Succulent Pottery Barn Wall Art Dupe