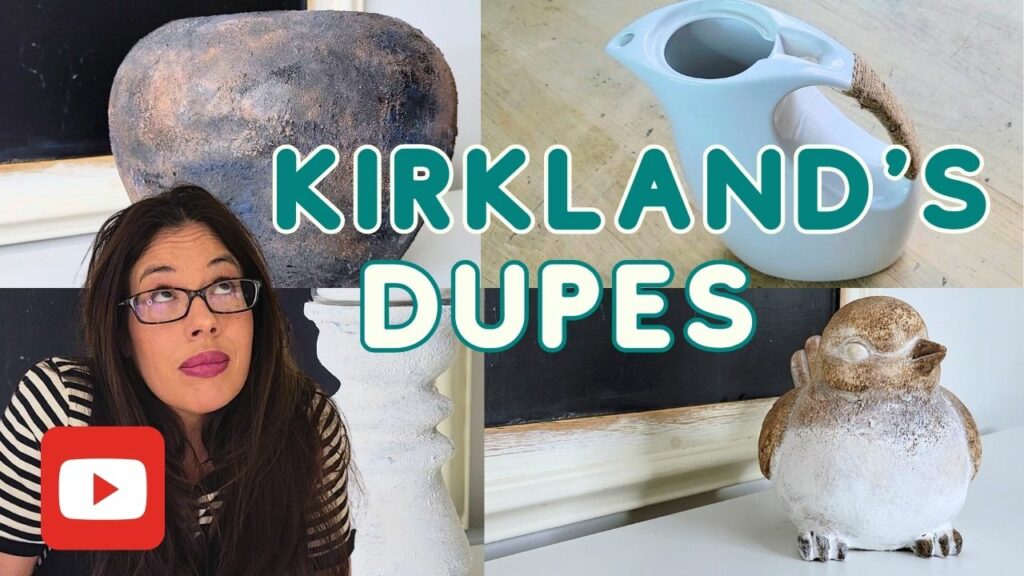
How To Paint A Vase To Look Like Kirkland’s
Find out how to paint a vase to look like one from Kirkland’s Home decor line using thrift store finds and a little paint.
Saving Money Doing The Dupe
Are you eager to spruce up your home decor but don’t want to break the bank? Look no further because you just found the answer- DIY duping is the solution you’re looking for.
What is a DIY dupe, you ask? DIY duping is a creative way to save money and get the look you want but at a fraction of the cost. Basically, you “shop” for what you like and then you recreate it using basic DIY supplies and a few inexpensive finds. With a little effort and creativity, you can transform basic items into beautiful home decor that looks exactly like the more expensive versions found in stores.
So if you’re looking for ways to save money on home decor, you’ll want check out how to paint a vase to look like the real deal. Stick with me. I’ll show you how it’s done.
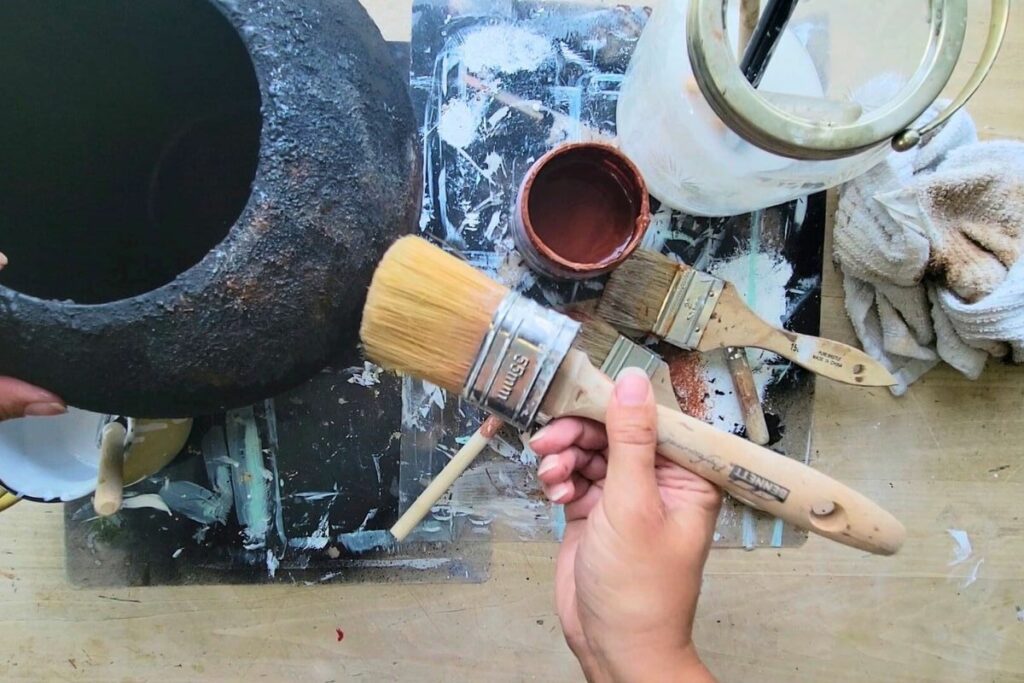
Supplies You Will Need
- A thrifted vase in any shape you like
- Baking soda
- Acrylic or chalk paint in a light colour
- Folk Art chalk paint in Nautical
- ArtMinds chalk paint in Copper
- ArtMinds chalk paint in Onyx
- ArtMinds chalk paint in Simply White
- Water
- Rustoleum Flat Black spray paint
- Large chippy brush
- Large buffing brush
- Small stencil brush
- Foam brush
- Plastic cup
- Stir stick
Watch the video where I DIY this vase and other Kirkland’s inspired dupes.
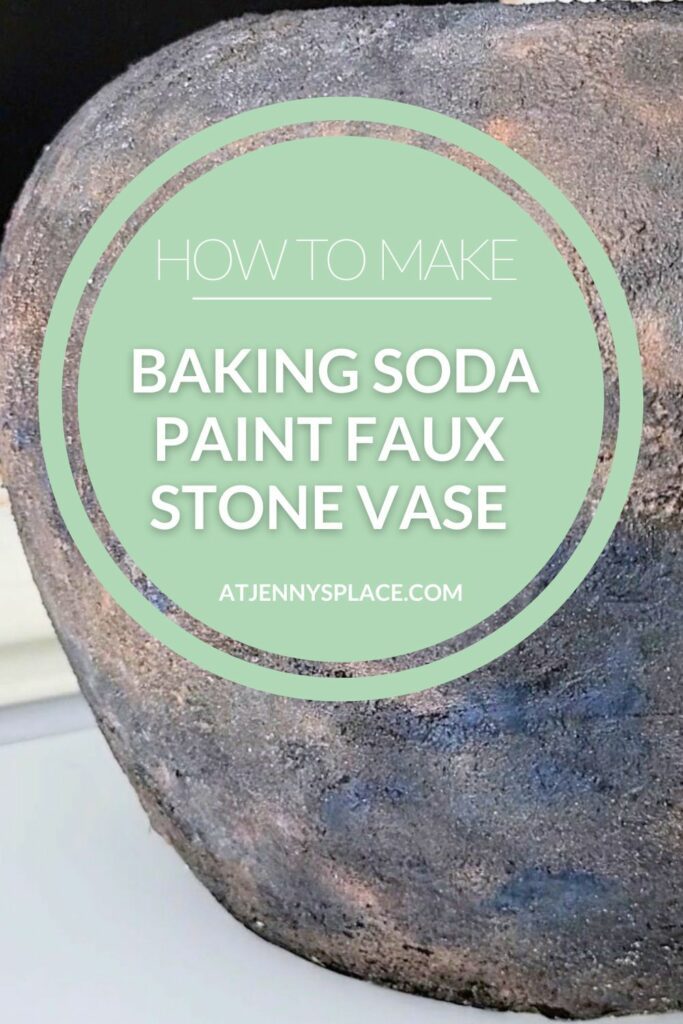
How To Paint A Vase To Look Like Kirkland’s
Do you ever look at those Oh! so trendy home decor pieces and wish you had them in your own home but you cringe at the thought of their price tag? I felt that way when I saw the almost $180 price tag that Kirkland’s wanted for this vase. Don’t worry, you can achieve the same look without breaking the bank.
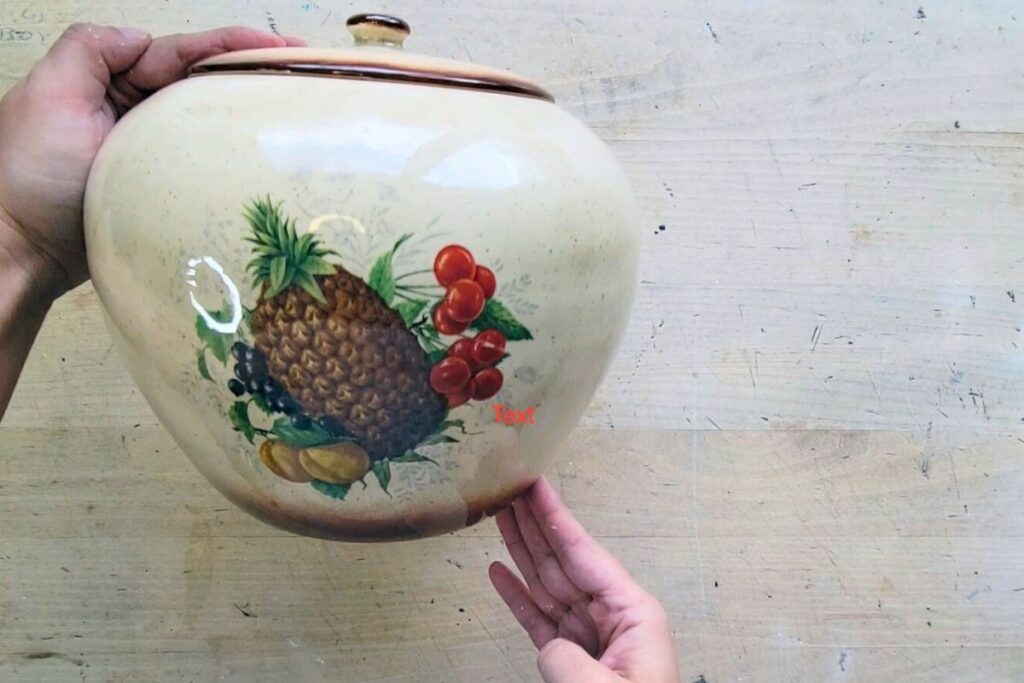
I found this… honestly, I’ve no idea what this was for. Personally, I find it rather ugly but at $5 the price was right and the shape was unusual enough that I figured it would work well for this project. To get it prepped all it needed was a quick clean.
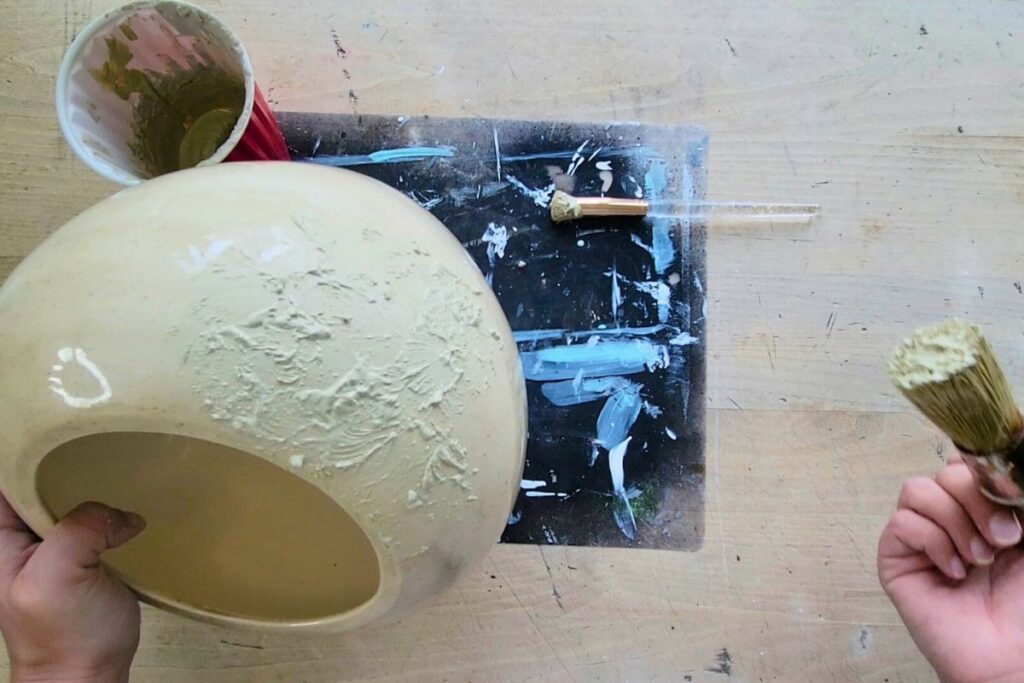
Baking soda paint time
Once the vase had dried it was time to make the baking soda mixture. Now, I can’t give you exact measurements for this because it will really depend on the size of your vase. Basically, you want to mix enough baking soda and the light coloured paint together to make a mixture that looks like slightly melting soft serve ice cream.
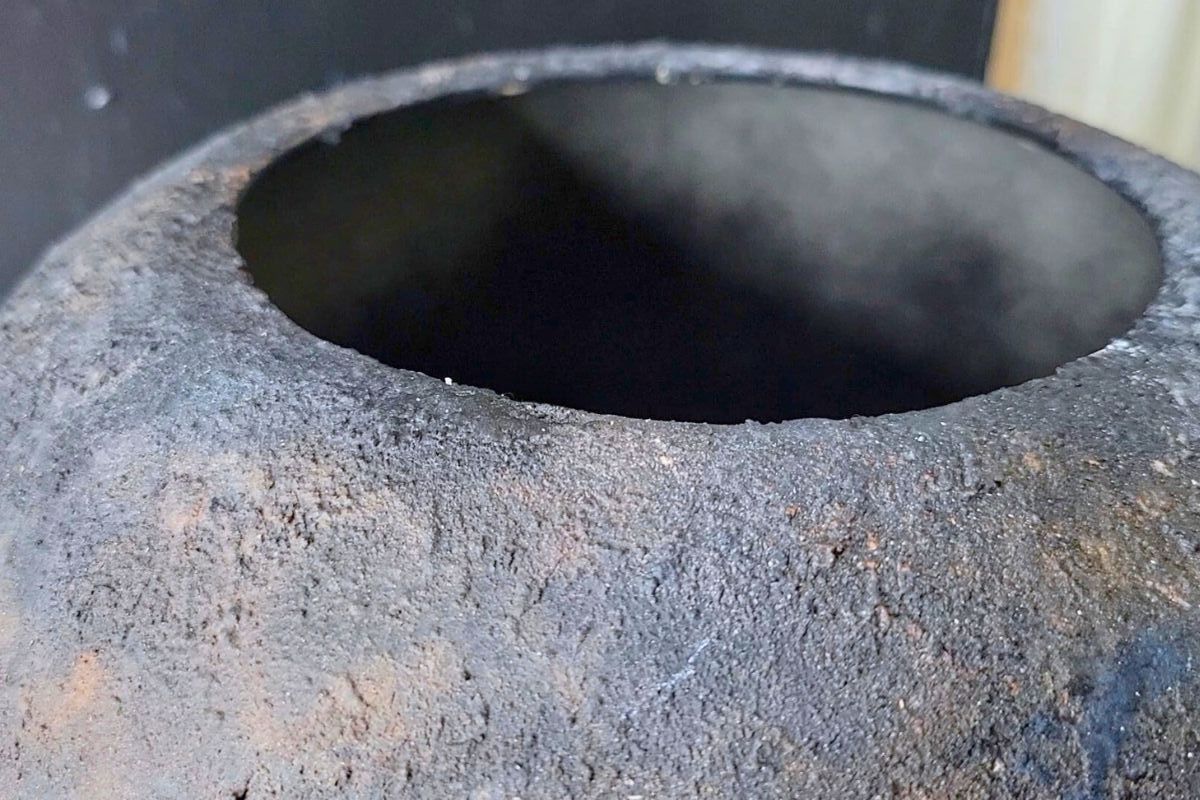
Using a large paint brush apply the baking soda paint mixture to the vase creating a fair bit of texture when doing so. This is faux stone so it’s going to have texture. I used my large wax chalk brush because I liked how much coverage it gave and the texture it created. However, any large paint brush will do.
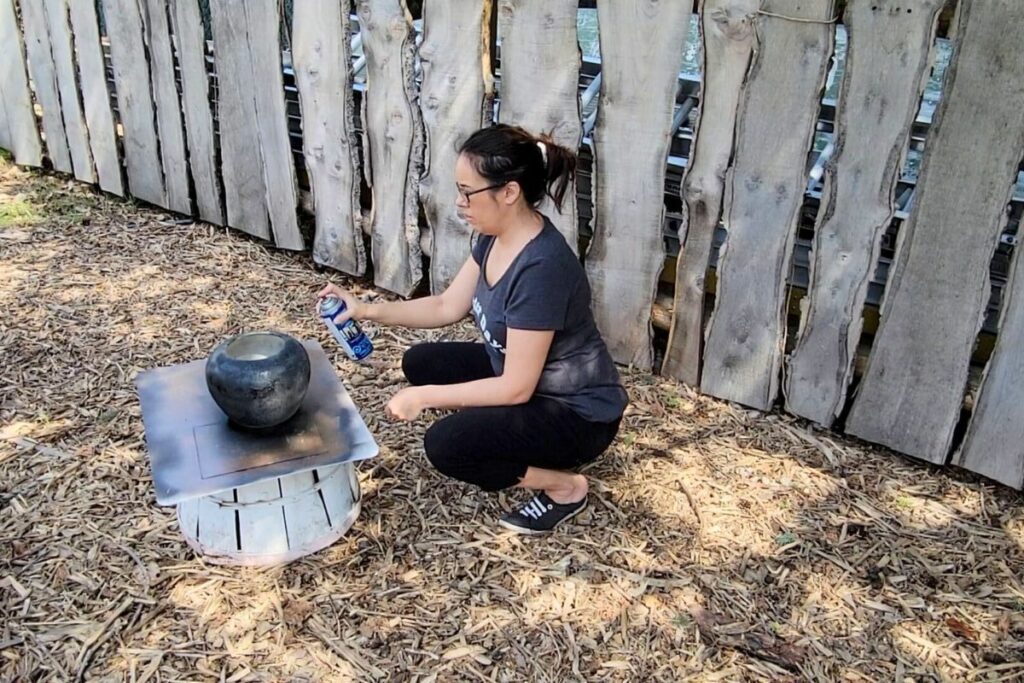
Once the baking soda paint has been left to dry overnight it’s time to head outside and give the whole thing a couple coats of the flat black spray paint. You want the black to be flat because it will look more realistic then if you went with a shiny black spray paint.
Let this dry completely.
PRO TIP: The original colour of the inside of the vase was off white. If I had kept it that colour it would have made the final result look incomplete and totally fake. So, if your vase is also not black inside make sure that you give the inside a couple coats of paint as well.
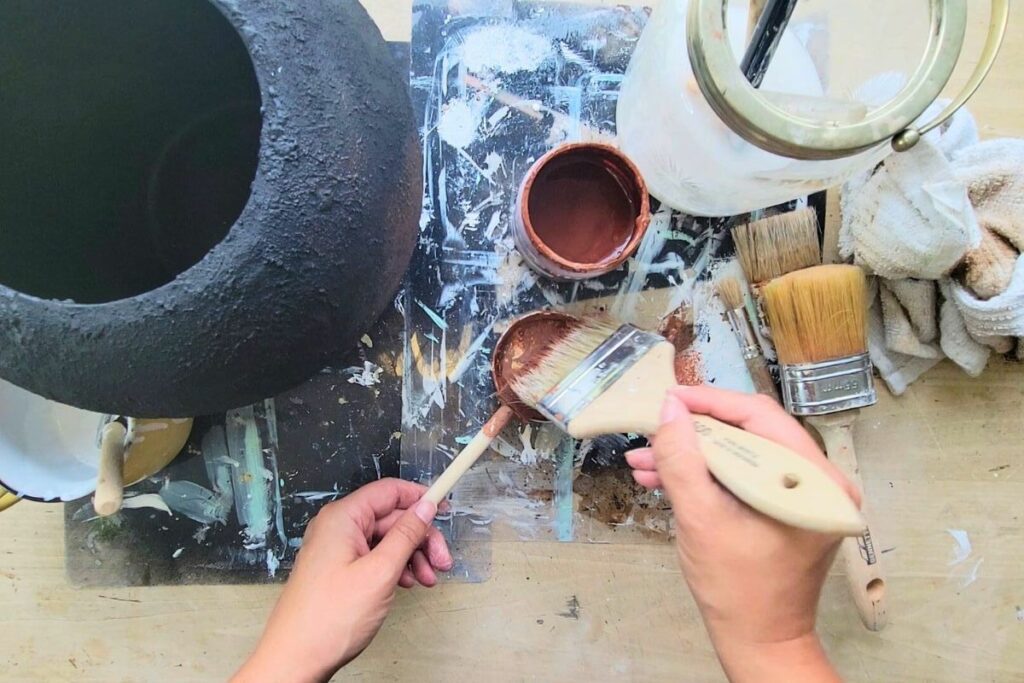
Now the fun starts!
Start by mixing a bit of the white chalk paint with a bit of water to make a white wash. Using your chippy brush and the copper chalk paint, apply some of the copper to the surface of the vase. You want to do this sparingly. You also want this to look natural so don’t put too much in one spot and don’t be too perfect with this.

Join Free Printable Library
Imagine having access all of my DIY guides, decor images, and project ideas and all at your fingertips.
That’s what you get when you sign up for AJP’s Free Printable Library. Unleash your creativity and sign up today to dive into this rich collection of DIY fun.
If you’re not happy with where you placed some of the copper then use some of the white wash to lighten it and to spread the colour around. To blend everything together use your large brush to buff everything out. You want everything to blend and look natural.
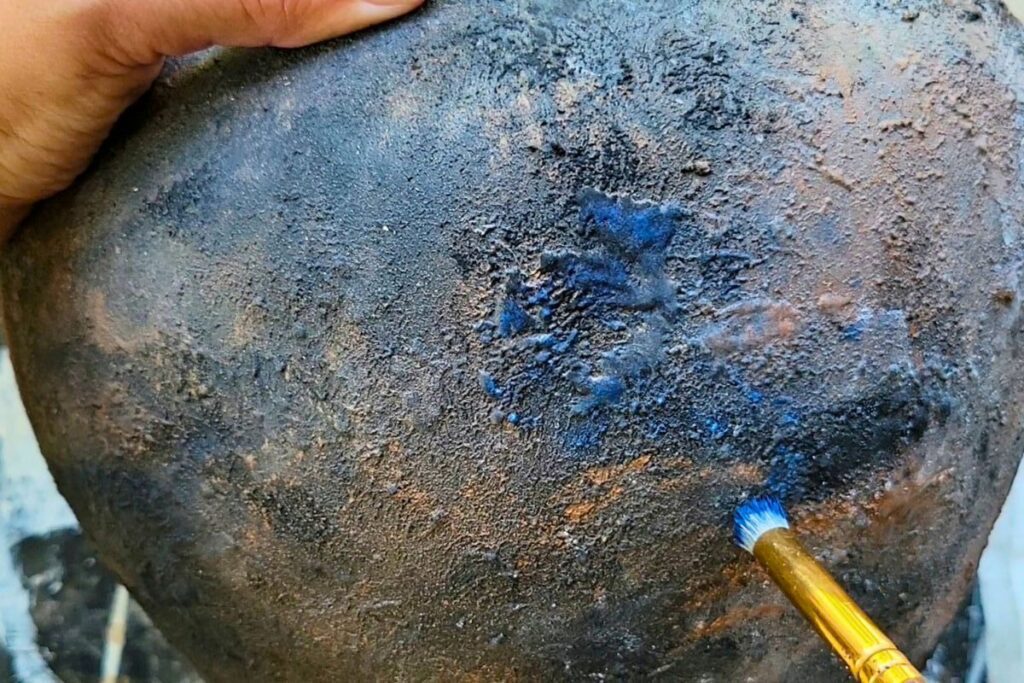
To create a bit more dimension, use the small stencilling brush to apply a little bit of the Folk Art chalk paint in Nautical. You really don’t want to over apply this colour or it will start to look cheap and fake. Just add little amounts to areas where you want to create a bit more dimension and interest.
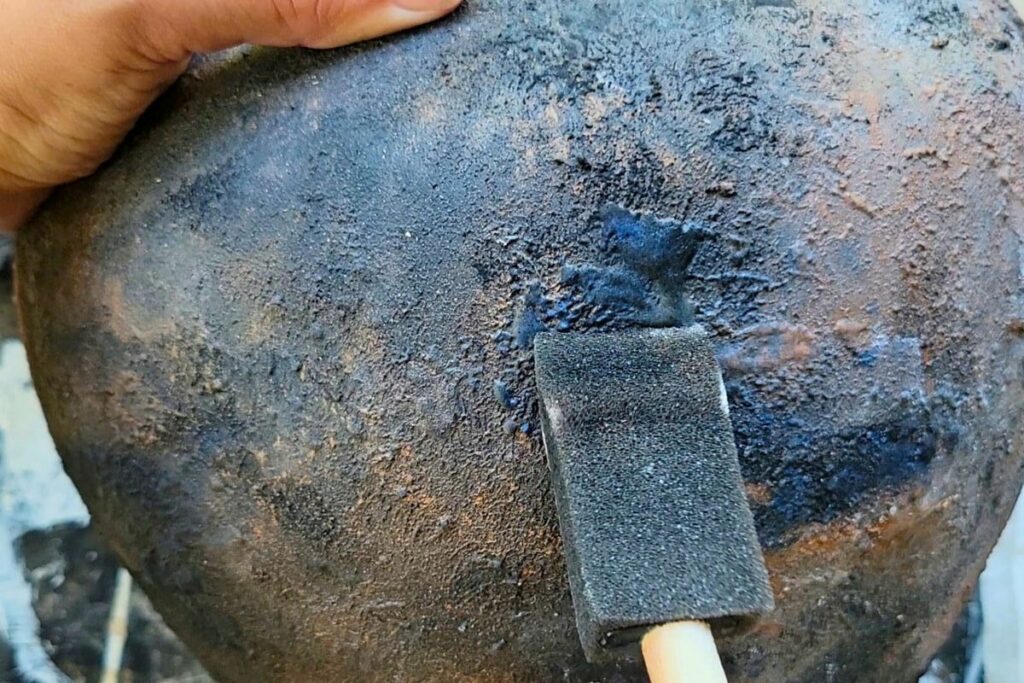
To work the blue colour in and to make it all come together cohesively use your foam brush and some of the Onyx chalk paint to blend it all out. Find raised areas in the texture and add some of the black paint there as well. This will create depth and it will help to balance the whole look.
Keep working with these colours and when needed continue to apply the watered down white chalk paint to mute everything. Go back and forth, blending, adding, and layering until you get a look that you are happy with.
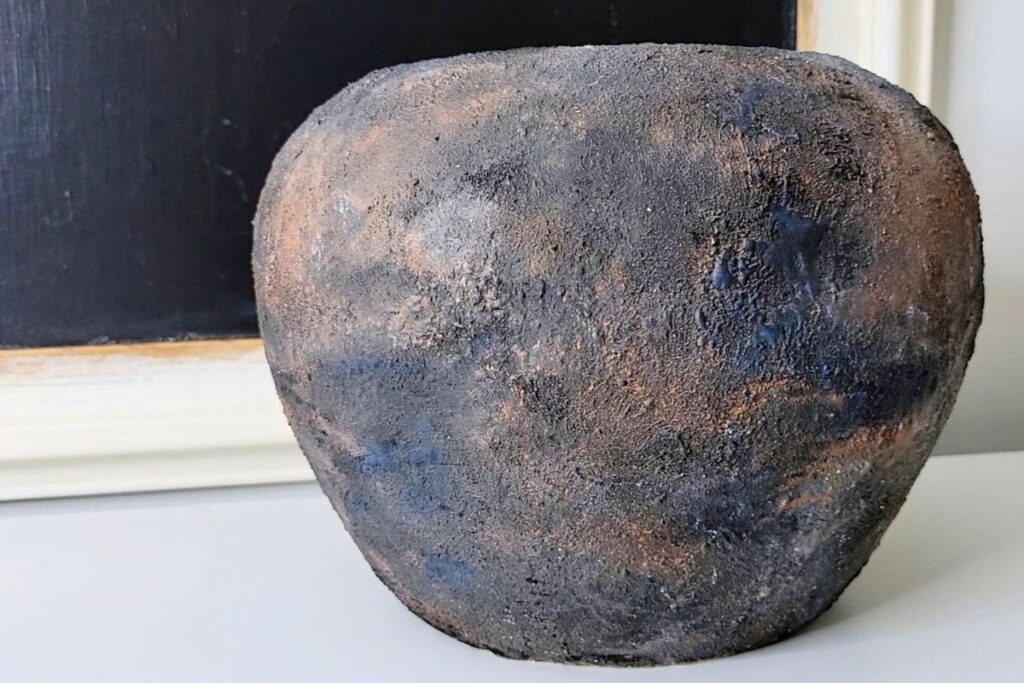
Et Voila!
Here is the finished look. The nice thing about his DIY vase is that you can really personalize it with the paint to create a look that you like and that works the best with your home decor.
Now, the final price will depend on what paints you already have on hand and the price of your vase. For me, all in this DIY Kirkland vase dupe cost just under $7 because all I needed to buy was the vase and a package of foam brushes.
Jenny’s Finishing Thoughts On How To Paint A Vase
So as you can see, knowing how to paint a vase to make it look like one from Kirkland’s Home is a relatively easy and low budget way to spruce up your living space. With just a few basic crafting materials and a little time, you can create a stunning piece of home decor that looks like it was purchased straight from Kirkland’s. Proving that when it comes to DIYs, you can have professional looking results without paying the high price.
So get creative and get your DIY on! Tell me, have your ever done a DIY dupe from Kirkland’s? And if yes, what was it that you duped? Make sure you share it in the comments below.
Did you find this post helpful or inspirational? Save This Pin to your DIY Vase board on Pinterest.
If you liked this post you may also enjoy:
DIY Candle Holders Pottery Barn Dupe