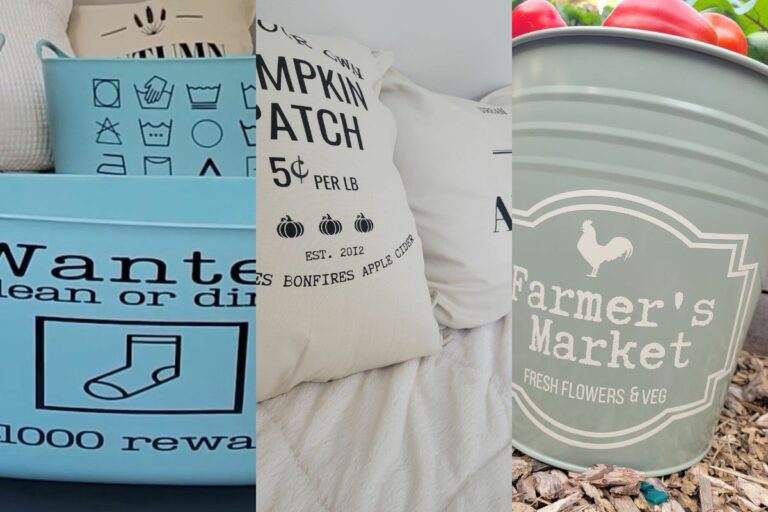
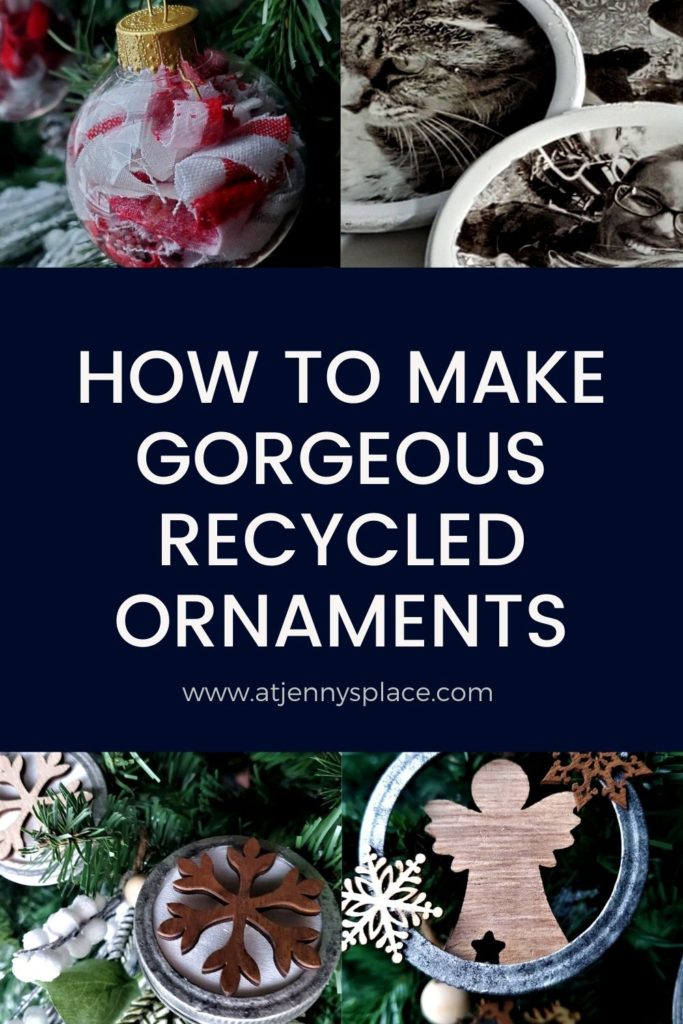
7 Christmas Decorations Using Recycled Materials
Learn how to make these fun and creative recycled Christmas decorations for the holidays. Go green this Christmas!
Festive Recycled Christmas Decorations
The holidays are a time for spending time with family, eating delicious food, and decorating your home to get into the festive spirit. One of the best parts of decorating for Christmas is choosing new and unique decorations to add to your collection.
However, buying new decorations can be expensive, and it’s not always easy to find exactly what you’re looking for. Luckily, there’s a cheaper and more eco-friendly option: making your own recycled Christmas decorations.
Not only will DIYing your Christmas decorations save you money, but it’ll also allow you to create one-of-a-kind pieces that are perfectly customized to your taste. And since you’ll be using recycled materials, you’ll also be helping to reduce waste and protect the planet. So if you’re looking for a fun project to do with your kids or just want to save some money this holiday season, consider making your own recycled Christmas decorations. You’ll be glad you did!
The Next Big Thing in Home Design? Reused Items!
Searching for a new way to decorate your home this Christmas? Consider using recycled materials! You can easily find all sorts of things around the house that are begging to be used in festive decorations.
There are many reasons why you should make your own Christmas decorations using recycled materials. First of all, it’s a great way to save money. You can find all sorts of things around your house that you can recycle and repurpose into festive Christmas decorations, so you don’t have to spend a lot of money on new decorations.
Another great reason to make your own recycled Christmas decorations is that you’ll be helping the environment. By recycling materials and repurposing them into decorations, you’ll be reducing waste and helping to preserve our planet.
Finally, making your own decorations is just plain fun! It’s a great way to get creative and express your holiday spirit.
So why not give it a try? You might just end up loving it!
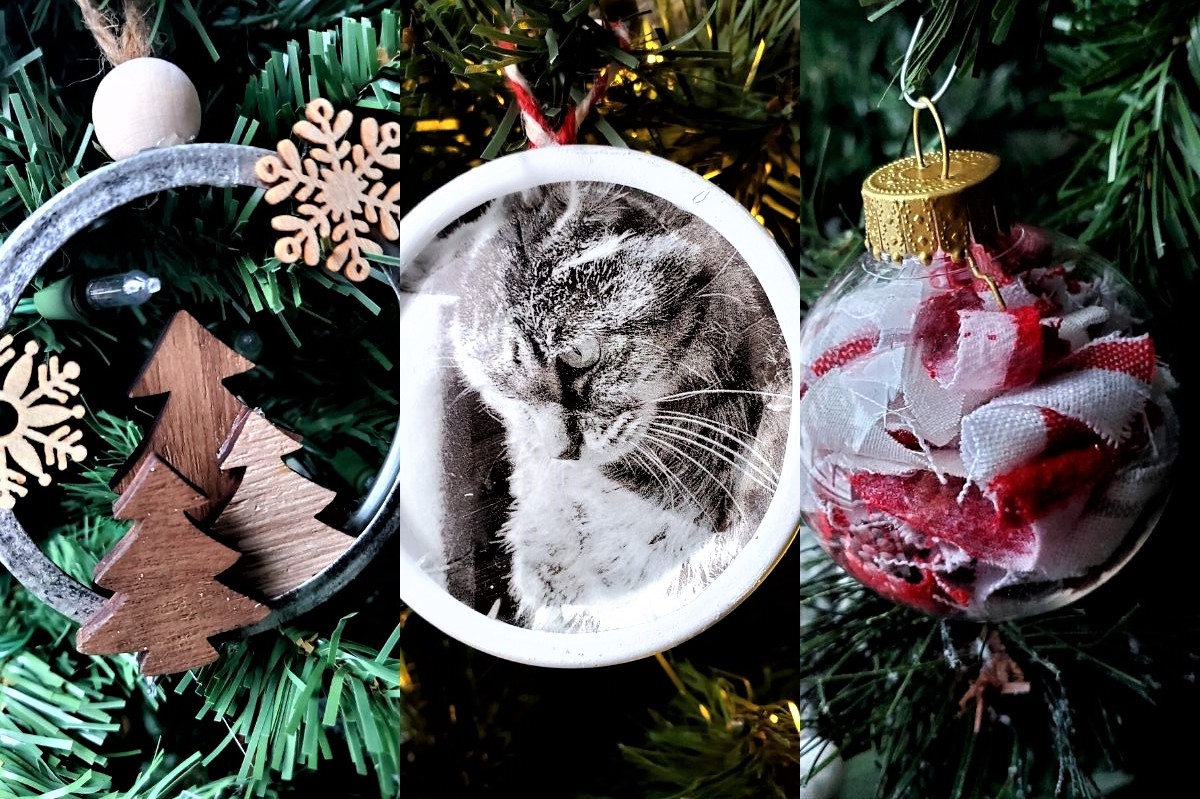
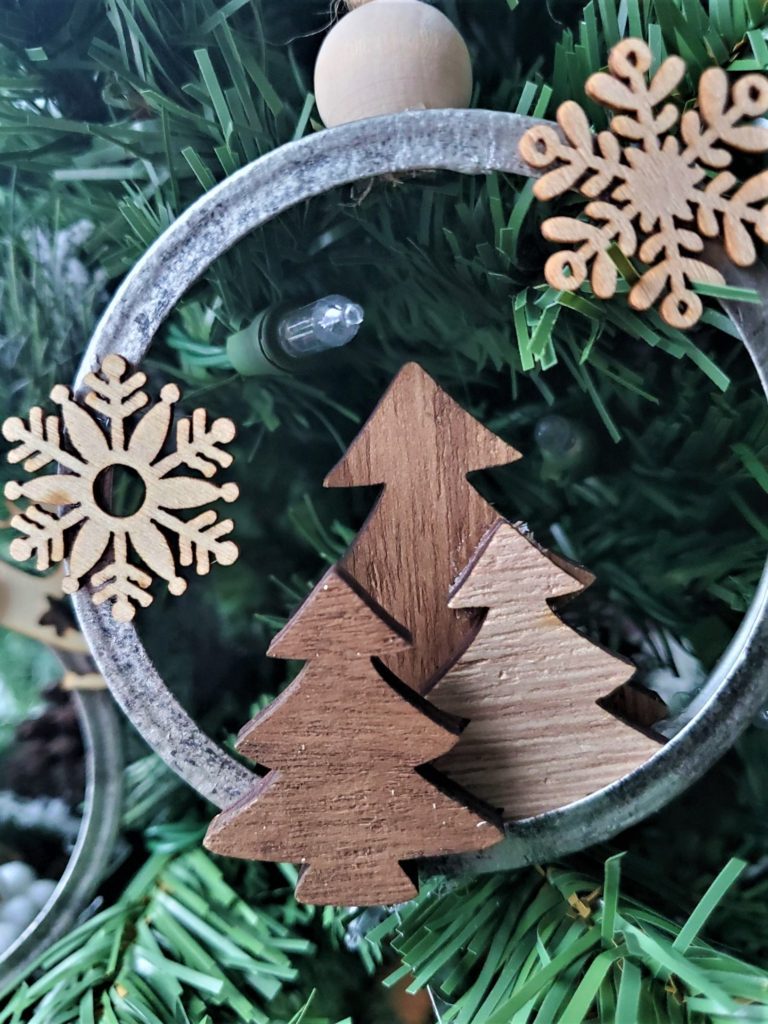
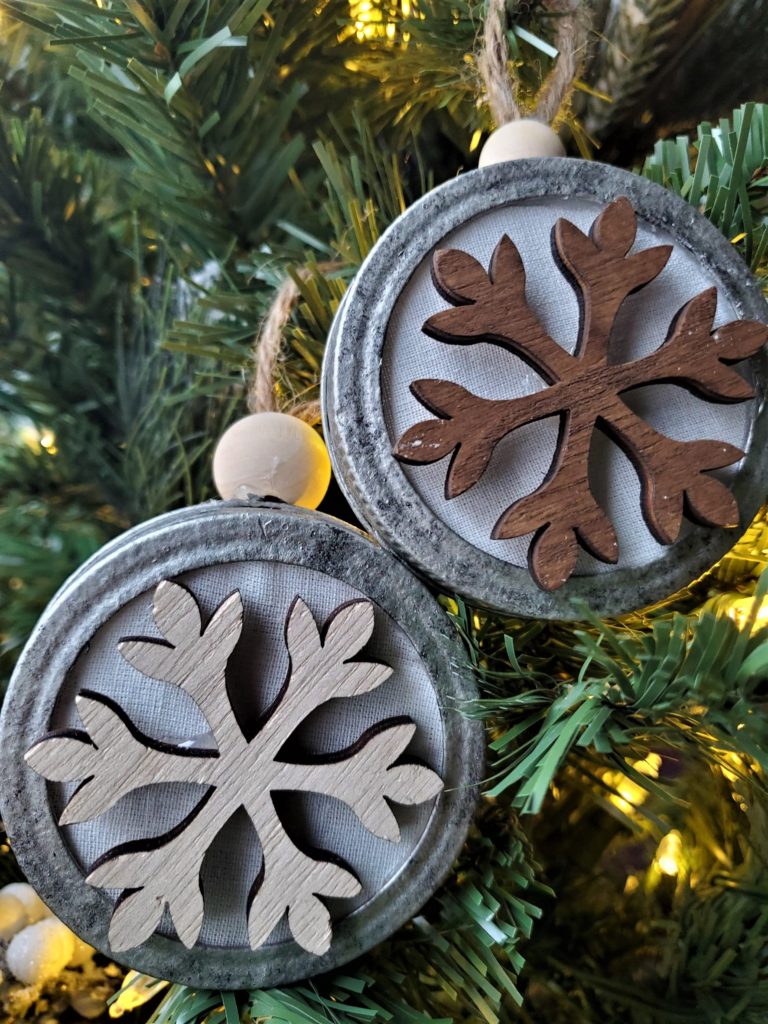
3D Mason Ring Wooden Ornaments
I love making homemade jelly, jam, salsa, and pickles so there is never a shortage of old, rusted jar rings around our home. When antiqued and paired with some wood cut outs these cheap and simple rings make positively stunning ornaments.
Supplies You Will Need
- Mason Jar Rings
- Soft Silver ArtMinds Chalk Paint
- Onyx ArtMinds Chalk Paint
- Stencil Brushes in Medium and Small
- ArtMinds Antique Wax
- Paint Brush
- Wood Cut Outs
- Hot Glue Gun and Glue
- Twine or Ribbon
How To Make 3D Mason Ring Wooden Ornaments
- Start by painting the Mason jar rings with the silver chalk paint. Use the stenciling brush and pounce up and down. You are aiming to add a lot of texture. Let dry.
- Now add the black with the small stenciling brush. Smudge out the black paint with your finger. Make sure that you get the top and the sides.
- Lastly, for the painting portion, soften the black paint with a bit more of the dabbed on silver paint. Let dry.
- Take the antique wax and add a bit of water to thin it out. Use this to stain the pieces you put aside a darker shade.
- Using your hot glue, place a nice line of glue on the bottom of each of the wood cut out.
- Press the wooden pieces onto the inside of the Mason jar rings. Hold in place until glue has hardened.
- To create dimension, place the wooden pieces in front and behind each other. Add a few pieces to the outside of the ring.
- With a little hot glue, add the twine or ribbon to the top inside of the Mason jar ring.
Voila! These are so gorgeous. When hanging on the tree, the light behind creates shadows which adds to the visual interest and really makes Christmas ornaments pop.
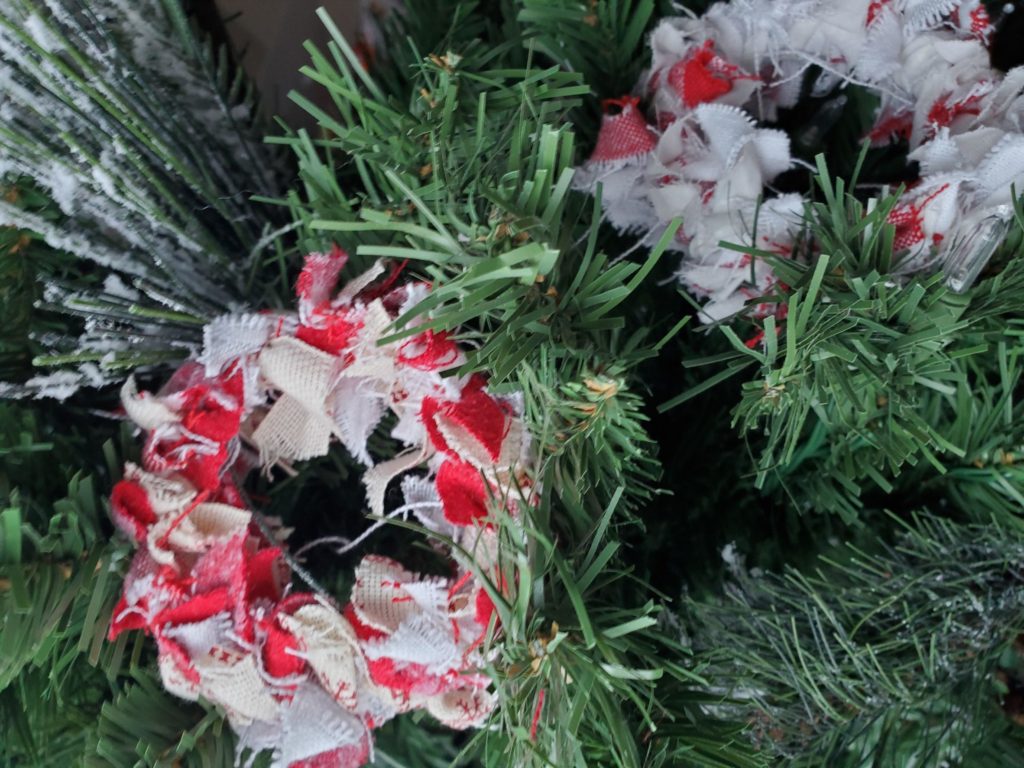
Thrift Store Bracelet Mini Shag Wreaths
These are by far the easiest of all the recycled Christmas decorations. I came up with this idea when I found a big bag of cheap bracelets at the thrift store. These simple bracelets have a ton of possibilities and these Christmas ornaments are just one of the ideas shared today that use these bangles.
Supplies You Will Need
- Cheap metal bracelets
- Old fabric cut into thin strips
- Ribbon
How to Make Thrift Store Bracelet Mini Shag Wreaths
- Cut your fabrics and ribbon into thin strips about 5 inched long. Set aside.
- Tie the strips of ribbon and cloth to bracelet one at a time. Knot these like you are tying your shoe lace.
- Trim the strips down so that you can see the wreath form. Fluff the strips up. .
So shabby chic beautiful. And so easy and fun to make. Loving these!
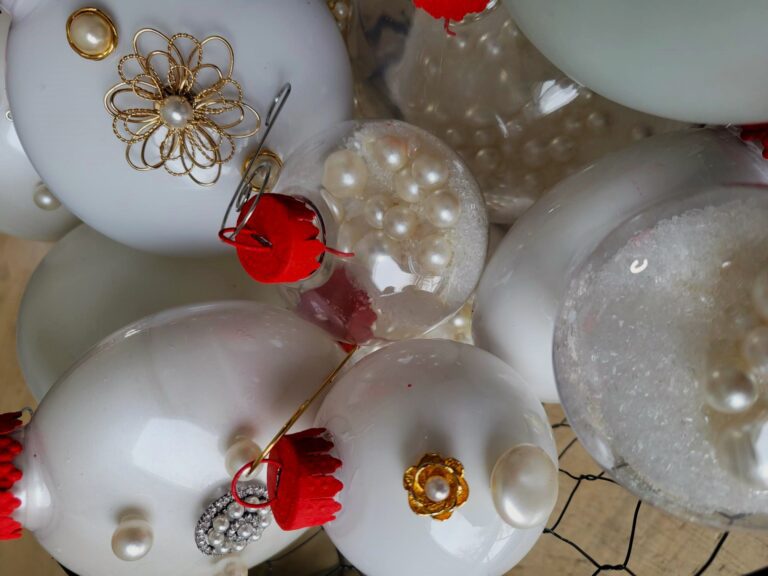
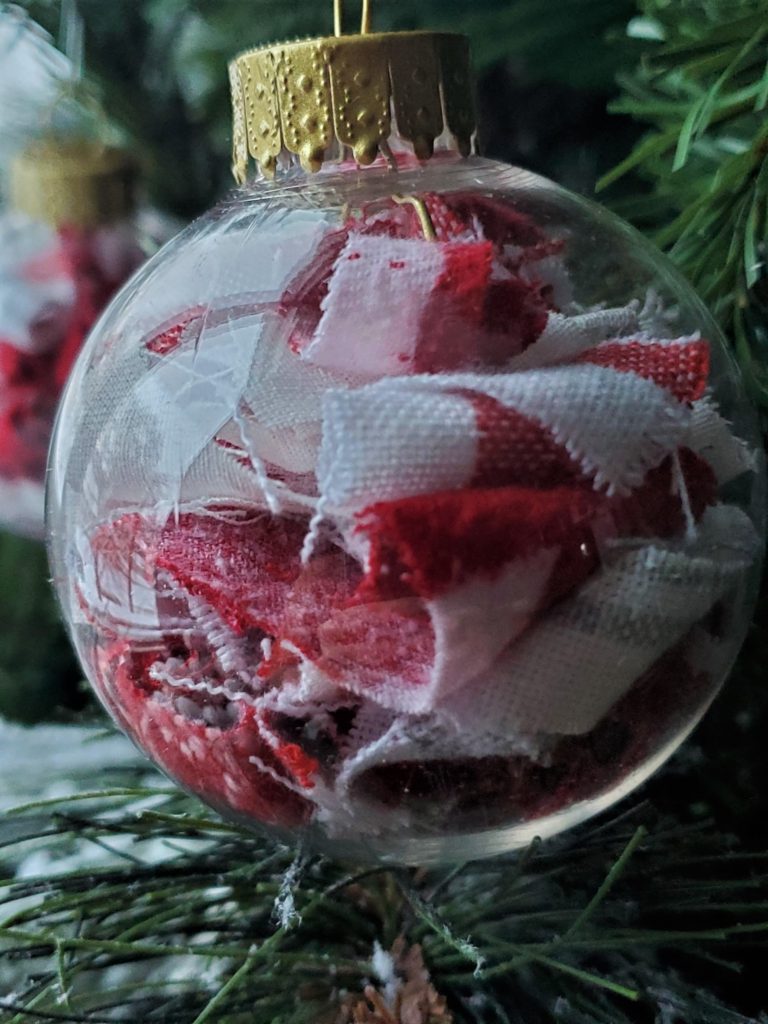
Scrap Cloth Candy Cane Christmas Ornaments
These recycled Christmas ornaments are awesome and may be my favourite of the bunch. Although, loving the next ornament and the one after that… and the last one. OK,all these Xmas decorations using recycled materials are fabulous.
Supplies You Will Need
- Clear, plastic Christmas ornament balls
- Bag of cut up scrap cloth and ribbon
- Optional: Rustoleum Gold Spray Paint
How to Make Scrap Cloth Candy Cane Christmas Ornaments
- Stuff the pieces of scrap cloth and ribbon pieces into the top of the plastic ornament.
- For the larger pieces of scrap cloth, roll them up into scrolls and stick them into the top of the plastic ornament.
- Replace the now gold ornament toppers and… Oh, my goodness! These are simply divine.
I truly couldn’t be happier with how they turned out and I hope that you love them too.
PRO TIP: Remove each of the ornament toppers and spray paint them with gold spray paint. This makes them look so high end.
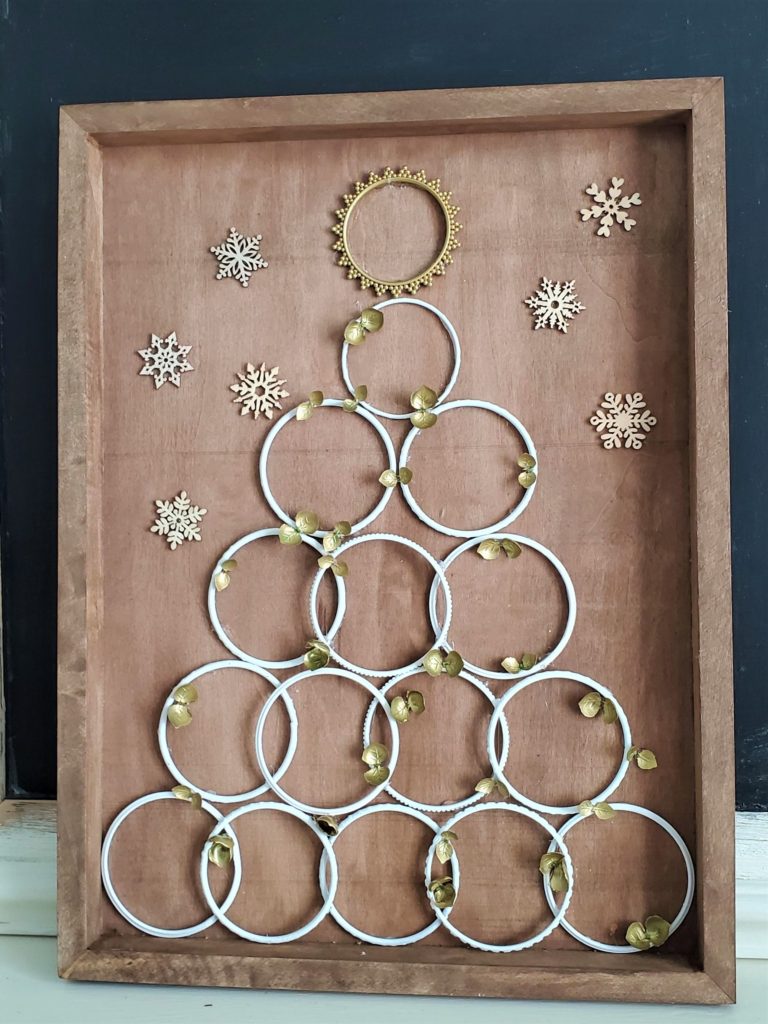
O Tannenbaum Wall Art
This magnificent Christmas tree picture uses more of those metal thrift store bracelets. A can of spray paint and a little imagination is all you need to make this stunning Christmas wall Xmas decorations using recycled materials.
Supplies You Will Need
- Wood Frame With Backing
- ArtMinds Antique Wax
- Metal Bracelets (Preferably in Adult and Child Sized)
- Round Ornate Earrings
- Small Wood Snowflake Cut Outs
- Faux Greenery
- Rustoleum Spray Paint in Antique Gold
- Hot Glue Gun and Hot Glue
How to Make O Tannenbaum Wall Art
- Spray paint the bracelets with the white spray paint.
- Cut succulent leafs into individual section so that they look like elegant and delicate ornaments. .
- Start at the bottom of the tree. Hot glue the 1st, 2nd, and 5th bracelet to the frame. They should be laying flat.
- Use a child sized bracelet at the the top as the tree topper. You could also use a smaller hoop earring.
- Arrange the bracelets on the wooden frame first to see how you want them arranged and to make sure that they will fit. Leave room for a tree topper.
- Arrange the other two bracelets over top of the first two so that they overlap with a little loop in between each.
- Use a pencil to mark where the bracelets hit. This is where you are going to place the dabs of hot glue. Gently press the top bracelets down onto the lower ones to adhere.
- Keep doing this until you reach the top of the tree.
- Now you get to hot glue the beautiful, gold leaves to the tree. Just put a small dab of glue on the back of each and gently press down.
Lastly, add a few wood snowflakes to the backing. This creates a bit more interest and dimension to the piece. I left my snowflakes in their natural wood colour but again, paint, stain, or bedazzle these any way you wish.
And Voila! Fini and fabulous.
TRANSLATION: Fini -= finished
NOTE: For the line that needs 4 bracelets. Hot glue the 1st and 3rd bracelet down. Lay the second bracelet over top and hot glue it down. The 4th bracelet will have to be partially hot glued to the top of the 3rd bracelet and to the side to the back of the frame. It will be on a slat but once finished this is not noticeable.
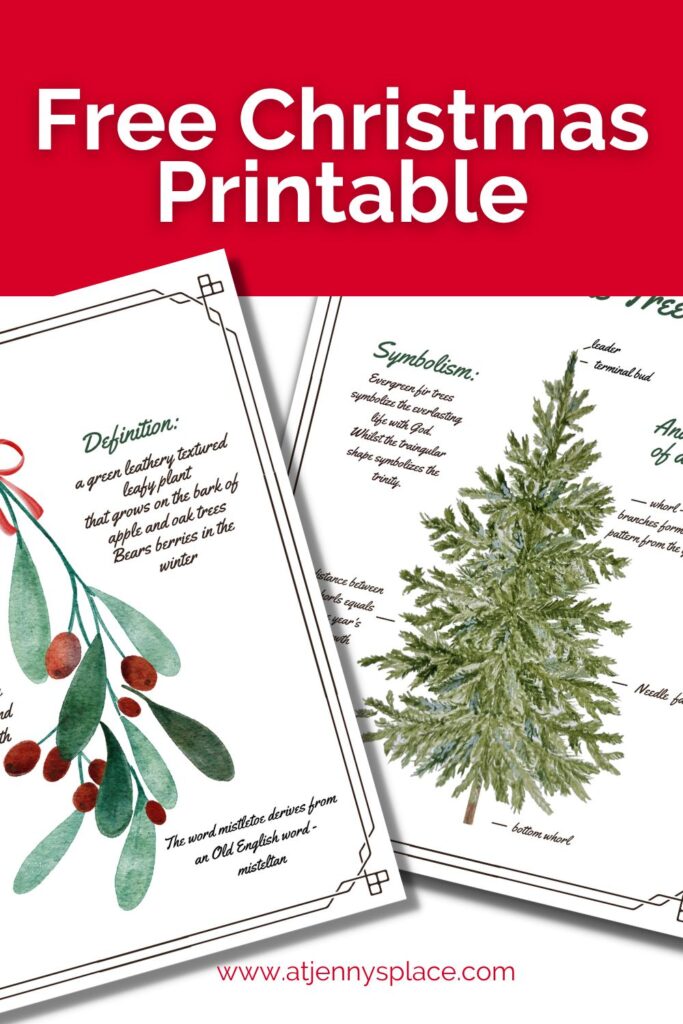
Christmas Art Printable!
Inspired by Kirkland Christmas, this holiday wall art is the perfect addition to any Christmas decor. Hang on the wall or display on your fireplace mantle.
Simply download the free printable, print and frame.
Antique Snowflake Ornaments
These ornaments are beautiful in their rustic simplicity. Best part? These ornaments are made almost completely with recycled materials which make them inexpensive and environmentally friendly.
Supplies You Will Need
- Mason Jar Rings
- Mason Jar Lids
- ArtMinds Chalk Paint in Onyx
- ArtMinds Chalk Paint in Soft Silver
- Stenciling Paint Brush in Medium and Small
- White Cloth
- Wood Snowflake Cut Outs
- Hot Glue Gun and Hot Glue
How to Make Antique Snowflake Ornaments
Start by antiquing the Mason jar rings. with silver and black chalk paint and a stenciling brush.
Using a pencil trace the lids onto the fabric and cut out.
Hot glue the fabric to the front of each of the Mason jar lids by placing dabs of hot glue around the edges and stretch the fabric over the entire lid.
Squirt a nice amount of hot glue around the whole inside of the Mason jar ring and then press the fabric covered lid inside with the material facing down.
Hot glue one of the snowflake wood cut outs to the front, middle of the fabric covered lid.
Lastly, make a loop in the twine or ribbon and hot glue this to the inside, top of the ornament to hang from the tree. Slide a wooden bead on and with a small dab of hot glue adhere the wood bead to the top of the ring.
So simple and beautifully rustic. These Xmas decorations using recycled materials make the perfect addition to any holiday tree.
No Sew Scandi Pillow Ornaments
These Scandi inspired heart pillow ornaments are as charming as they are classic. These Xmas decorations using recycled materials are made from old pajamas, left over crafting cloth, and a pillow that I had kicking around.
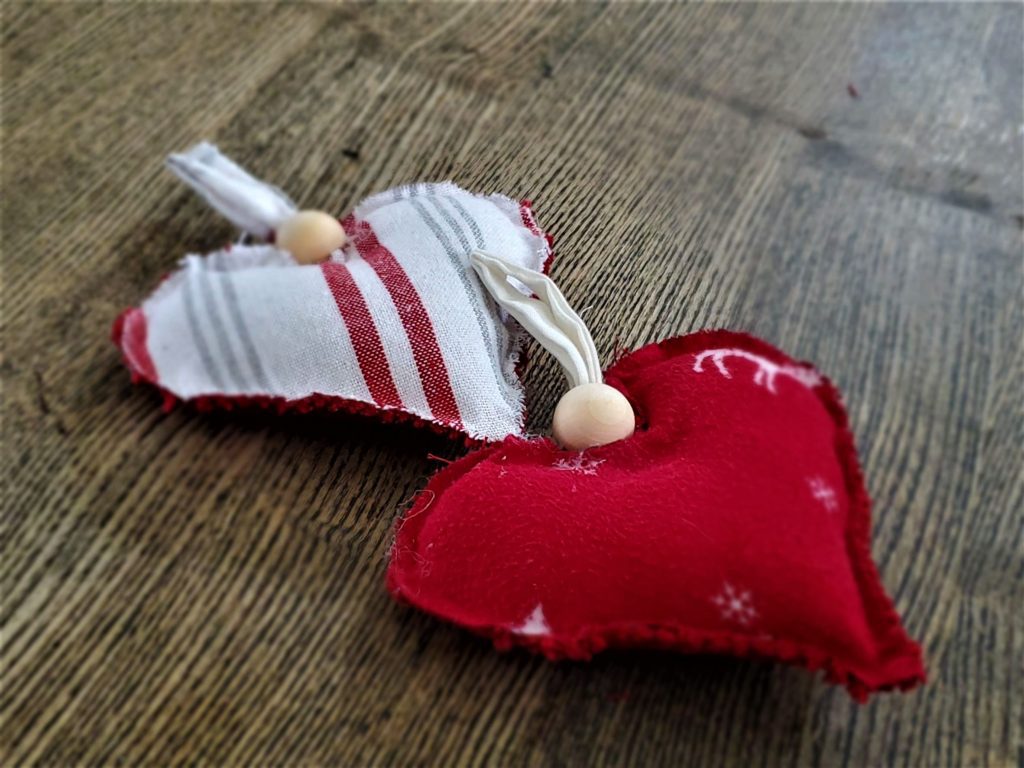
Supplies You Will Need
- Pillow Filler (I just used an pillow I had in the house but you can always buy one at the dollar store.)
- Scrap Cloth Squares
- Optional: Ribbed Cloth Place Mat
- Hot Glue Gun and Glue Sticks
- Twine or Ribbon
- Wood Beads
- Scissors
- Optional: Wood Cut Outs
NOTE: Using a ribbed cloth place mat is optional. You can just make these out of cloth for both sides. But the place mat makes these seem sturdier and less puffy. Your choice.
How to Make No Sew Scandi Pillow Ornaments
- Start by finding a heart shape that you like. I just looked one up on line and traced it out onto a white piece of paper.
- Use your template to trace out the heart shape on the cloth and the place mat. Cut each of the cloth hearts out.
- Hot glue the cloth heart piece to the the heart shaped place mat cloth. Leave a small hole at the top where the two heart sides meet.
- Stuff the glued hearts with the pillow filler so that the heart is slightly puffy but not to the point where it appears really stuffed.
- Cut the twine or ribbon so that it forms a loop. This is to hang it on the tree.
- Stick the twine in to the heart ornament and hot glue it into place.
- Then glue the hole shut and slide a wooden bead onto the twine. Make this extra secure by sticking the hot glue gun tip into the wood bead and add a squirt of hot glue inside.
PRO TIP: Instead of using ribbon or twin I chose instead to use the seam pieces that I had cut away from the original fabric pieces. This way they were nice and sturdy and the coordinated with the fabric hearts.
I also used this fabric to create some really simple holiday wall art. These were so simple but they looked perfect hanging on the kitchen wall.
Picture Perfect Ornaments
I can’t tell you how I prayed when I first came up with this ideas that these would work out. I wanted you guys to have a way to bring family images to the Christmas tree without breaking the bank. I did have a bit of a spray painting issue but other than that I think they turned out great. You tell me though. Success?
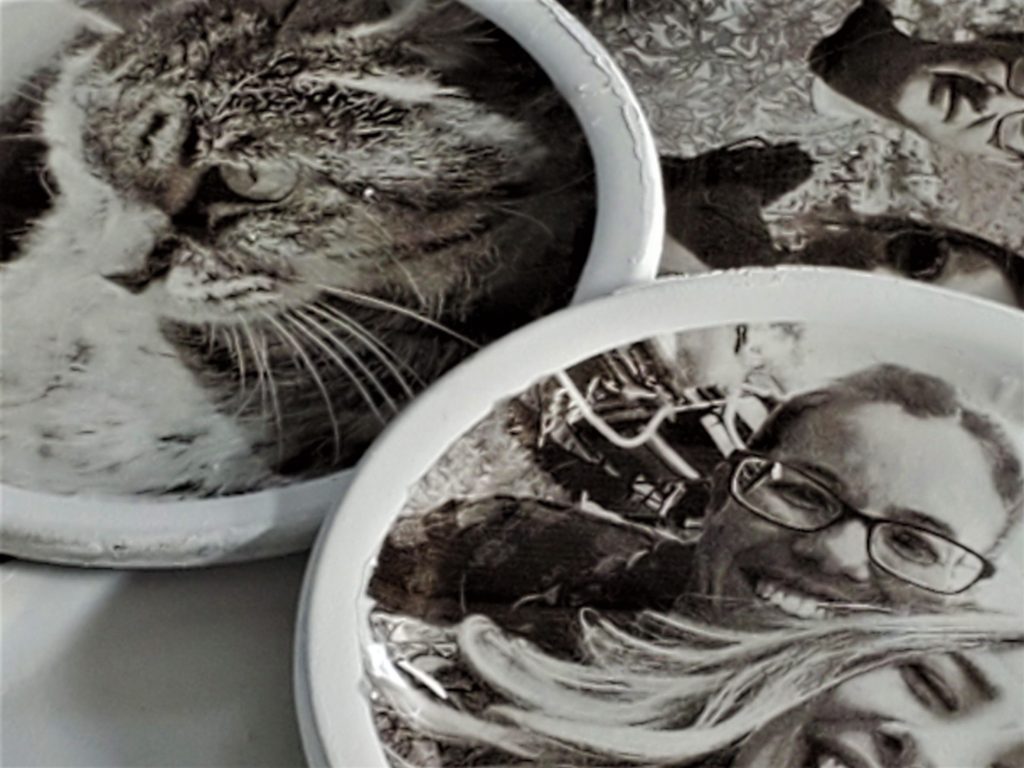
Supplies You Will Need
- Mason Jar Lids in Regular and Wide Mouth
- Rustoleum Spray Paint in White
- Computer and access to Canva’s free templates
- Printer
- Avery Clear Shipping Labels Full Sheet
- Twine or Ribbon
- Hot Glue Gun and Glue Sticks
How to Make Picture Perfect Ornaments
- Start by spray painting the fronts and back of each of the lids. Let dry.
- Go to www.canva.com to register for this free and simple to use program.
- Cut each of the circle out and carefully adhere them to the front of each of the Mason jar lids.
- Hot glue ribbon or twin to the back the each of the ornaments to hang them from the tree.
And the end results are certainly worth the little bit of extra effort. These sentimental Xmas ornaments using recycled materials are the perfect way to capture and share precious moments.
NOTE: Canva does offer users the option for a paid version of their site but it is not necessary for this project.
Jenny’s Finishing Thoughts Recycled Christmas Decorations
Creating Xmas decorations using recycled materials is all the rage and it’s easy to see why. Reusing what you have to make beautiful ornaments is both affordable and incredibly rewarding. Plus, it’s just plain fun and the planet thanks you.
What is your favourite recycled material to use in your Christmas DIYs? Share in the comments below.
Did you find this post helpful or inspirational? Save This Pin to your Recycled Christmas board on Pinterest
If you liked this post you may also enjoy:
How To Decorate For Christmas On A Small Budget