13 Easy Black And White Halloween Decor
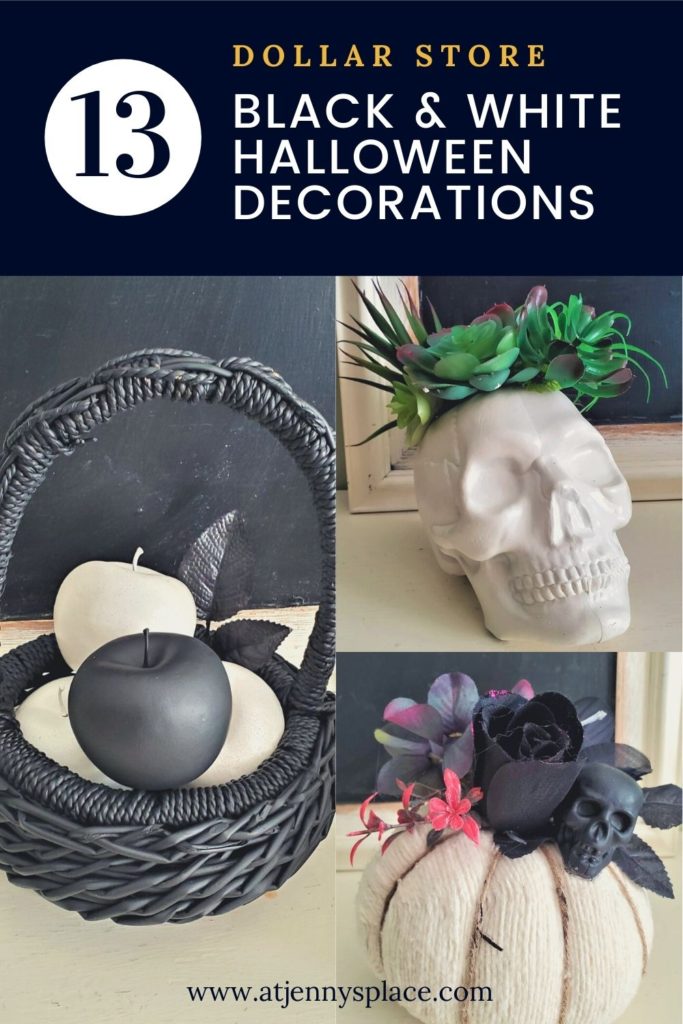
Black and white Halloween decor provides a stunning and sophisticated look for any home. Find 13 Halloween decor ideas that use black and white with a stunning touch of faux copper thrown in for wicked measure.
How Can I Decorate For Halloween Cheap?
Halloween is such a fun time for the DIY decor enthusiast and now a days the ideas are practically limitless. This holiday has grown in popularity and along side it the demand for bigger, better, and spookier decorations. Everyone from Walmart to higher end home decor stores carry everything from the fabulously spooky to the cute and charming when it comes to Halloween decor.
But with Halloween being sandwiched in between Thanksgiving and Christmas the months of October to December can get pretty expensive. Thankfully, with a little bit of time, some paint, a bit of creativity, and access to a dollar store you can create your own decor that will be sure to impress and will cost you very little.
Some DIY ways you can decorate cheaply for Halloween are:
How Do You Decorate Your House For Halloween?
How to decorate your house for Halloween could be a whole article on it’s own (Maybe I’ll write one. Would you be interested in reading that?) but here are a few simple and quick ideas for decorating you house for Halloween that are sure to amp up the spook factor :
13 Spookily Simple Black And White Halloween Decor Ideas
Black and white Halloween decorations are fantastically eye catching. They are reminiscent of Alfred Hitchock, Frankenstein, and Psycho and it brings you to a time when terror was understated and pure.
The following 13 black and white Halloween decor ideas are all simple and easy to create. The majority of the supplies used are from the Dollar Store so they are all cheap to make but you certainly wouldn’t know it from the end results. And all of them are guaranteed to make your house look terrifying.
Magically Lit Fancy Skull
This amazingly intricate skull from the dollar store doesn’t really need any help but I just can’t help myself. A little bit of spray paint and some lights turn this already amazing skull into an over the top Halloween decoration.
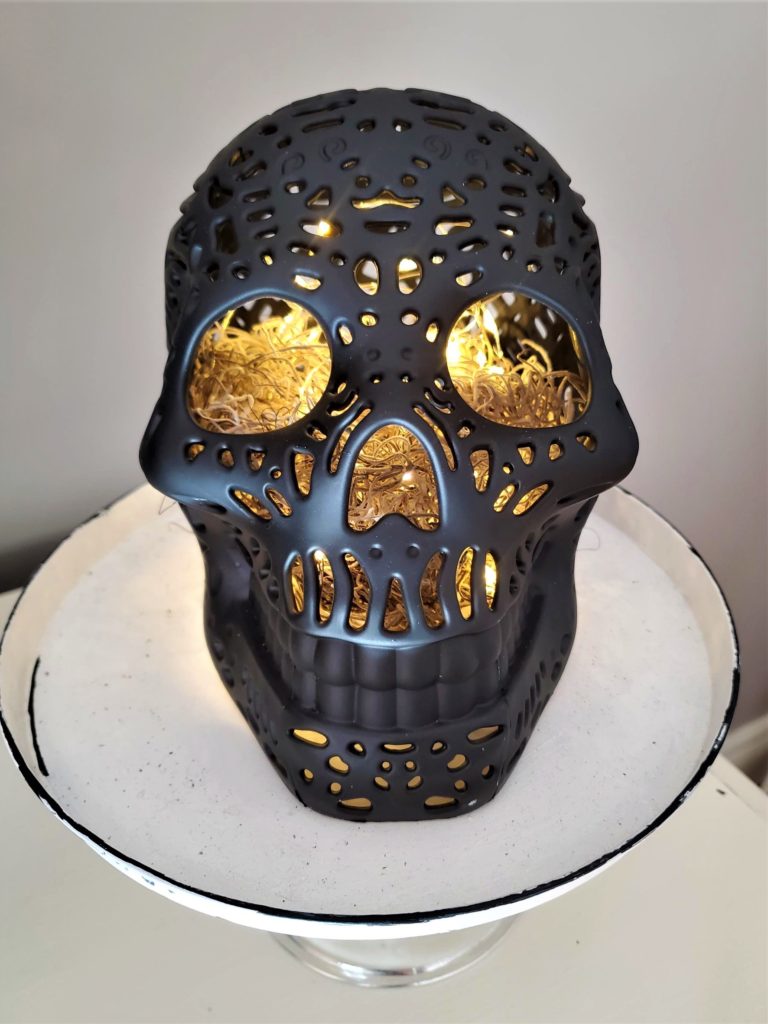

Supplies You Will Need
- Shiny, ornate black skull (from Dollar Tree, shown top of the image)
- Tremclad Professional Flat Black Spray Paint
- LED Mini Lights
- 2 AA Batteries
- Mos
How To Make Magically Lit Fancy Skull
- Spray paint plastic skull with the flat black spray paint. Let dry.
- Place LED mini lights on top of a plate, cake stand, or table top. Make sure that there are fresh batteries inside the battery pack and that they are turned on.
- Cover the battery pack with moss and curl the lights around a bit.
- Top this off with the skull head.
Easy, cheap, and perfect for Halloween.
Halloween Pillar Candles
Elegant and easy. These skull pillar candles look awesome while turned off during the day and even better at night and in full spooky glow.
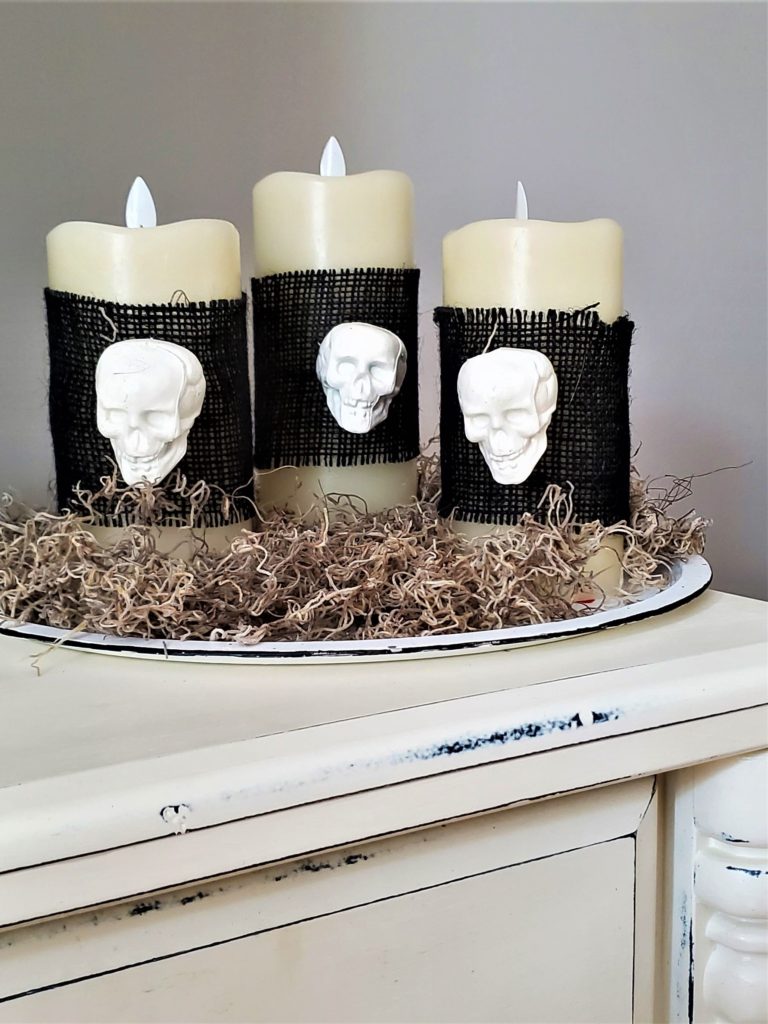

Supplies You Will Need
- Mini Plastic Skulls (from Dollar Tree)
- Behr Spray Paint in Off White
- Black Burlap Ribbon
- Battery Operated Pillar Candles
- Hot Glue Gun and Glue Sticks
How To Make Halloween Pillar Candles
- Spray paint the mini plastic skulls with the off white spray paint. Let dry.
- Measure the burlap around the pillar candles plus an extra 1/2″.
- Hot glue the 1/2″ down so that the one edge is doubled. This will prevent the hot glue from seeping through to the candle and ruining it.
- Hot glue the skulls to the middle front of each of the burlap strips.
- Wrap the burlap around the candle, add a strip of hot glue to the doubled burlap end and press the other side of burlap down on top.
- Turn on the candles and watch the arrangement glow.
Perfect to use as a creepy night light in the bathroom or as table top decor.
Skulls On A Stake
This project was so fun to make and the end result is nothing short of spooktacular. This project offers a couple of painting options. So use the overall look that works best for you.
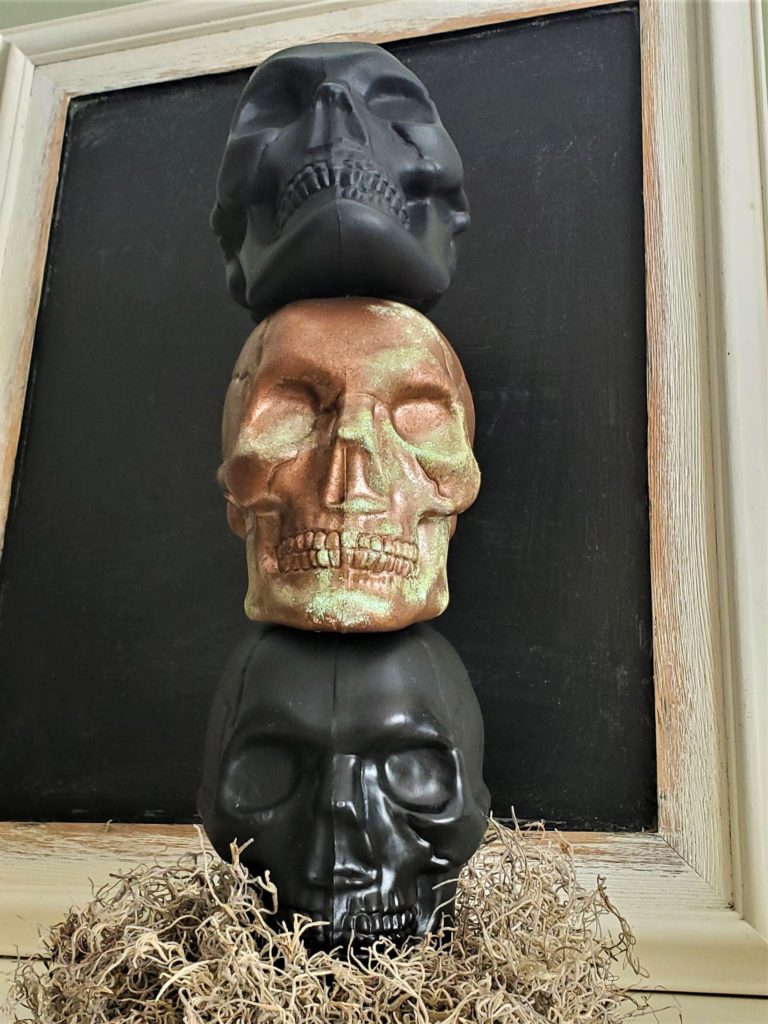

Supplies You Will Need
- Plastic skull heads on a stake (I found these at Dollarama but you can find similar ones at Dollar Tree)
- Metal Paper Towel Holder (I got mine from Dollarama but you can find similar ones at Dollar Tree)
- Tremclad Professional Flat Black Spray Paint
- Exacto Knife
- Moss
Supplies for Copper Skull (Optional):
This fall I am really feeling all things copper. So many of my fall decor pieces are made with faux and real copper pieces. So I decided to add a bit of copper to the mostly black and white pieces. This is completely optional. If you prefer to keep things as only black and white Halloween decor then just use some flat white spray paint to paint the middle skull white.
If you decide to go with the fabulous oxidized copper skull you can find out how exactly I created this using one of the 5 different faux copper painting techniques I shared in August.
- Rustoleum Universal Metallic Enamel Spray Paint in Aged Copper
- ArtsMinds Chalk Paint in Succulent
- Artminds Chalk Paint in Antique Aqua
- ArtMinds Wax in Antique
- Stencil Paint Brush
How To Make Skulls On A Stake
- If you bought the plastic skulls from the dollar store that come with a black, plastic garden stake, remove the stake.
- Cut the plastic part that holds the skull on the garden stake on all 3 of the skulls. Make a slit large enough to slide the skull down the paper towel holder. (See image)
- Next, cut a slit into the top of the skull. This slit need to be big enough that it will also be able to slide down the paper towel holder. (See image)
- Spray paint 2 of the 3 skulls with the flat black spray paint. Let dry.
- For the 3rd skull paint with the copper spray paint and then use the chalk paint to create an oxidized look or if you prefer, spray paint the 3rd skull with flat white spray paint. Let dry.
- Paint one of the teeth on one of the black skulls copper with some copper chalk paint. (Optional)
- Slide a black skull on to the paper towel holder, follow this with the copper or white skull, and then top it all off with the third black skull.
- Cover the bottom part of the metal paper towel rack with some moss.
And Voila! Call me humble, but these skulls a freaky awesome! I love the way this looks and it was so ridiculously easy and cheap to make. But what do you think?
Succulent Skull Heads
You get a few options with this project. The skull base can be spray painted white, black, or with an oxidized faux copper look. All look frighteningly good. I went with an ivory skull and the oxidized copper skull but black would look stunning as well.
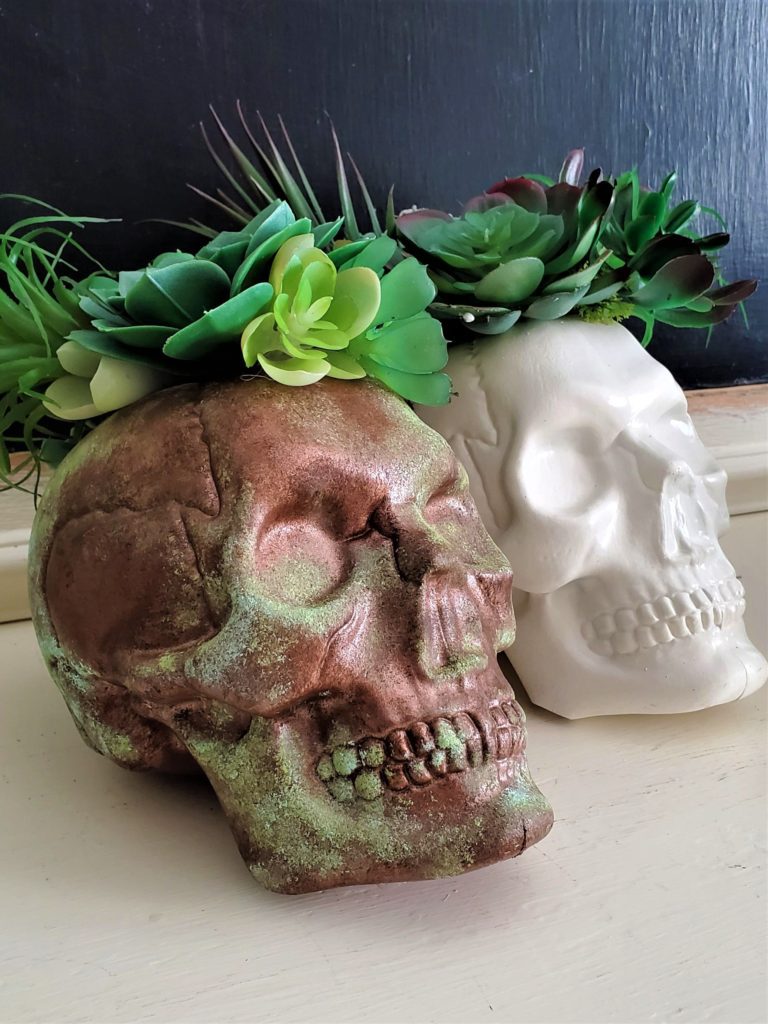

Supplies You Will Need
- Plastic skull heads on a stake (I found mine at Dollarama but you can find similar ones at Dollar Tree )
- Behr Spray Paint in Off White
- Tremclad Professional Flat Black Spray Paint (optional)
- Faux Succulents (from Dollar Tree)
- Floral Foam (or reuse packing foam like I did because I had it on hand)
- Exacto Knife
- Hot Glue Gun and Glue
- Moss
How To Make Skulls On A Stake
- If you bought the plastic skulls from the dollar store that come with a black, plastic garden stake remove the stake.
- Cut the plastic part that holds the skull on the garden stake off of the skull. This will allow the skull to sit up right.
- Cut the top of the skull head off.
- Spray paint the skull black, white, or with the oxidized copper painting technique. Let dry.
- Cut the foam down to fit inside the hole in the top of the skull.
- Cut the faux succulents down so that there is just an inch or two of stem.
- Using a generous dab of hot glue, glue the succulents into the foam.
- For some of the succulents cut the stem completely off and glue these around the edges.
- If needed cut a layer or two off of a couple of the succulents so that you end up with smaller succulents and use these to fill in the holes.
- Lastly, fill in any leftover spaces with moss or bright, ferny greenery.
I saw similar succulent skull arrangements at Michael’s. Hubby says these DIY ones look even better and by reusing skulls and succulents I had on hand, plus some spray paint and chalk paint I had hanging around the house, these skulls cost me nothing to make. Awesome!
Curly Cue Pumpkins
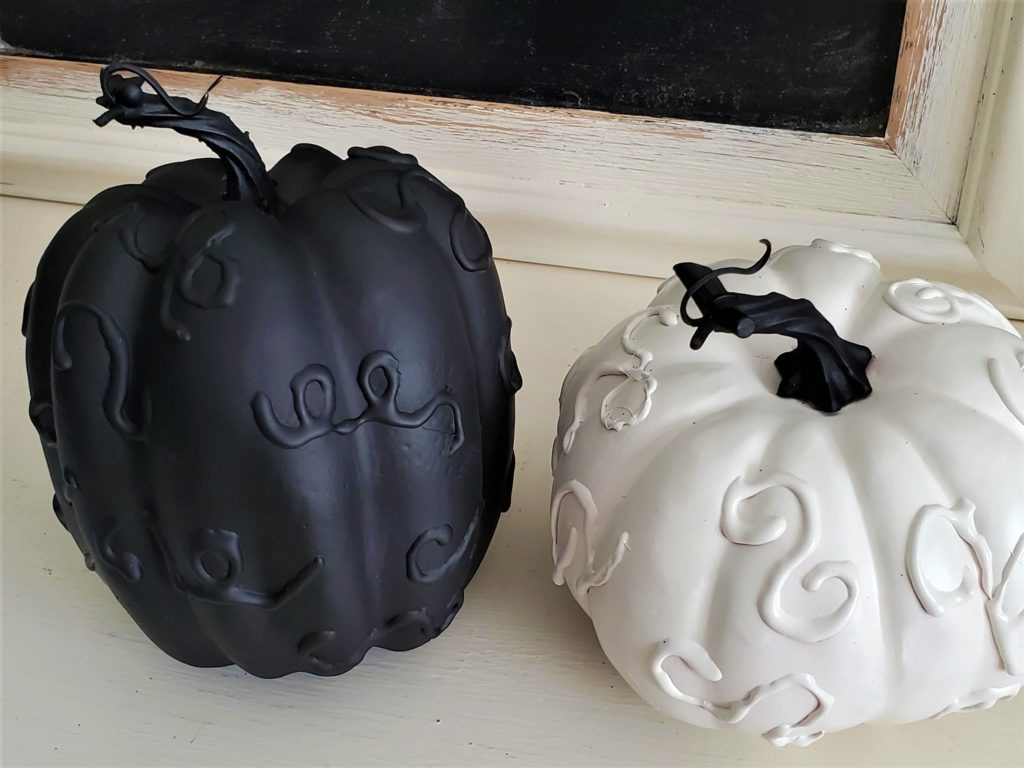

Supplies You Will Need
- Foam and plastic covered pumpkins (I found mine at Dollarama)
- Hot Glue Gun and Glue
- Tremclad Professional Flat Black Spray Paint
- Behr Spray Paint in Off White
How To Make Curly Cue Pumpkins
- Start by using the hot glue gun and glue to create curly cues, abstract lines, or words on the pumpkin. Let dry completely.
- Using either the ivory or black spray paint, spray paint the entire pumpkin. Let dry. This will take a couple coats of paint to cover the bright orange colour.
That’s it. Nothing to it. Display these on their own or combine them with a bunch of other black and white pumpkins to create an impressive pumpkin patch arrangement.
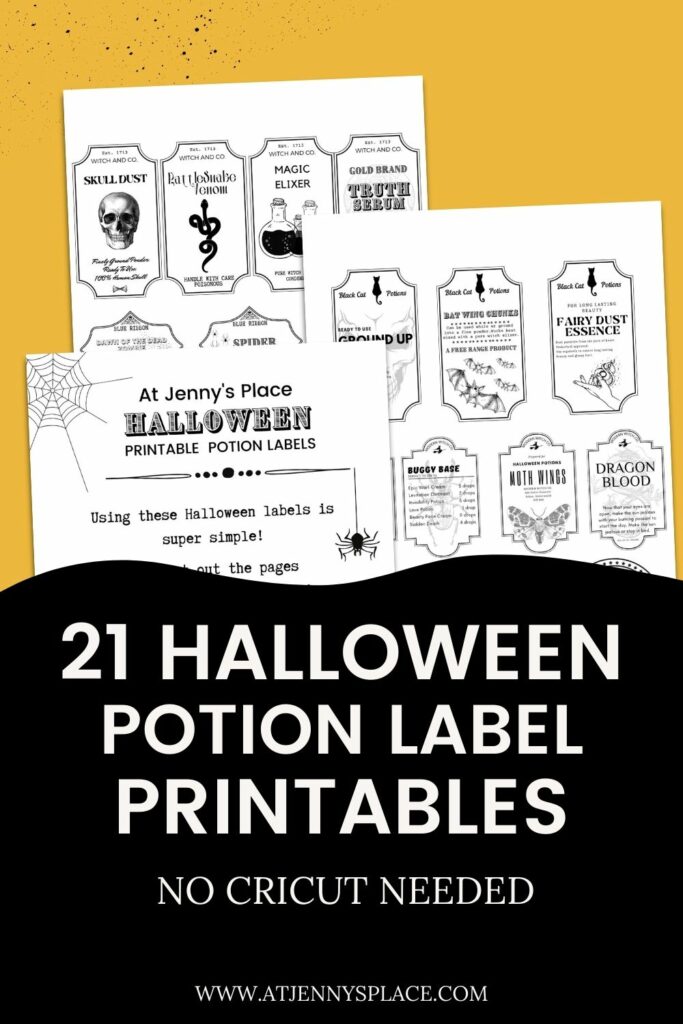

Free Halloween Printable!
Get in the spirit of Halloween with these free printable potion labels!
At Jenny’s Place, has fun labels that will help you add that extra touch of magic to your Halloween festivities. Whether you’re hosting a costume party or just want to add some eerie decorations to your home, these printable labels are perfect for creating an authentic atmosphere. Best of all, when you sign up now, you’ll gain unlimited access to AJP Free Printable Library. Join today!
Dia de los Muertos 3D Picture Frames
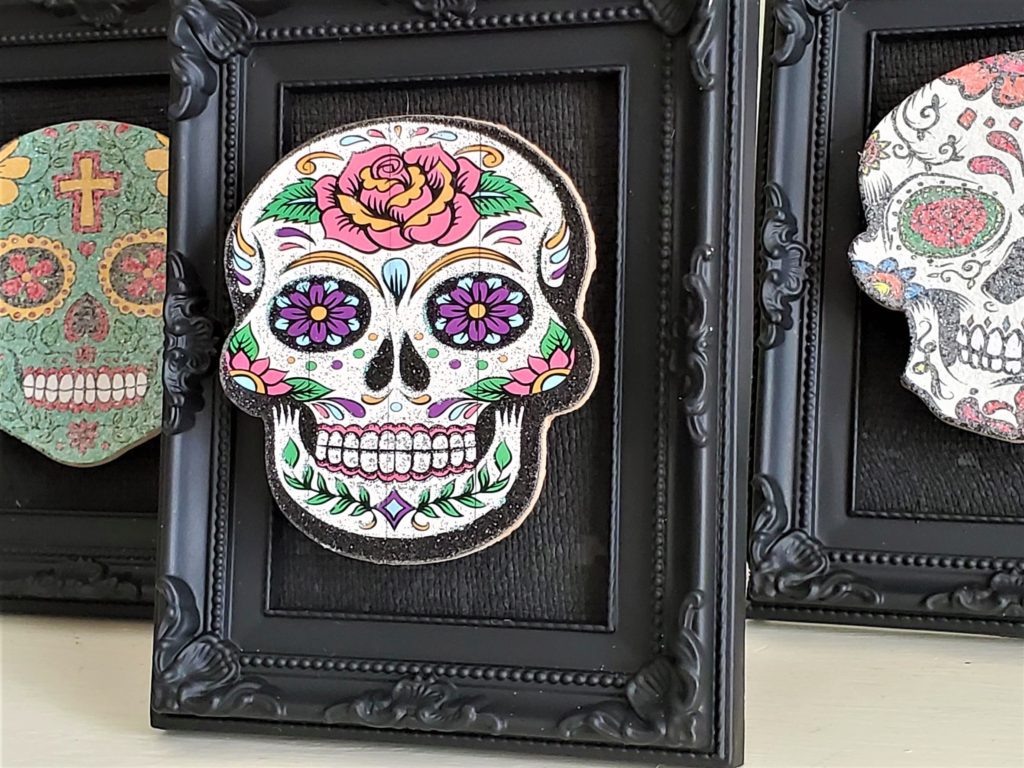
Before world wide madness hit our family had the incredible opportunity to visit Mexico. There we created so many amazing memories. As soon as I saw these Dia de los Muertos skull wall hangings at Dollar Tree I knew I had to make something with them. These are technically not just black and white but the overall look is so awesome and they read black and white so… who cares?

Supplies You Will Need
- Dia de los Muertos Hanging Sugar Skull Decor (from Dollar Tree)
- Scissors
- Jenga Blocks
- 3 Ornate Picture Frames (I bought the ones I used at Dollarama over 11 years ago but you can always find ornate picture frames at the dollar store at any time.)
- Hot Glue Gun and Glue Sticks
- Tremclad Professional Flat Black Spray Paint
How To Make Dia de los Muertos 3D Picture Frames
- Start by painting the picture frames and the picture frame backings with the flat black spray paint.
- Also, paint the Jenga blocks with the black spray paint.
- Once dry, put the backings back into the frames.
- Cut the individual skulls off of the wall hanging ribbon.
- Hot glue the skull heads to the Jenga block.
- Place the skull with the Jenga block, glue side down, in the middle of the picture frame backing.
That’s it. These were so easy to make and I just love how they turned out. I don’t even mind the bit of colour that they add to the overall look. They break up all the black and white Halloween decor but because they read as black they fit right in.
Succulent Pumpkin
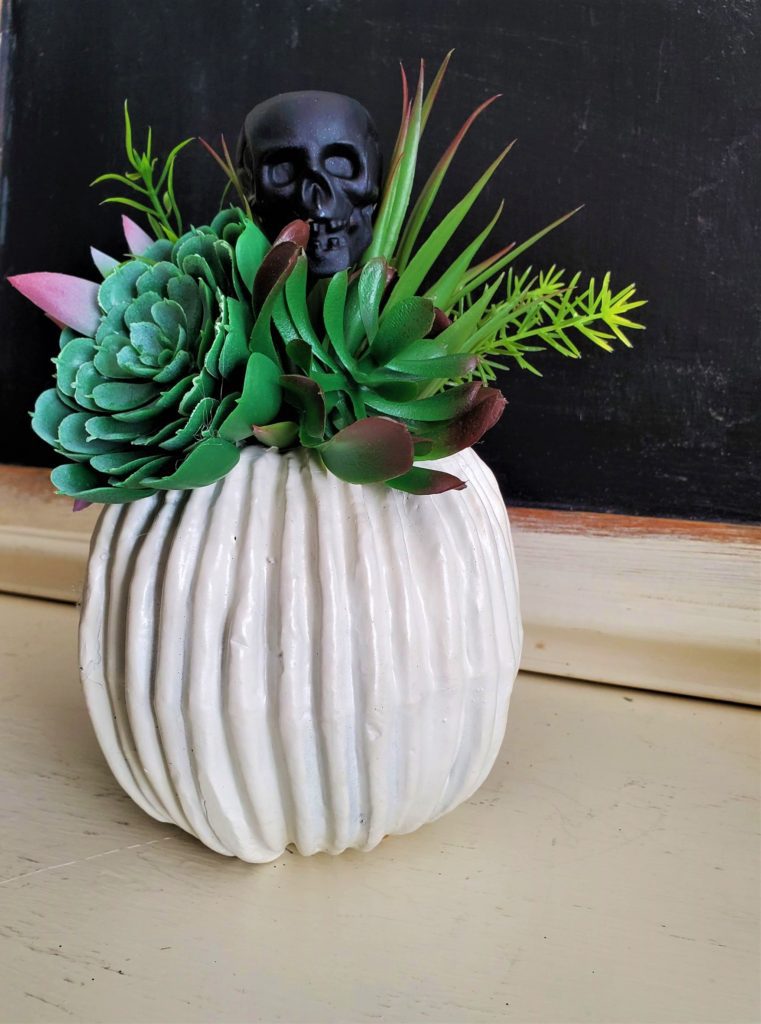
Take out those faux succulents again because we are going to make a gorgeous succulent pumpkin that looks like it came straight from a home decor store.

Supplies You Will Need
- Foam Pumpkin
- Faux Succulents (from Dollar Tree)
- Behr Spray Paint in Off White
- Hot Glue Gun and Glue Sticks
- Mini Skull Head (optional and from Dollar Tree)
- Tremclad Professional Flat Black Spray Paint (optioanl)
How To Make Succulent Pumpkin
- Take the stem out of the pumpkin.
- Cut the stems off of the succulents.
- Hot glue the succulents onto the top of the pumpkin.
- Hot glue the black skull onto the top of one of the succulents.
Done. This elegant arrangement makes the perfect table top decor piece. And really, it’s up to you if you want the pumpkin to be black, white, or even copper.
Medusa’s Bouquet
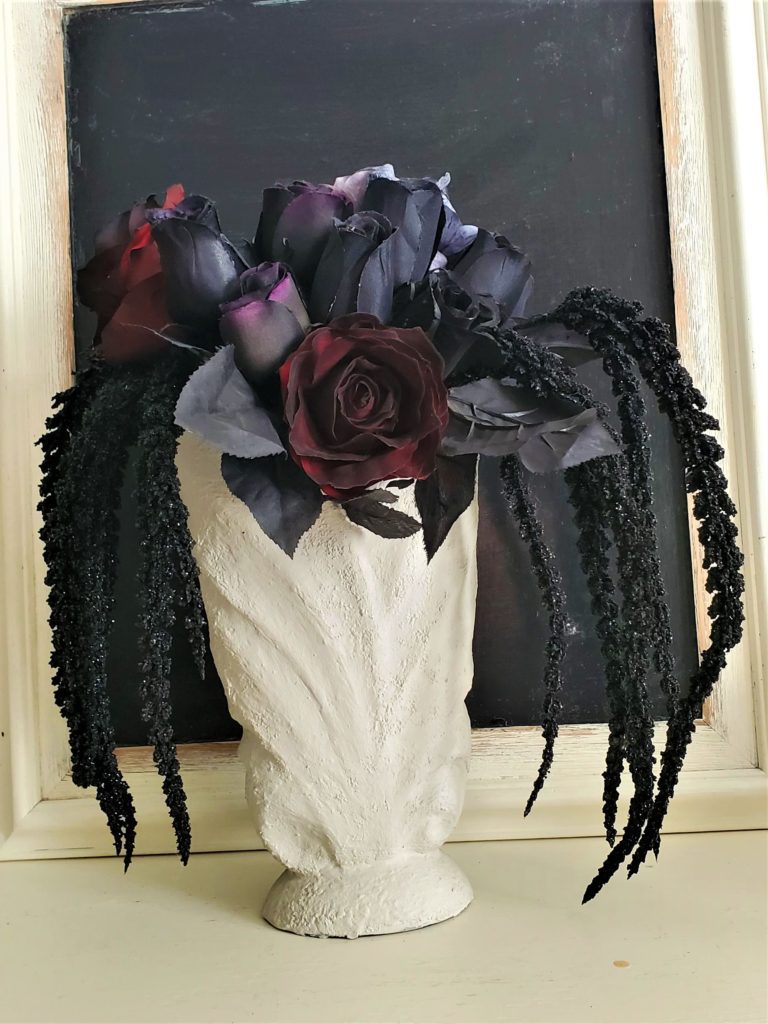
In order to make Medusa’s bouquet you will first need to find out how to make the vase using a faux stone painting technique. But trust me, the efforts are well worth it.

Supplies You Will Need
- Faux Stone Vase (see suggestion above.)
- Black and Dark Purple Faux Flowers (I suggest using roses, hydrangeas, and amaranthus)
How To Make Medusa’s Bouquet
- Bend the stems on the faux flowers so that they fit nicely in the stone vase.
- Place the amaranthus on the side of the vase.
- Place the hydrangeas at the back of the vase.
- Cluster the black roses in the front.
And Voila! A bouquet fit for the dangerous dame herself. And the best part is that you can reuse the vase and faux flowers over and over again.
Floral Adorned Pumpkin
This super simple black and white Halloween decor faux floral pumpkin is the bomb. It takes no time at all to make but the visual impact it makes is definitely note worthy.
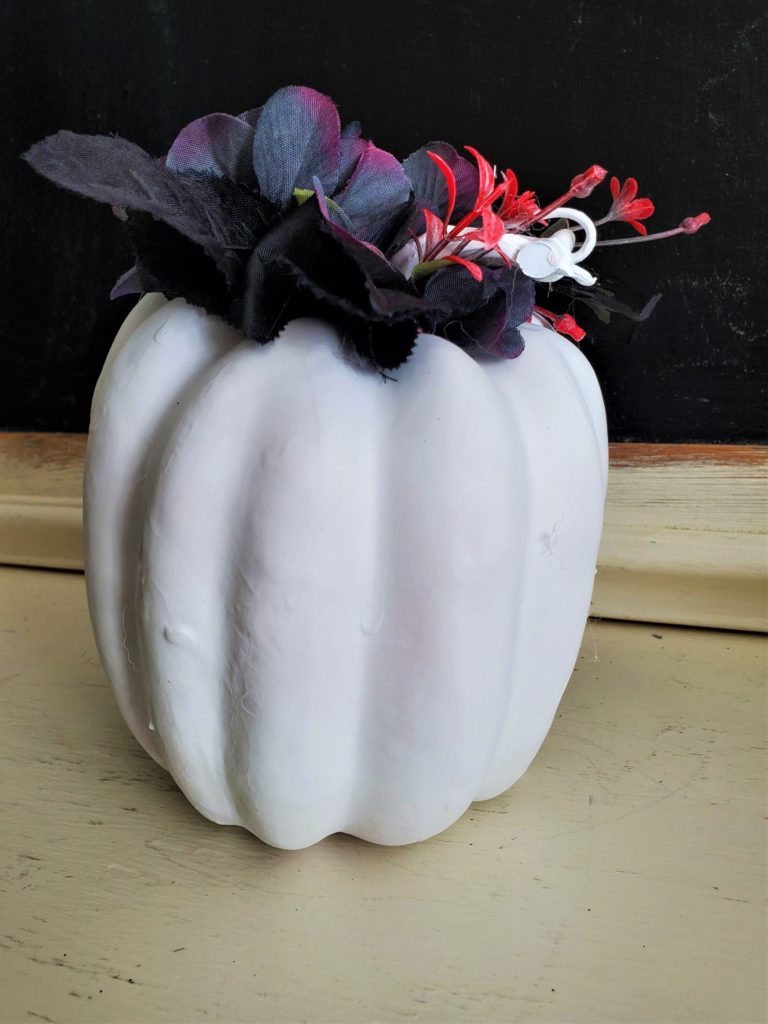

Supplies You Will Need
- Foam pumpkin
- Rustoleum Spray Paint in Flat White
- Dark Blue, Purple, and Black Faux Hydrangea Stem (Dollar Tree)
- Black Faux Leaves
- Faux Dark Fall Stems (Dollar Tree)
- Hot Glue Gun and Glue Sticks
How To Make Floral Adorned Pumpkin
- Start by spray painting the foam pumpkin with the white spray paint. Stem and all.
- Using the hot glue, adhere the faux flowers and black leaves to the top of the pumpkin.
And another fabulous black and white Halloween decor piece done. Seriously, that’s it. So simple. And yet, so terrifyingly perfect for Halloween.
Yarn and Floral Rustic Pumpkin
This one is for those of you who want the black and white Halloween decor but prefer things a bit more rustic.
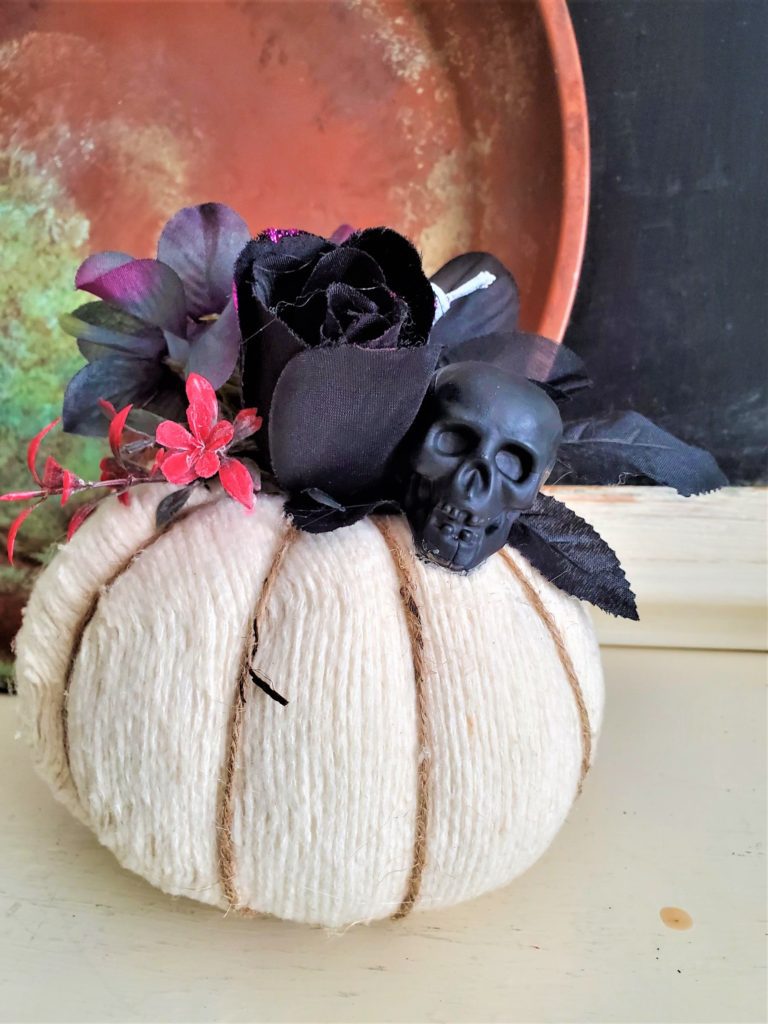

Supplies You Will Need
- Foam Pumpkin (I got mine from Dollarama but you can find similar pumpkins at Dollar Tree)
- Rustoleum Spray Paint in Flat White
- Yarn in White or Ivory (from Dollar Tree)
- Twine
- Faux Flowers (Dark coloured hydrangeas, black rose, black leaves, and, faux dark fall stems) (Dollar Tree)
- Hot Glue Gun and Glue Sticks
- Mini Plastic Skull (optional)
- Tremclad Professional Flat Black Spray Paint (optional)
How To Make Yarn and Floral Rustic Pumpkin
- Start by spray painting the pumpkin with the white spray paint.
- Remove the stem.
- Cut the faux flowers off of their stems and set aside.
- Start at the middle of the pumpkin by hot gluing the yarn end to where the stem used to sit.
- Using dabs of hot glue, wind the yarn around and around the pumpkin.
- When you get to the sides keeping winding and adding more glue.
- When finished one side, do the other side again starting where the stem should be and working your way to the side.
- Once the pumpkin is completely covered in yarn, hot glue the cut faux flower blooms and the rose onto the top of the pumpkin.
- Hot glue the stem back on.
- Spray paint the mini skull with the flat black spray paint. Let dry. (Optional)
- Hot glue the black mini skull to the front of the flower arrangement. (Optional)
And that is all it takes to make the perfect rustic Halloween pumpkin with very little effort or money.
Spooky Easy Pumpkin Luminaries
These were so ridiculously easy to makeover it’s almost embarrassing but they tuned out so fantastically that I had to share.isn’t it amazing how a little spray paint can create such a huge difference?
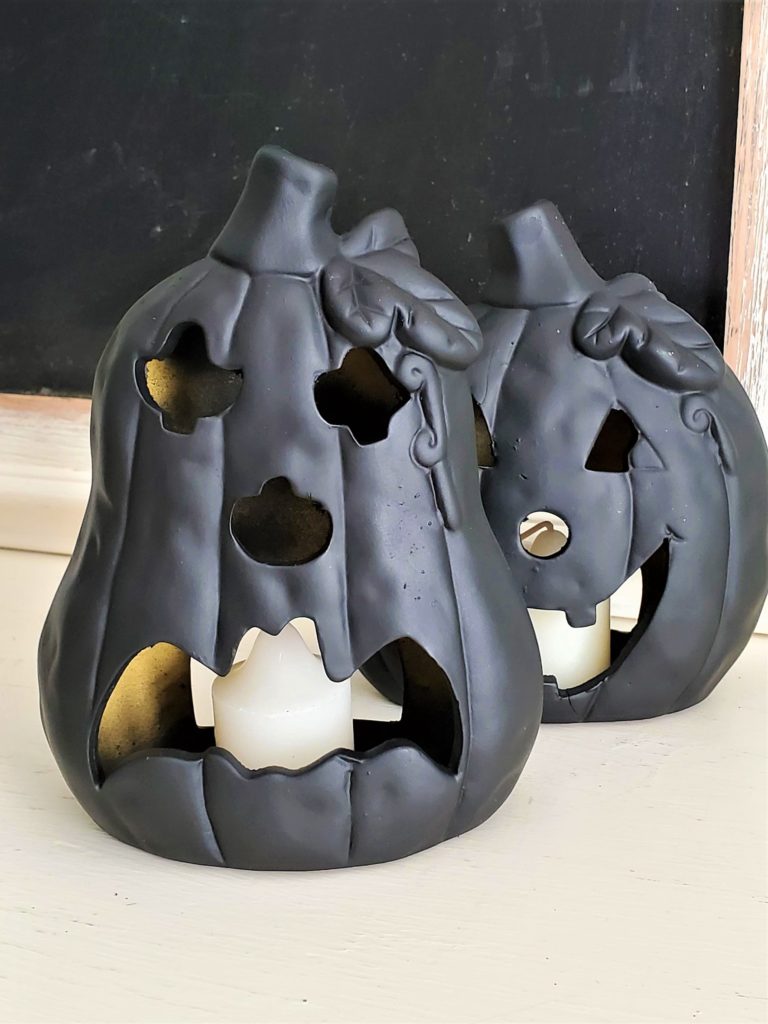

Supplies You Will Need
- Ceramic Pumpkins (I found these at Dollarama)
- Tremclad Professional Flat Black Spray Paint
- Small White Candles
How To Make Spooky Easy Pumpkin Luminaries
- Wipe the ceramic pumpkins clean.
- Paint the pumpkins with two coats of the flat black spray paint. Let dry.
- Place a small white candle in each and if wanted, light.
PRO TIP: If you prefer to avoid a lit candle use a battery operated votive candle instead.
Have An Apple Table Top Decor
Fit for Snow White, these black and white Halloween decor apples in a basket look fabulous. This is a simple DIY that you can do quickly but makes a huge visual impact.
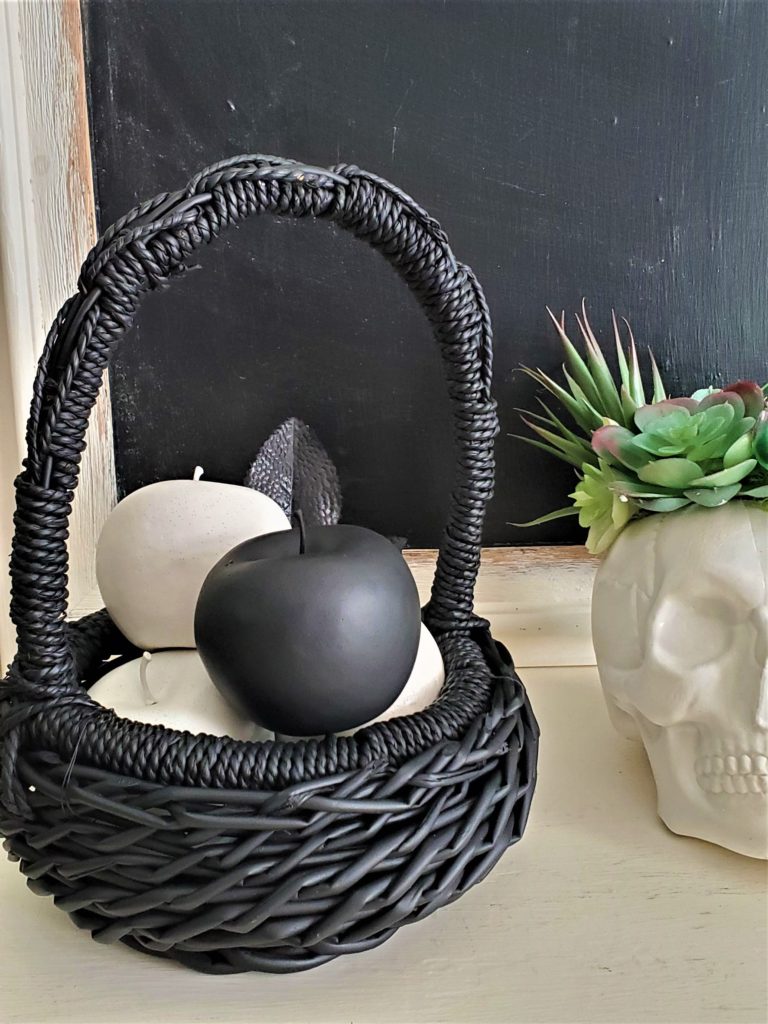

Supplies You Will Need
- Tremclad Professional Flat Black Spray Paint
- Rustoleum Spray Paint in Flat White
- Wicker Baske
- t4 – 6 Plastic Apples (from Dollar Tree)
How To Make Have An Apple Table Top Decor
- Start by spray painting the wicker basket inside and out with the flat black spray paint. Let dry.
- Next spray paint all but 1 of the plastic apples with the flat white spray paint. Let dry.
- Spray paint the last apple with the flat black spray paint. Let dry.
- Arrange the apples in the basket. Add a black leaf or two, if you wish.
Love it! Would make a unique and stunning kitchen decor piece.
Golly Gee Bat Wreath
When I saw this wispy grapevine wreath at the thrift store I just knew I had to make a Halloween wreath with it. I loved the textured, dry flowers on it but not their faded red colour. A coat of spray paint made all the difference. If you can’t find a similar wreath any grapevine wreath will do.
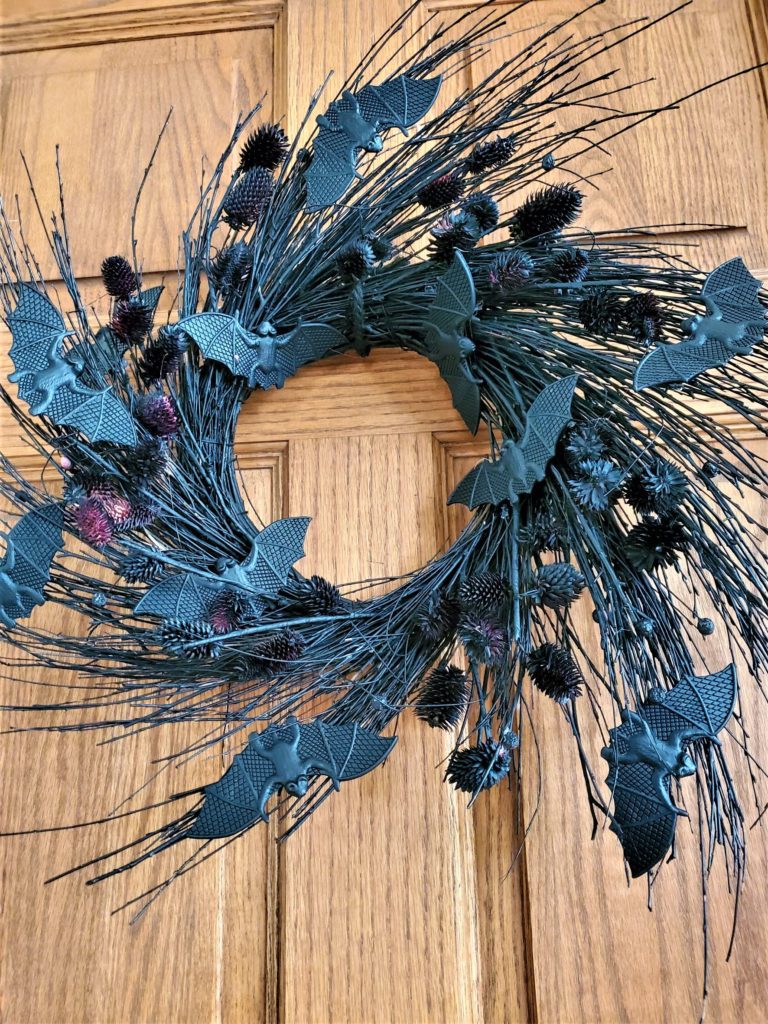

Supplies You Will Need
- Grape Vine Wreath
- Tremclad Professional Flat Black Spray Paint
- Mini Rubber Bats (from Dollar Tree)
- Hot Glue Gun and Glue Sticks
How To Make Golly Gee Bat Wreath
- Paint the entire wreath with the flat black spray paint.
- Using the hot glue, attach the bats to the wreath form.
And a final Voila! Family has said that this wreath is creepy and I think they are right. Do you agree?
This understated, black wreath will look amazing on your front door and is sure to make the hair on your guest’s necks stand straight up.
Jenny’s Finishing Thoughts on Creating Black And White Halloween Decor
A lot happens during the fall. Everyone is getting readjusted to school schedules, feasts are being planned and are being prepared for Thanksgiving, and we all know that Christmas is just around the corner. And in the middle of all this craziness we have Halloween.
Keeping things easy and cheap is definitely the way to go. Having a wicked colour scheme is a great start and what better combination than black and white Halloween decor? It fits into any style of home and basic items can be made to look extra spooky with just a little spray paint.
I encourage you to try some of these DIYs and see what kind of black and white Halloween decor ideas that you can up with. And when you do, please share on my Facebook page. It would be great fun to see what you came up with.
Did you find this post helpful or inspirational? Save This Pin to your Halloween Decor board on Pinterest
